Have you ever wondered what beautiful wood details are hiding beneath layers of old paint?
Removing outdated finishes can reveal the natural character of furniture, but detailed designs require a careful approach to avoid damage.
Learninghow to strip paint from wood helps homeowners restore chairs, tables, and decorative pieces while protecting carved patterns and textured surfaces.
Keep reading to learn the proper paint removal process and helpful tips for restoring detailed wood furniture successfully with confidence.
Materials Needed to Remove Paint from Detailed Wood Furniture
Before removing paint from detailed wood furniture, gather the right supplies. These materials help loosen paint, protect delicate designs and make the stripping process easier and more effective.
| Material | Purpose |
|---|---|
| Paint Stripper | Softens paint for easy removal. |
| Plastic Wrap | Keeps the stripper active longer. |
| Plastic Scraper | Lifts softened paint without scratching the wood. |
| Paint Scraper | Removes loosened paint from flat, durable surfaces. |
| Putty Knife | Scrapes paint from wider or flat sections carefully. |
| Nylon Brush | Cleans paint from grooves without damaging details. |
| Fine Steel Wool | Removes stubborn paint from detailed areas. |
| Mineral Spirits | Cleans away stripper residue. |
| Cleaning Cloths | Wipes off paint and residue. |
| Warm Soapy Water | Cleans brushes during use. |
| Sandpaper (Fine Grit) | Smooths the surface before refinishing. |
| Safety Goggles | Protects eyes from splashes and debris. |
| Respirator | Reduces exposure to chemical fumes and dust. |
How to Strip Paint from Wood Furniture
Removing paint from detailed wood furniture requires careful stripping. Different furniture pieces may require different restoration approaches. Understanding the types of home furniture helps identify common pieces found in homes.
Step 1: Apply a Thick Layer of Paint Stripper
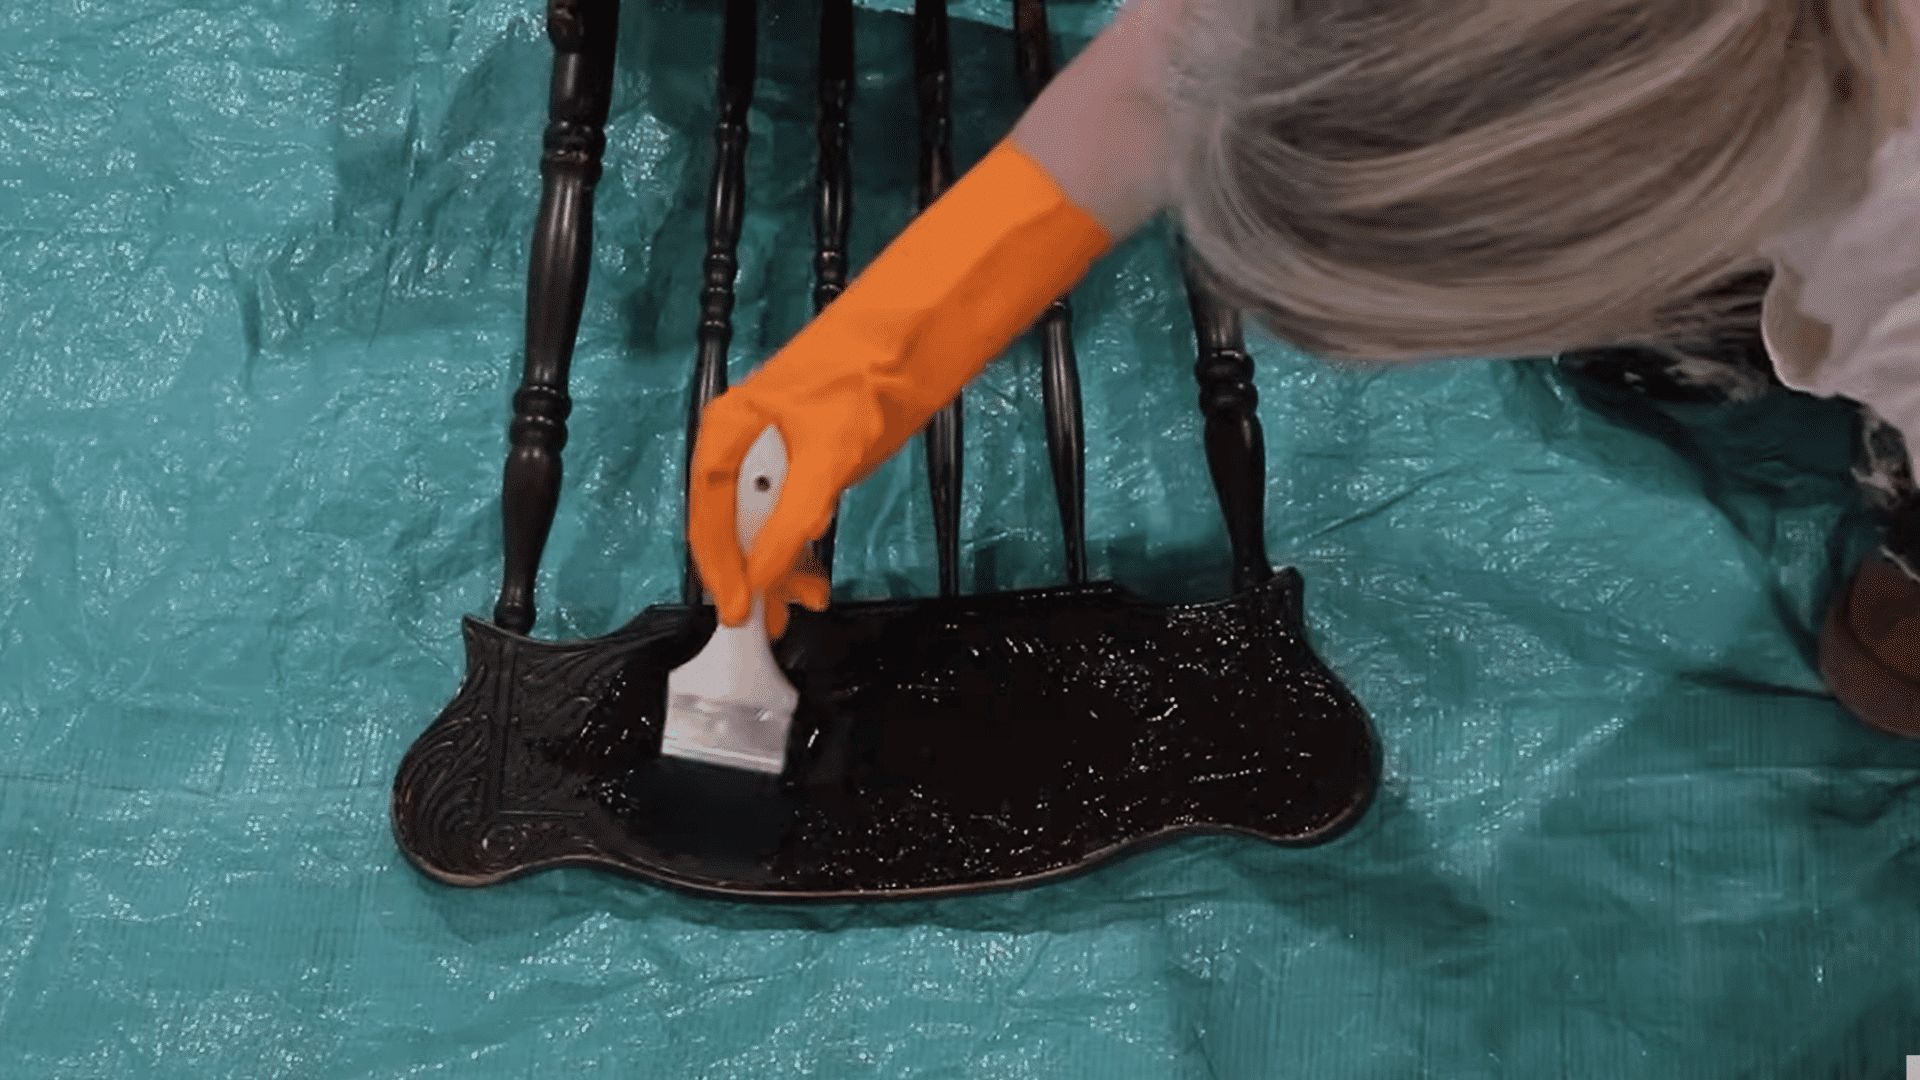
Begin by placing the detailed furniture piece on a protected work surface covered with a tarp.
Apply a generous amount of paint stripper directly onto the painted area using a chip brush.
Avoid spreading the stripper too thin because a thicker layer allows it to penetrate and soften the paint more effectively. Make sure the stripper reaches all detailed sections, edges, and grooves where paint has collected over time.
Step 2: Cover the Surface With Plastic Wrap
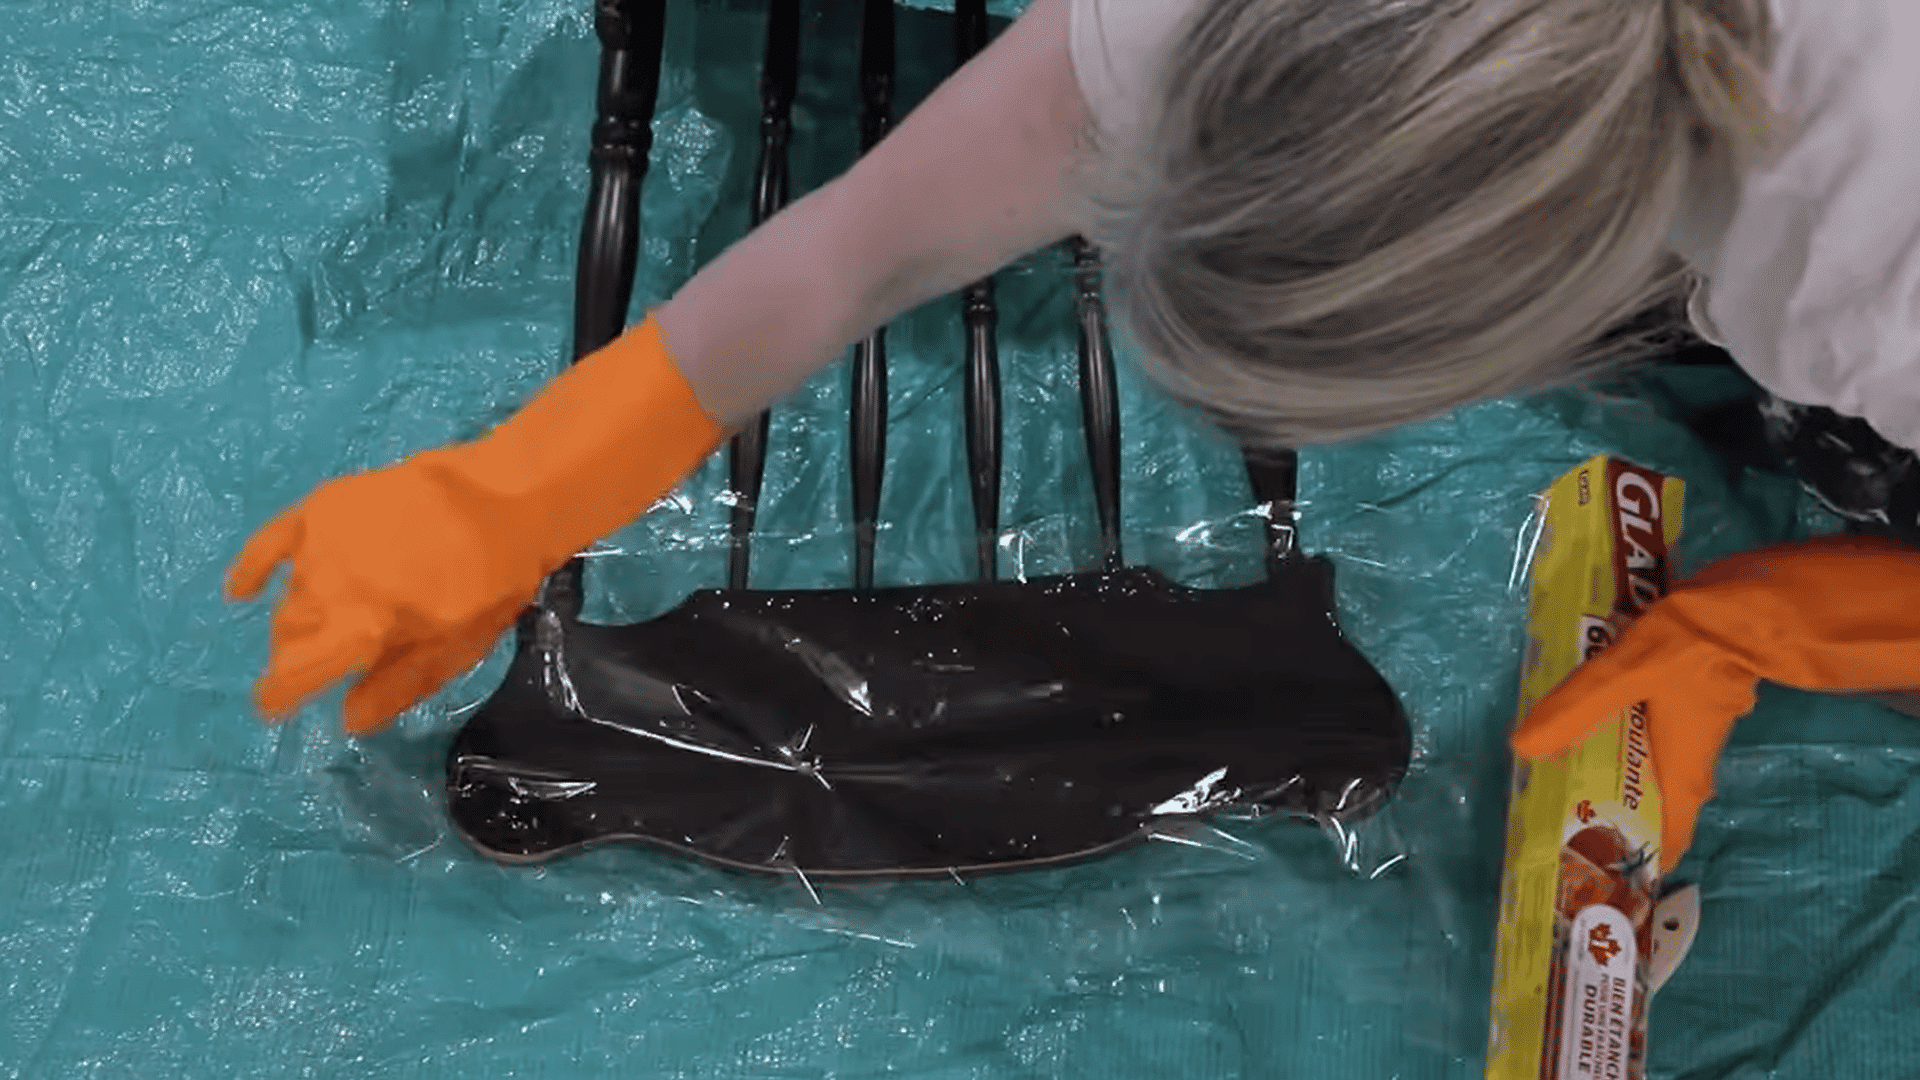
After applying the paint stripper, cover the entire treated area with plastic wrap to keep the product from drying out too quickly.
Press the plastic gently against the surface using gloved hands so the stripper stays in contact with the paint.
Allow it to sit for several minutes according to the product instructions. This step helps the stripper activate properly and makes the paint easier to remove from intricate furniture details.
Step 3: Check for Bubbling Paint Layers
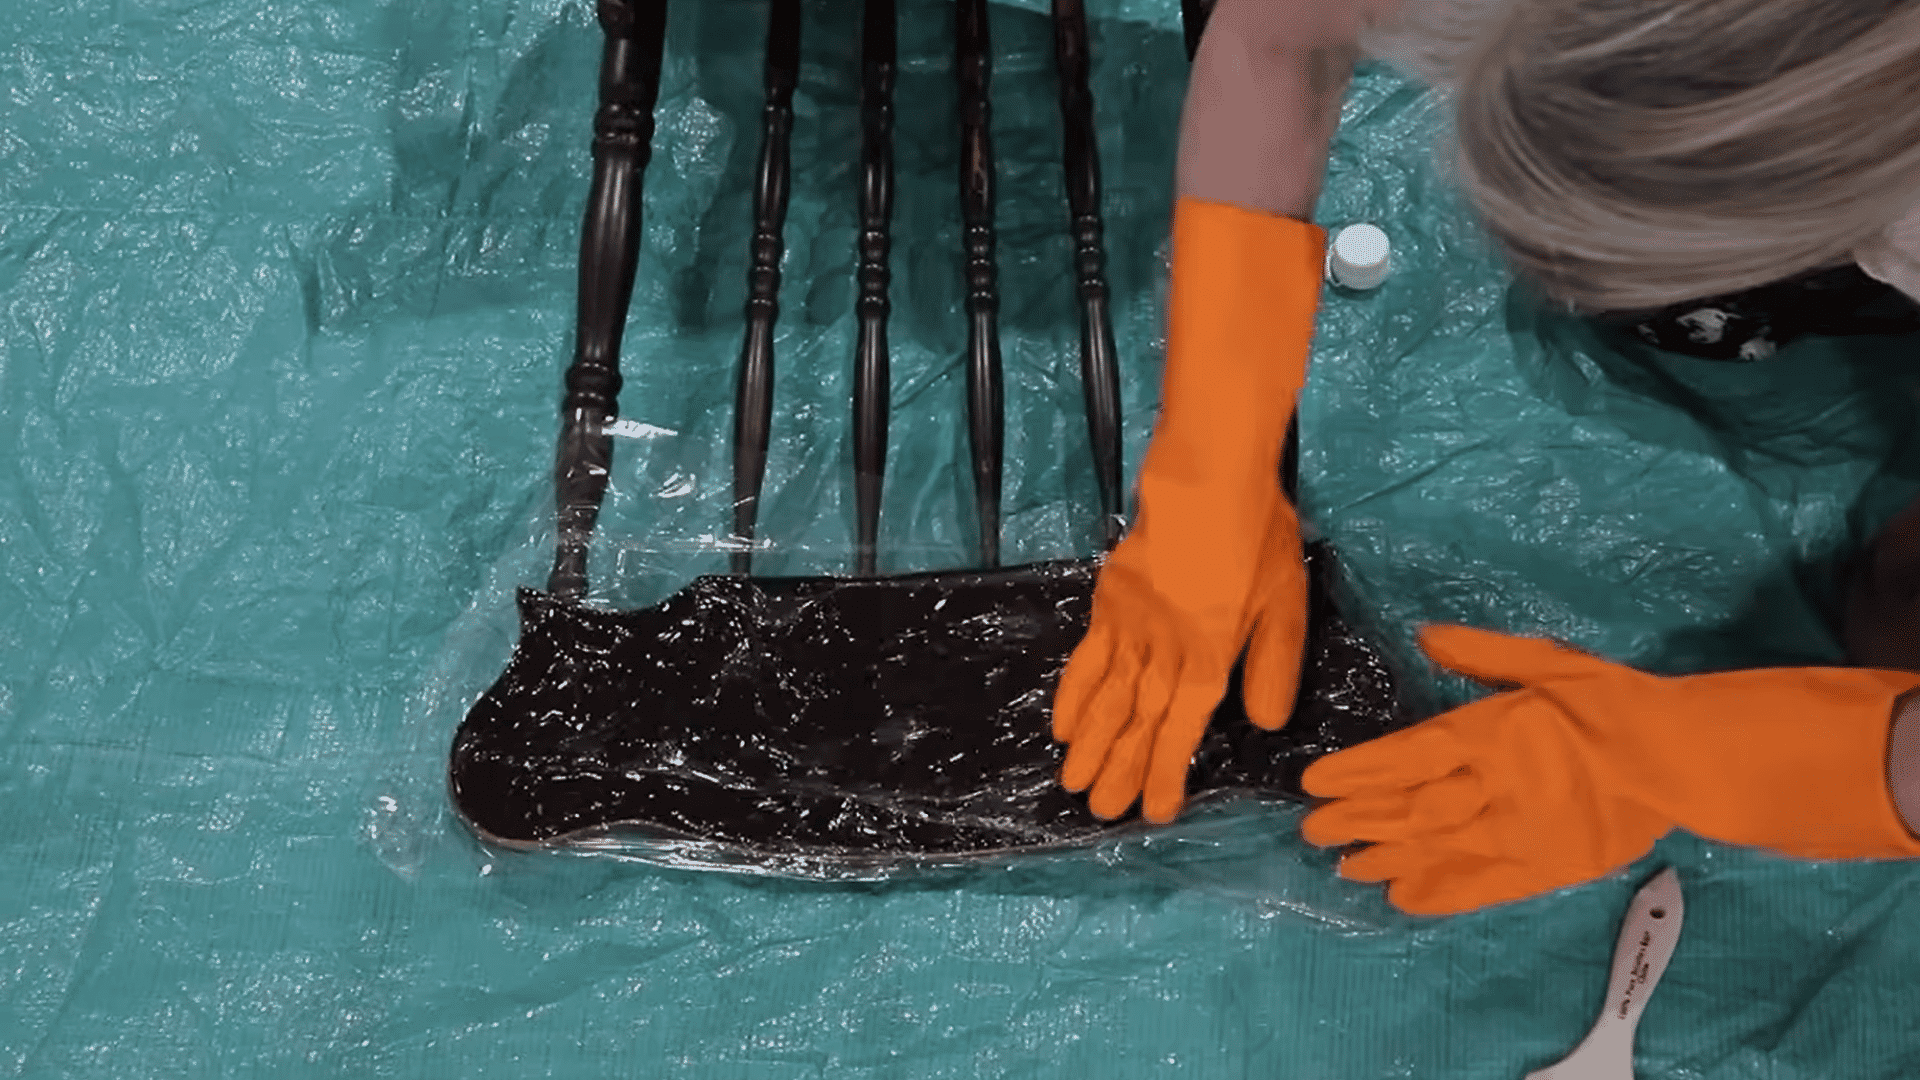
After allowing the stripper enough time to work, carefully lift a section of the plastic wrap to check whether the paint has begun to bubble or loosen.
Bubbling indicates that the stripper has successfully broken down the paint layer. If the paint is still firm, allow additional time before removing it.
Avoid rushing this stage, as properly softened paint requires less scrubbing and reduces the risk of damaging the underlying wood.
Step 4: Scrub Away Softened Paint Carefully
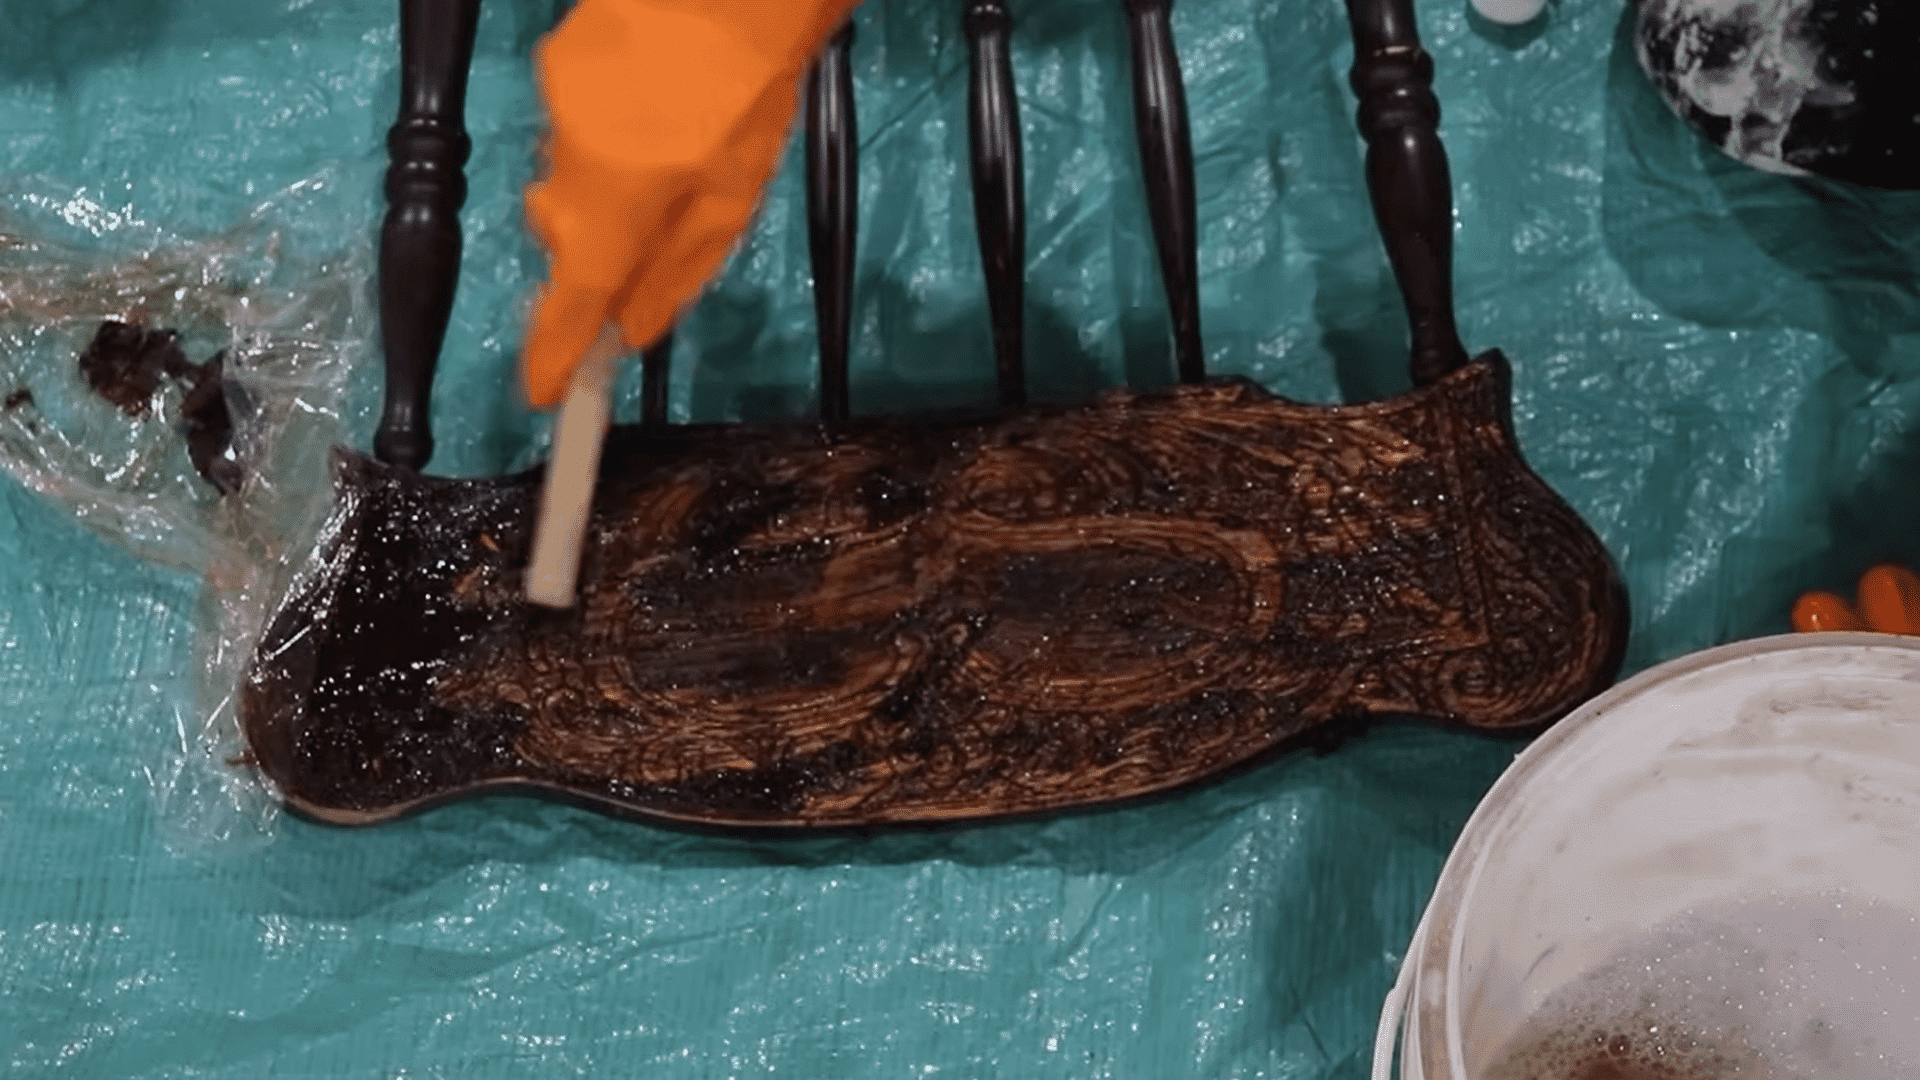
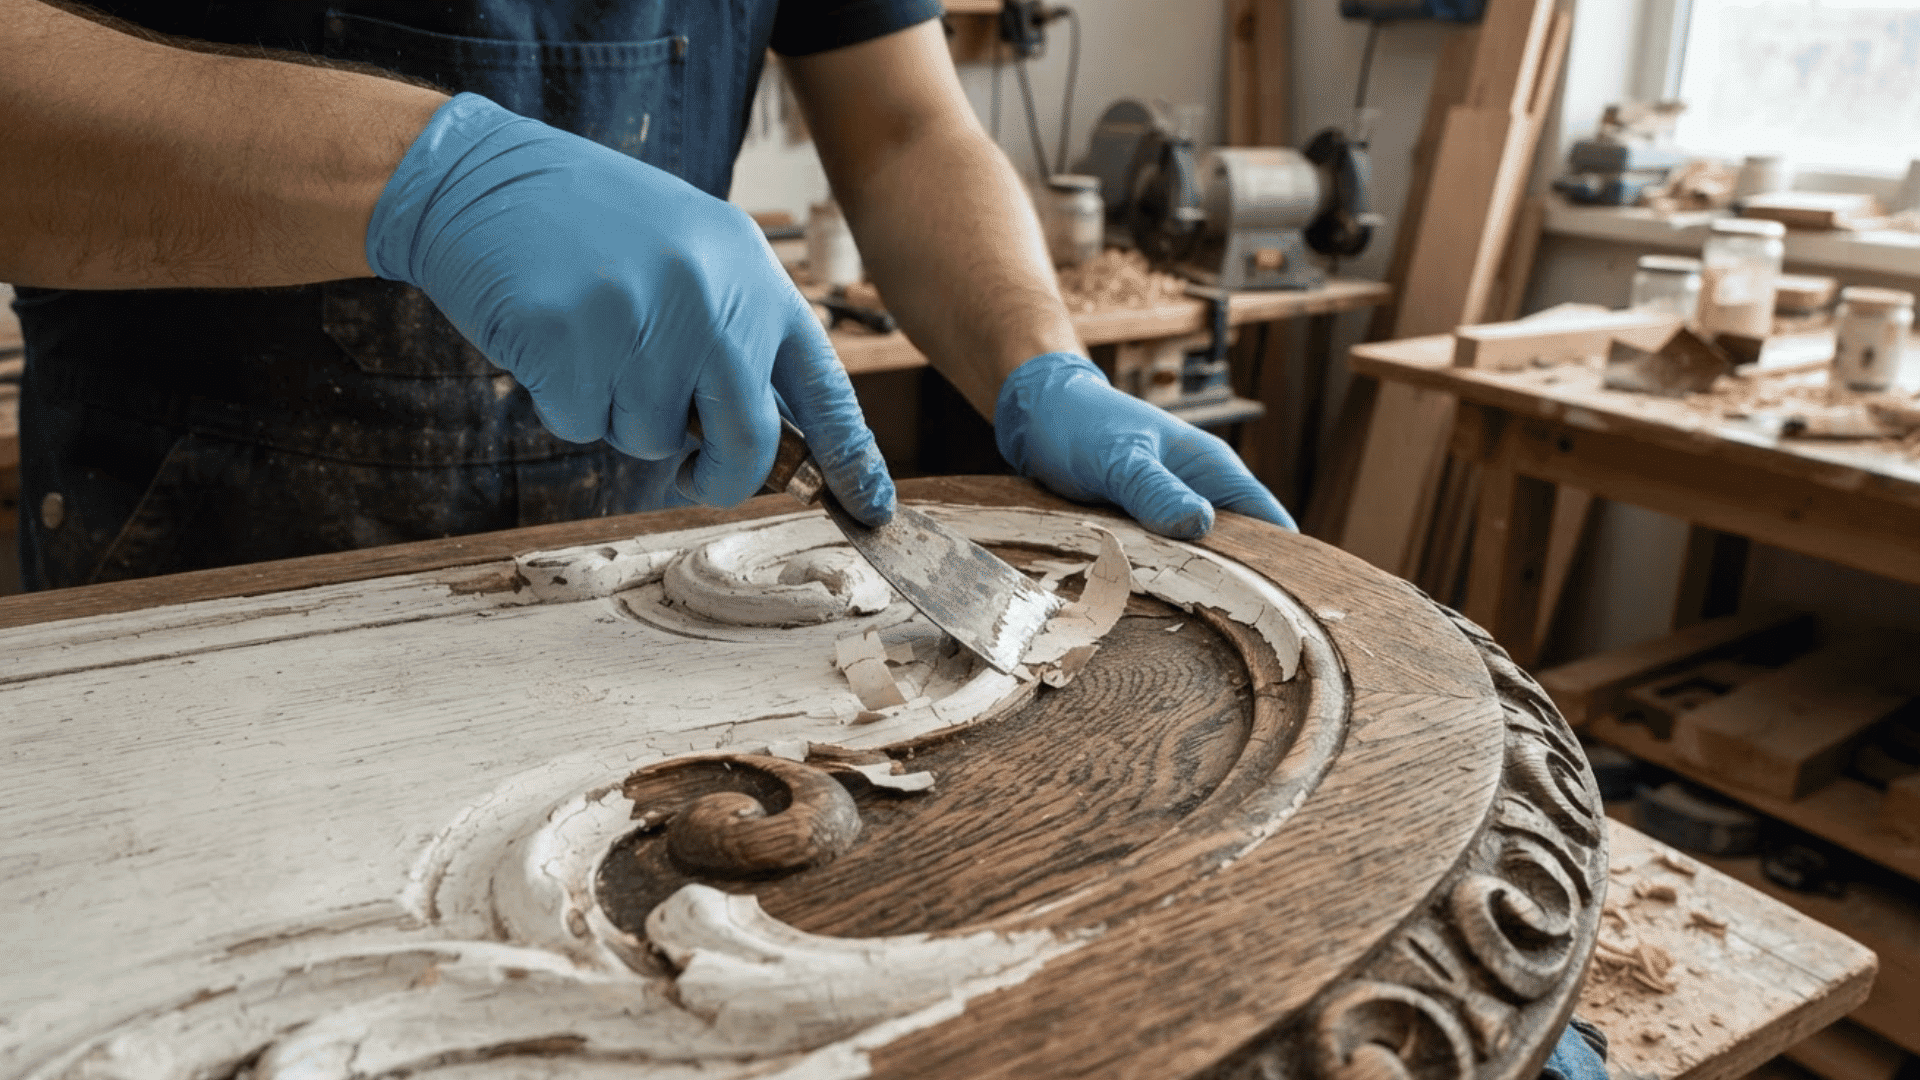
Once the paint begins bubbling, remove the softened paint using a plastic scraper or nylon brush to avoid damaging the wood.
Reserve a wire brush or fine steel wool only for intricate carvings and deep grooves, as they can scratch softer woods like pine.
Always work with the wood grain using light pressure to preserve the surface. Clean the brush in warm, soapy water as needed to remove paint buildup and keep it effective.
Step 6: Remove Remaining Stripper Residue
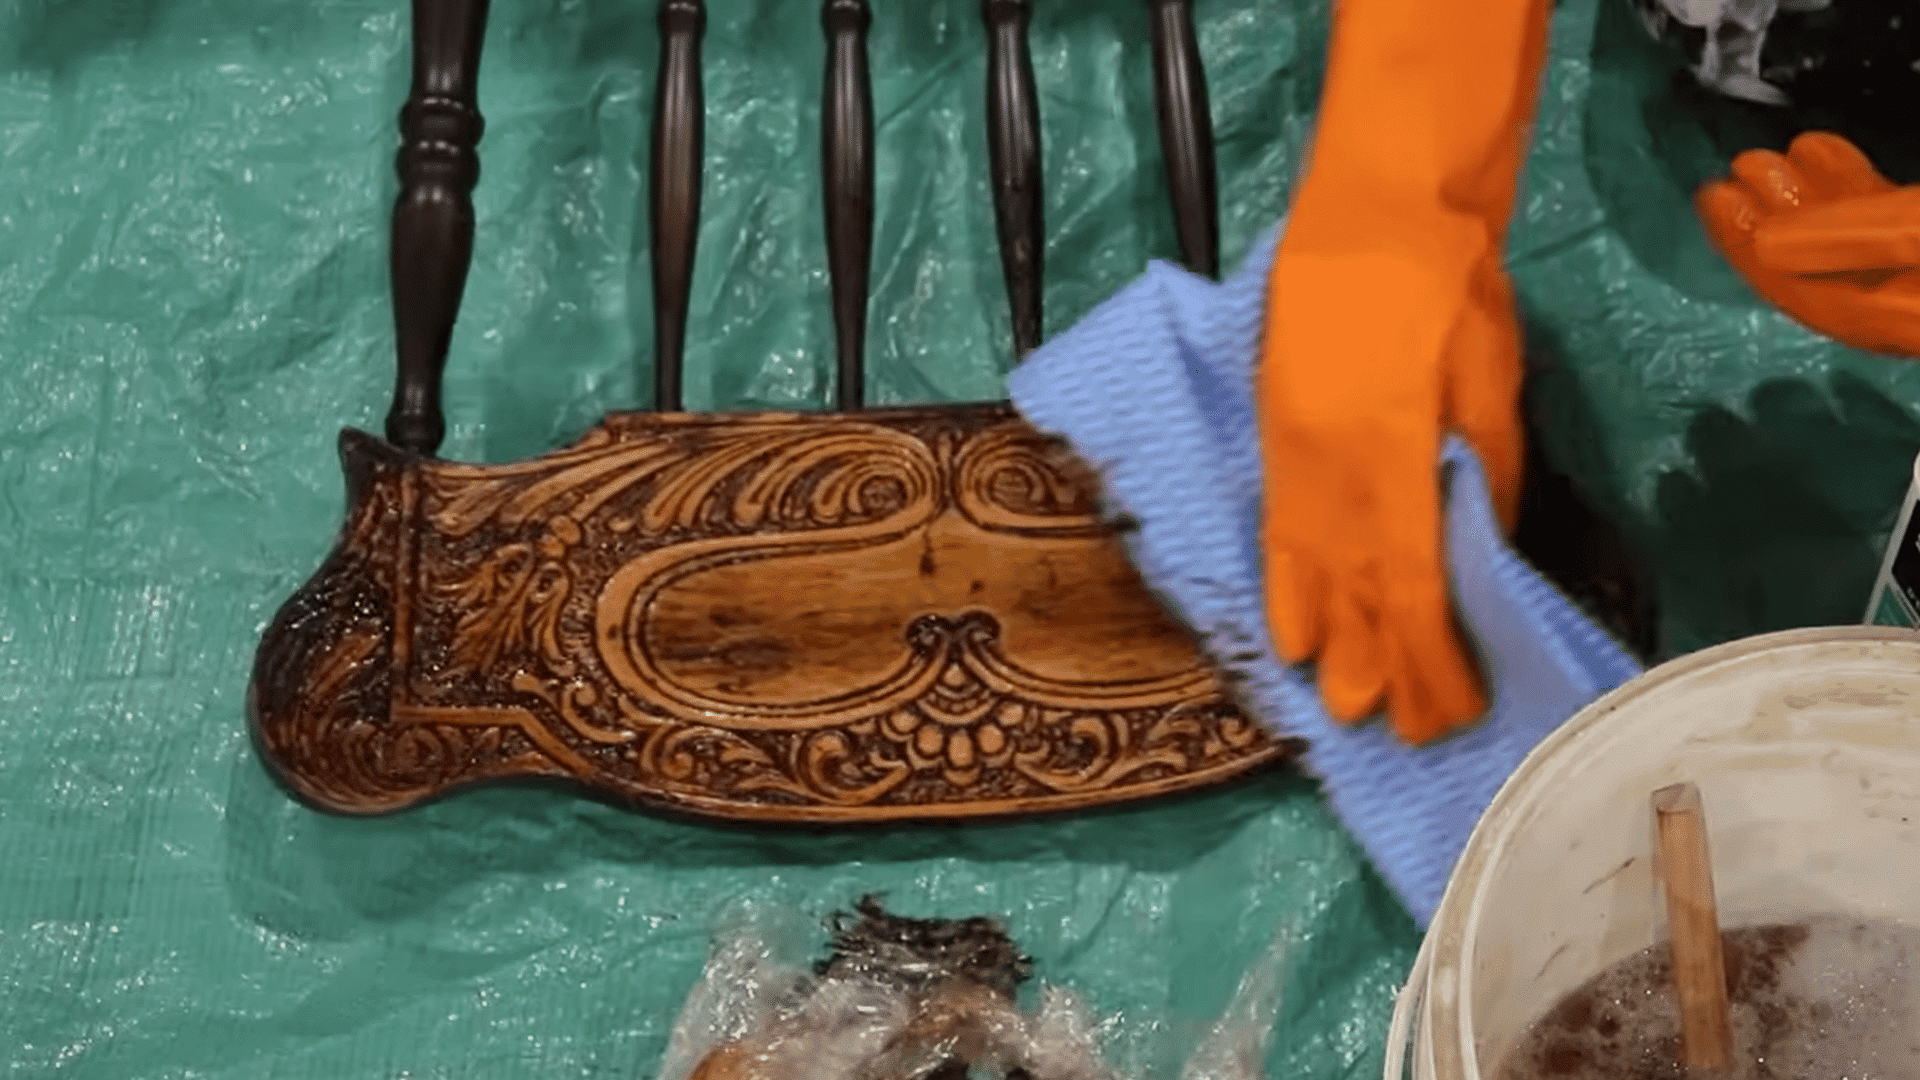
After removing most of the softened paint, clean the surface to remove any remaining stripper and residue.
Use mineral spirits with a cleaning cloth to wipe down the wood and remove remaining product from the detailed areas.
Continue cleaning until the surface feels smooth and free from excess chemicals. Some paint may remain in deep grooves, but additional stripping or gentle scrubbing can remove it if a completely natural wood finish is desired.
Step 7: Repeat The Process For Stubborn Areas
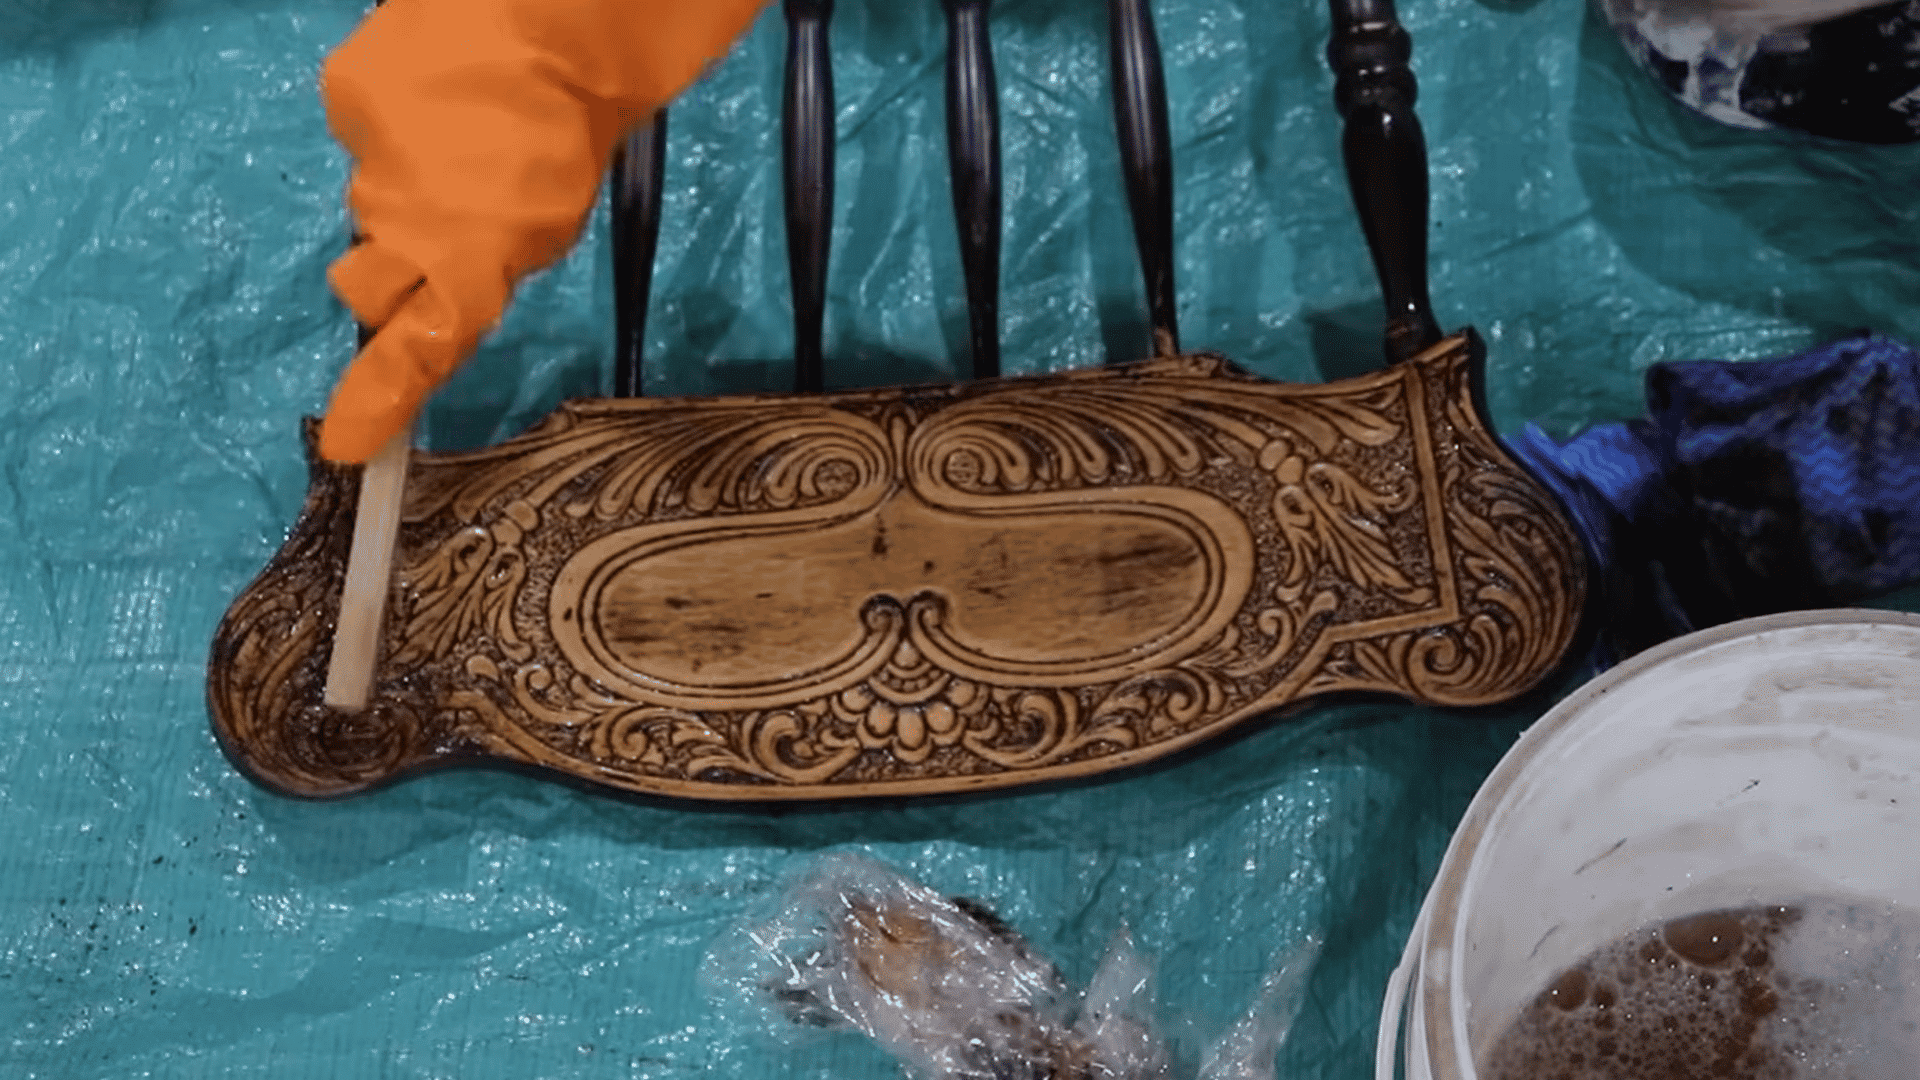
Detailed furniture often contains small grooves, corners, and decorative sections where paint can remain after the first application.
Apply another layer of stripper to these stubborn areas and repeat the covering, waiting, and scrubbing process.
Continue working slowly until the desired amount of paint has been removed. For antique or rustic finishes, leaving small traces of paint in recessed details can also create a distressed appearance.
Step 8: Prepare The Wood For Refinishing
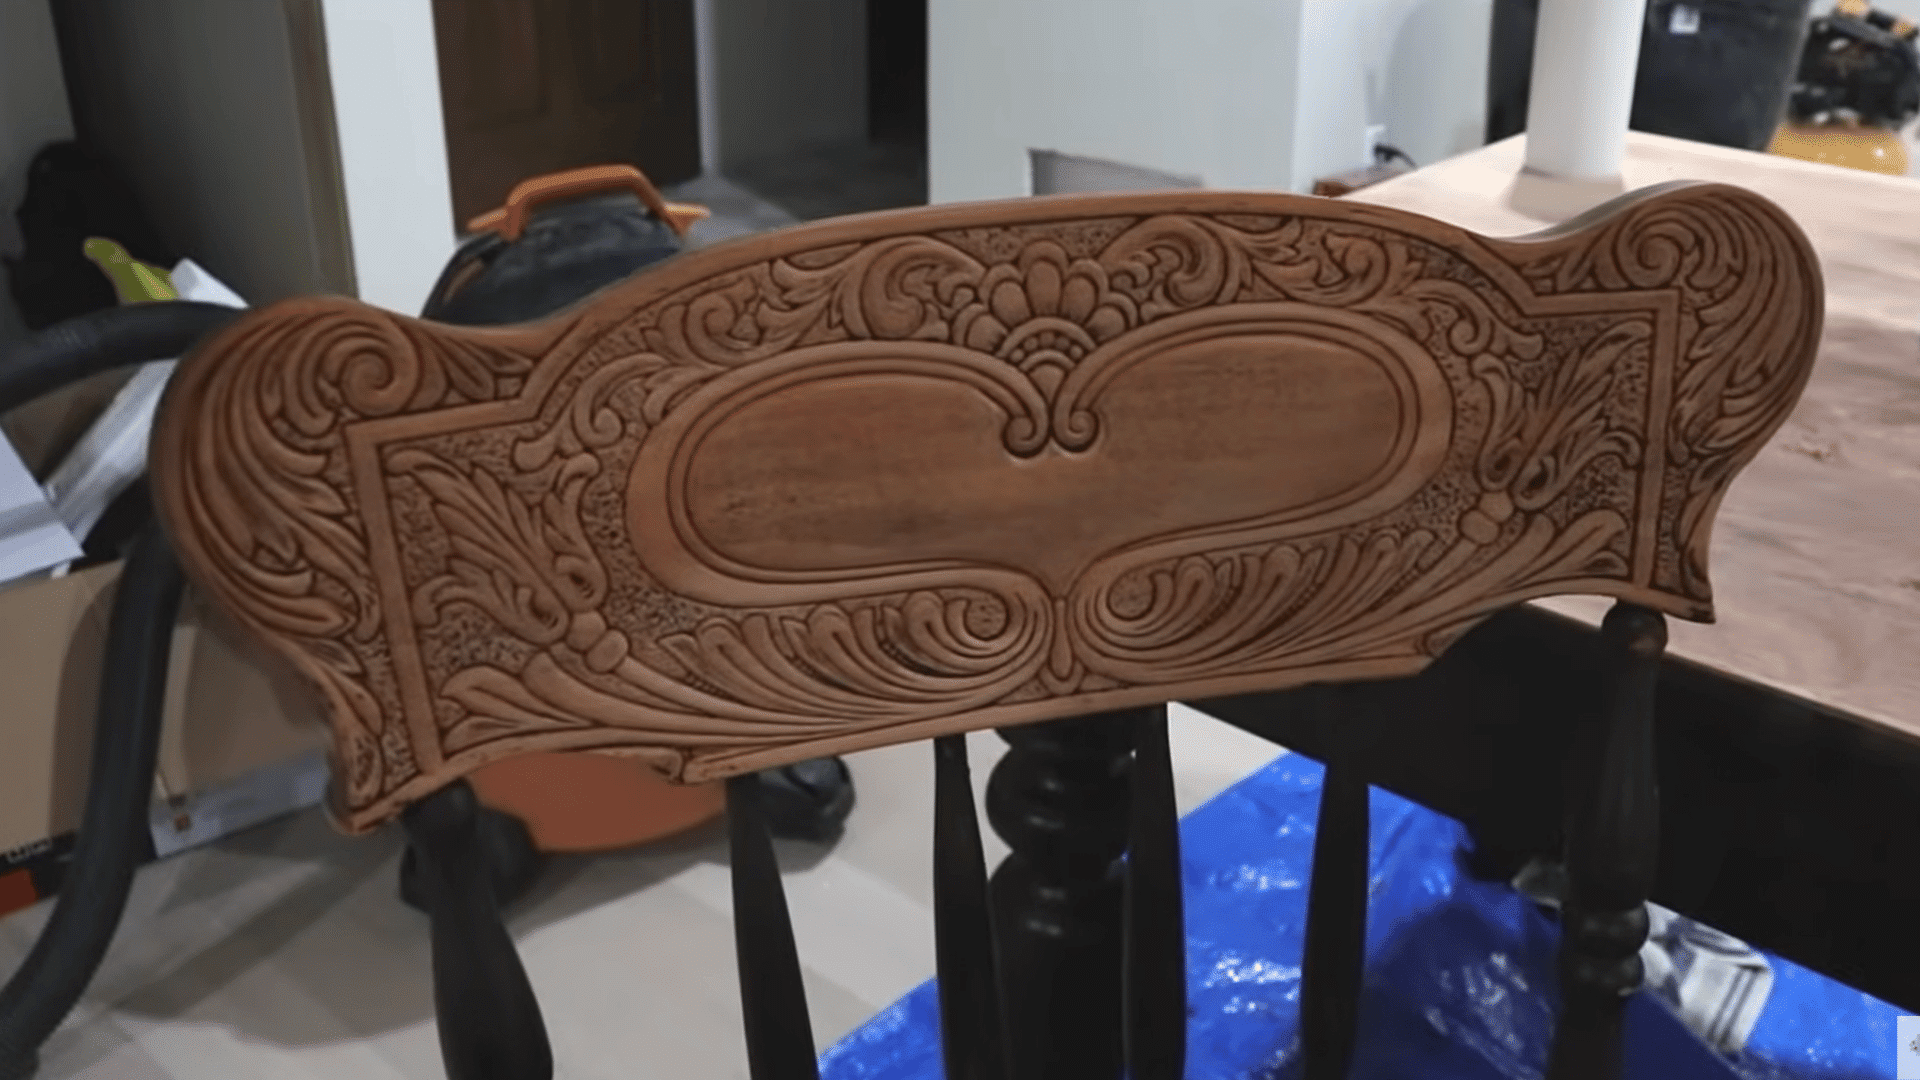
Allow the stripped wood to dry completely before refinishing. Inspect the surface and remove any remaining paint stripper residue with mineral spirits or a clean cloth.
If the wood feels rough, lightly sand it with fine-grit sandpaper, following the wood grain. Wipe away all sanding dust using a tack cloth or damp lint-free cloth.
Once the surface is clean, smooth, and dry, it is ready for stain, paint, or a whitewash wood finish that highlights the natural grain.
Choosing The Best Paint Removal Method
The best paint removal method depends on the furniture’s design, paint type, and desired finish. Consider the advantages of each option before starting.
| Paint Removal Method | Best For |
|---|---|
| Gel Paint Stripper | Intricate carvings, vertical surfaces, and detailed furniture because it stays in place longer. |
| Liquid Paint Stripper | Flat surfaces and large furniture pieces that need quick, even coverage. |
| Paste Paint Stripper | Thick or multiple paint layers on ornate wood with deep grooves. |
| Citrus- or Soy-Based Stripper | Indoor projects, light paint removal, and users seeking lower-odor alternatives. |
| Paint Scraper or Putty Knife | Lifting softened paint from flat areas after the stripper has worked. |
| Plastic Scraper or Nylon Brush | Removing softened paint from delicate wood without scratching the surface. |
| Wire Brush or Fine Steel Wool | Cleaning stubborn paint from intricate carvings and deep grooves only. |
| Light Sanding | Final surface preparation after stripping, not for removing paint from detailed carvings. |
Safety Tips Before Removing Paint
Taking safety precautions before stripping paint helps prevent exposure to harmful chemicals, dust, and hazards from old paint during the project. A wood table refinishing guide explains the basic process for restoring wooden furniture.
- Check for Lead Paint: Homes built before 1978 may contain lead paint, so test surfaces before sanding or scraping.
- Use a Lead Testing Kit: Testing kits help identify the presence of lead before disturbing old paint layers and creating harmful particles.
- Ensure Proper Ventilation: Work in open or well-ventilated areas to reduce exposure to chemical fumes and dust.
- Cover Floors and Surfaces: Use drop cloths or plastic sheets to protect areas from paint chips and stripper residue.
- Dispose of Paint Chips Properly: Collect removed paint chips carefully and follow local disposal guidelines, especially if lead-based paint is present.
- Avoid Excessive Heat Gun Temperatures: High heat can damage wood, create smoke, and increase safety risks during paint removal.
Conclusion
Restoring detailed wood furniture takes time, but careful preparation and the right techniques help preserve its original character. Some projects may also use aging techniques after stripping.
Paying attention to carved areas, using suitable tools, and preparing the surface properly before refinishing all contribute to better, longer-lasting results.
Knowing how to strip paint from wood also makes it easier to refresh antique pieces, family heirlooms, and everyday furniture without removing their unique details. A little patience during each stage can make a noticeable difference in the final finish.
Have a favorite restoration tip or project? Share it in the comments below and inspire others with your experience.
Frequently Asked Questions
Can Vinegar Remove Paint from Wood Surfaces?
Vinegar may slightly soften some paints, but it is not reliable for complete paint removal.
How Long Should Paint Stripper Stay on Wood?
Paint stripper waiting time depends on the product, paint layers, and surface condition.
Can Painted Wood be Restored Without Removing all Paint?
Yes, distressed finishes can preserve some paint layers for a vintage appearance.