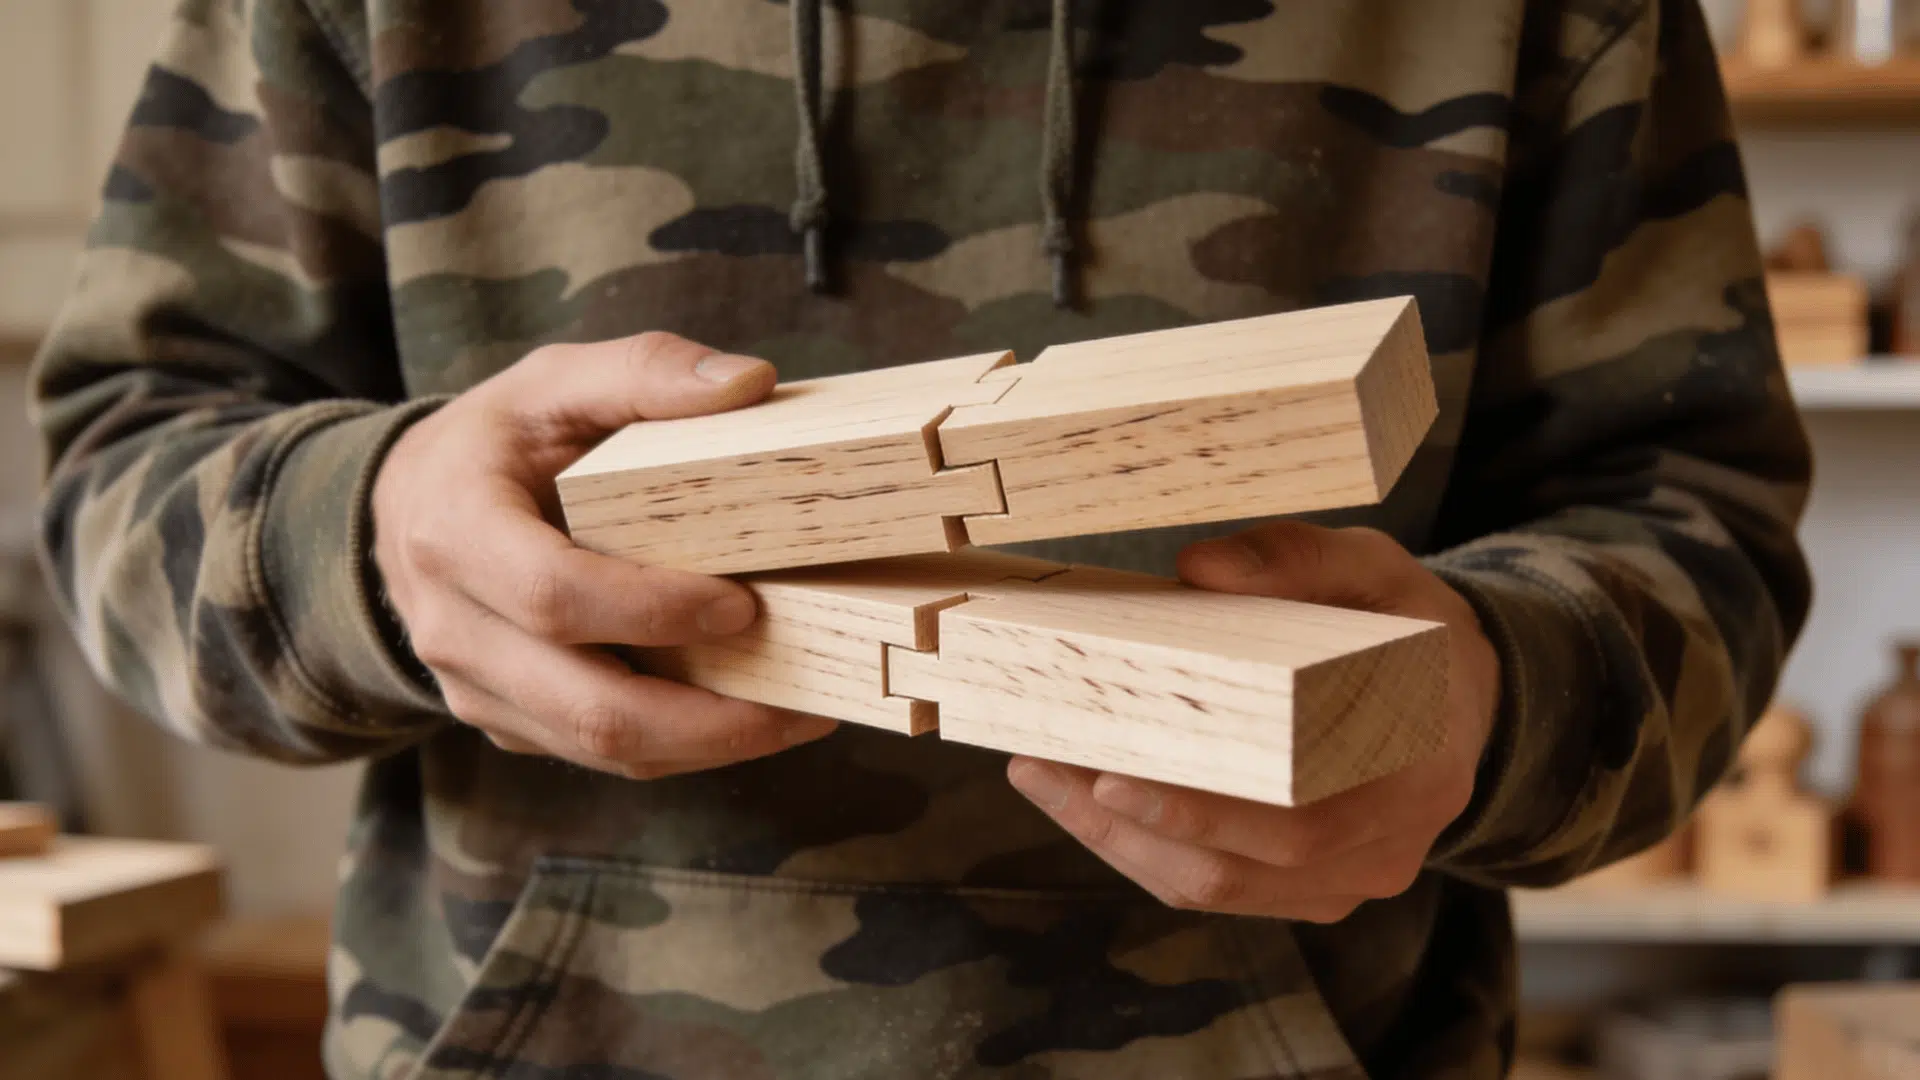
You’ve probably seen those neat, interlocking cuts on the edges of wooden boxes and trim pieces. That’s a finger joint, one of the most reliable ways to connect two boards in woodworking.
Most hobbyists and even some pros stick to basic butt joints or screws without realizing how much strength they’re leaving on the table
But not every woodworker knows when to use a finger joint over a dovetail or a simple butt joint. Picking the wrong one can cost you time, materials, and a finished piece that falls apart.
In this blog, you will walk through how finger joints work, how they compare to other joints, and when they’re the right pick for your next project.
What is a Finger Joint in Woodworking?
Finger joints, also called comb joints, have interlocking “fingers” that fit together like a comb. Cutting complementary profiles into two pieces creates a large glued surface, producing a strong, neat seam.
The most common form is the tapered (scarfed) finger joint, used to splice shorter boards into long lengths for baseboards, doors, molding, trim and flooring.
Finger joints fall into two categories: non-structural, with shorter fingers for furniture and visible joinery and structural, with longer, pointed fingers for load-bearing uses such as flooring and roofing.
Their wide glue area and interlock make them an economical choice for creating long, stable lumber from smaller boards.
The chosen wood species can affect cutting quality and joint appearance, so learning about maple wood may help when selecting material for furniture or trim.
Types of Finger Joints
Some types differ by their profile and cut angle, while others are defined by how you connect the two boards end to end or at a corner.
Straight Finger Joint (Box Joint)
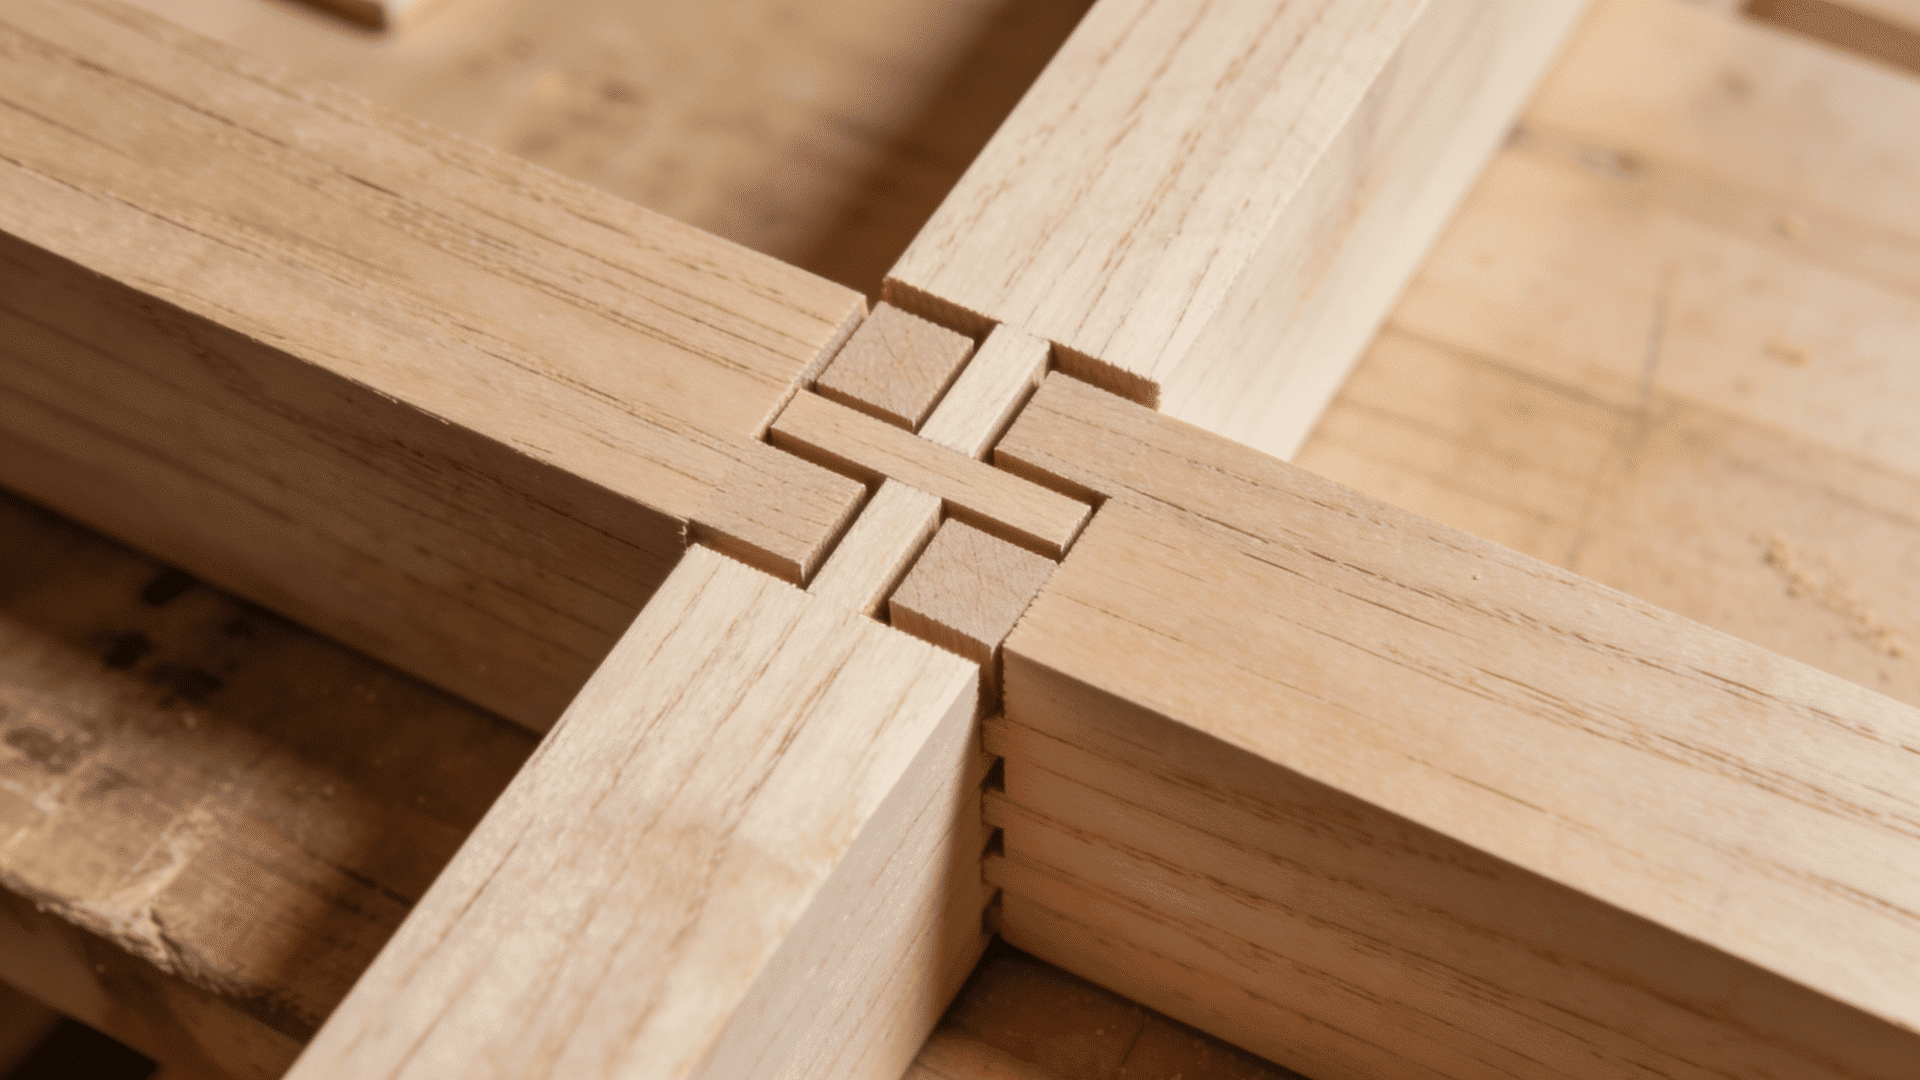
This is the most common type you’ll run into. It uses perfectly square fingers that mesh together like a zipper. There are no angled cuts, so it’s simpler to make than a dovetail.
You can cut these on a table saw with a basic box joint jig. You’ll mostly use this joint for building boxes, cabinets, and drawers.
It gives you a clean, geometric look and a solid glue bond without needing advanced skills or expensive tools. By orientation, you’ll almost always use this type of joint to connect two boards at a 90° angle.
Woodworkers ready to test the method can follow these steps to make a simple DIY box joint with evenly spaced cuts and a secure corner fit.
Tapered Finger Joint
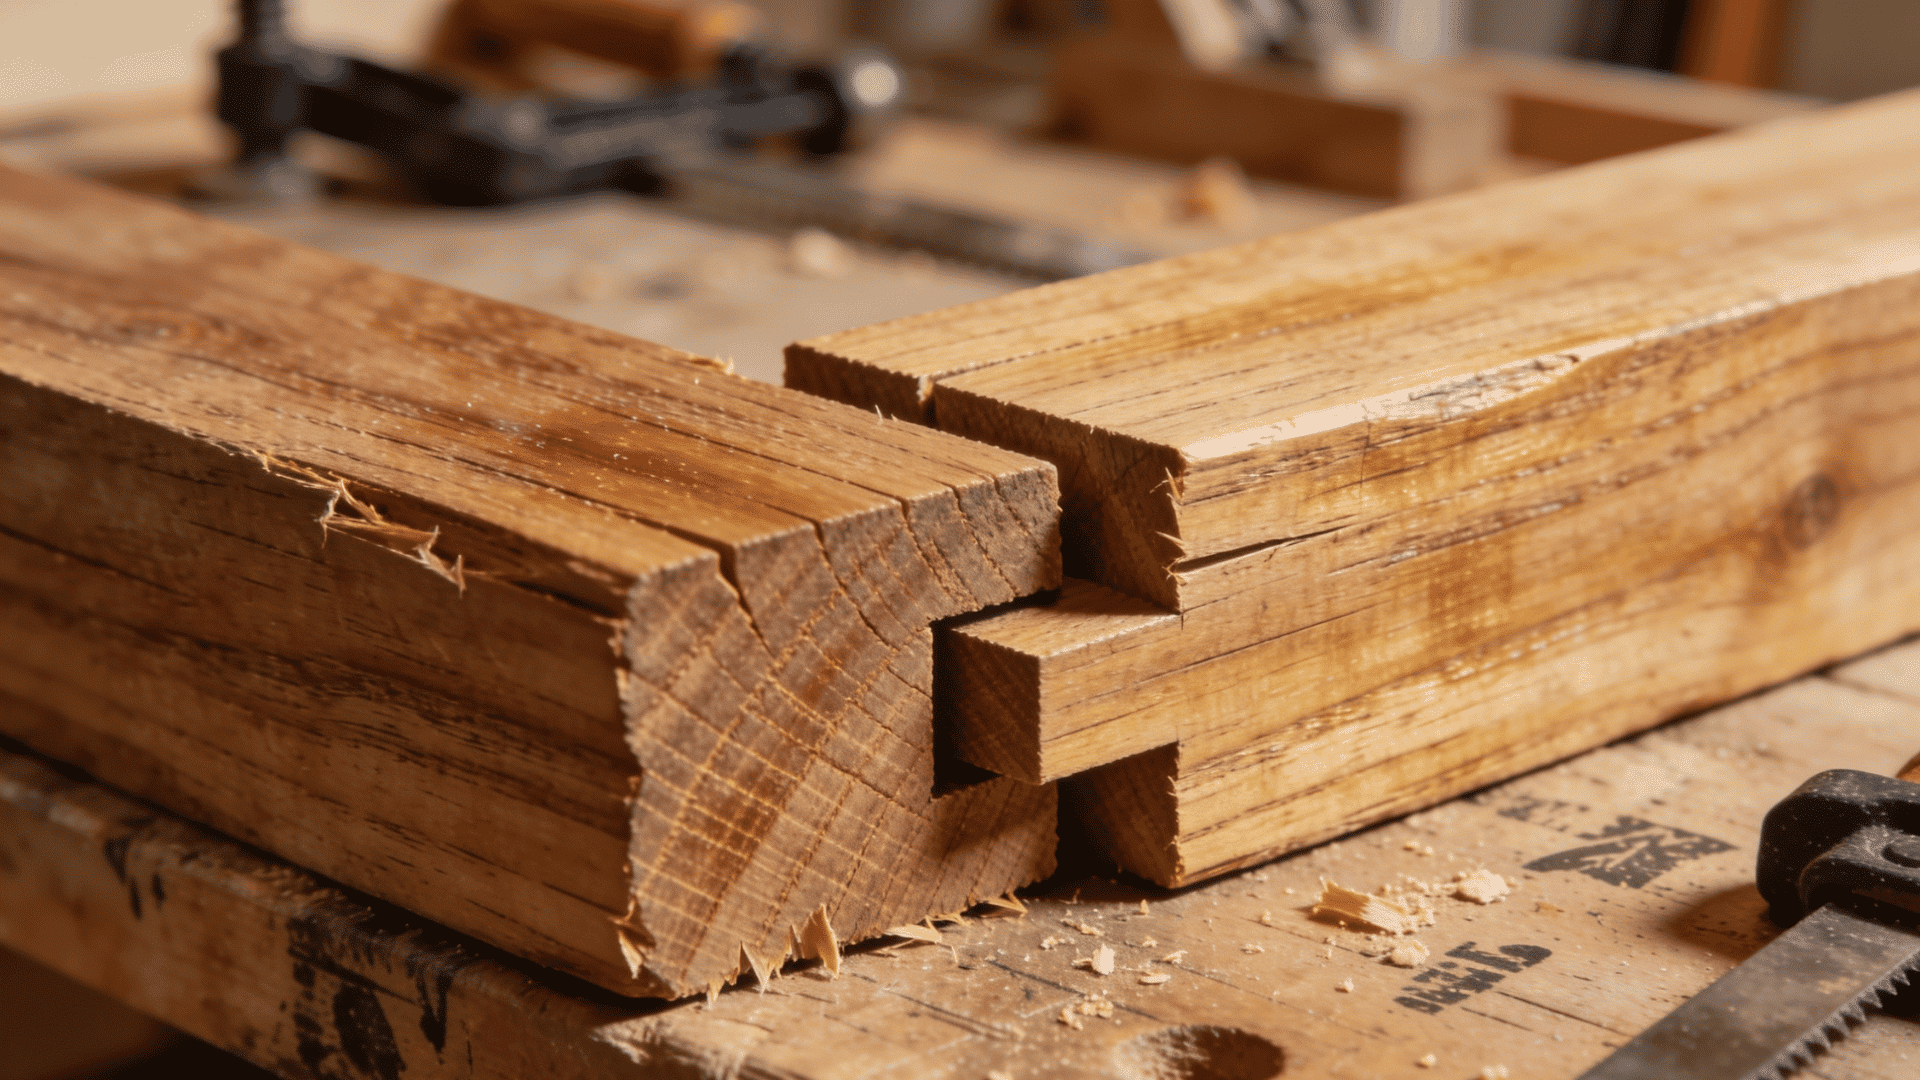
In this type, you cut the fingers at an angle instead of straight. That angle adds more gluing surface area, which means you get a tighter, stronger bond.
You’ll often find this joint in finger-jointed lumber, those long boards made by joining several shorter pieces end to end. If you make furniture, you’ll also like it for its visual effect.
The angled cuts give your joint a distinct pattern that stands out.
Because of its end-to-end orientation, this is your go-to choice when you need to turn short offcuts into full-length trim, molding, or baseboards.
Dovetail Finger Joint
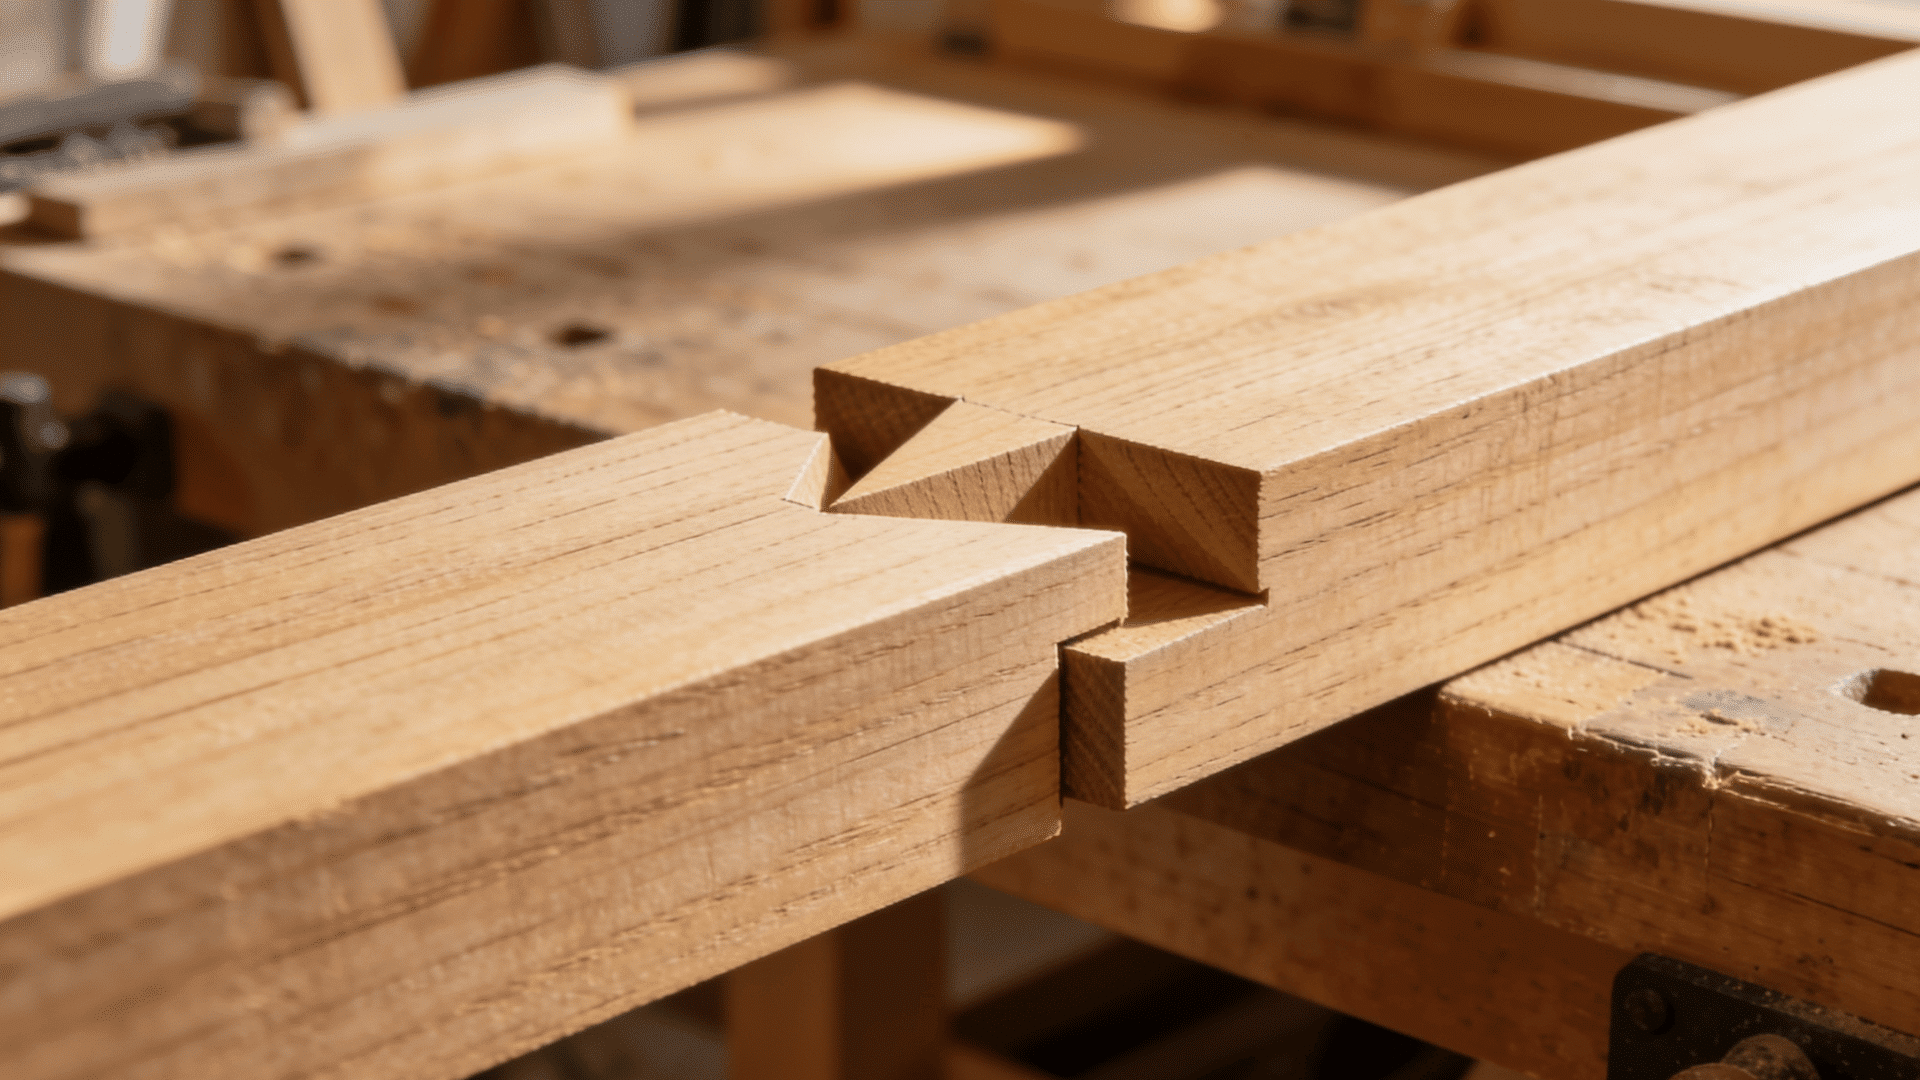
Think of this as a crossover between a finger joint and a dovetail. You cut the fingers into a slight wedge shape, which mechanically locks the two boards together.
That wedge helps your joint resist pulling forces much better than a straight finger joint. It’s still easier to cut than a full dovetail, so you get the best of both styles.
You can use this type in both orientations, end-to-end for longer stock or at 90° corners on heavy-use drawers and tool chests where you expect stress from multiple directions.
Understanding the main types of woodworking joints makes it easier to compare their strength, cutting difficulty, appearance, and suitability for different uses.
Materials Required
Gather these basic tools and materials before making the finger joint jig.
| Material | Purpose |
|---|---|
| Table saw | Makes precise cuts |
| Flat-top blade | Creates flat slots |
| Plywood | Forms the jig base |
| Wooden strip | Creates the pin |
| Calipers | Measures blade kerf |
| Crosscut sled | Supports the jig |
| CA glue | Secures the PIN |
| Clamps | Holds parts firmly |
| Hand saw | Trims the pin |
| Painter’s tape | Covers the throat gap |
| Scrap wood | Tests joint fit |
Step-by-step Making Finger Joint
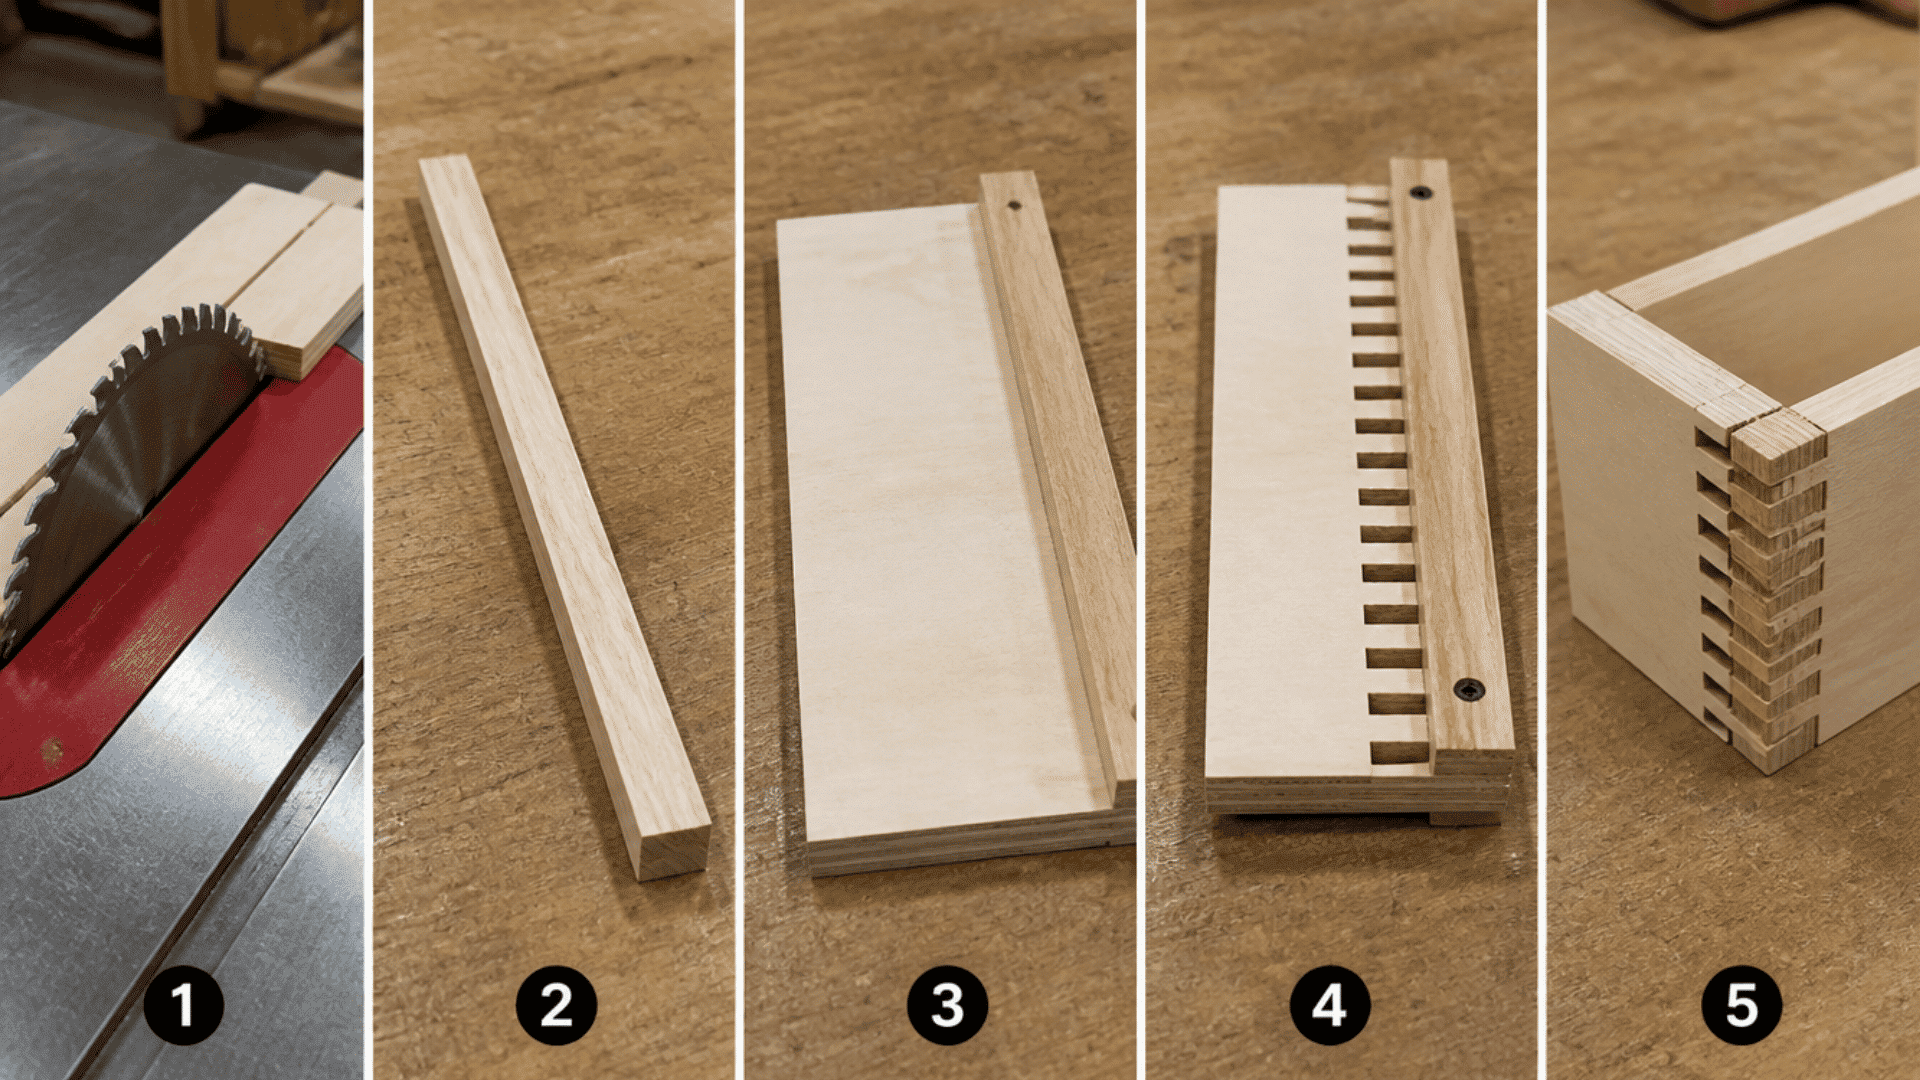
Follow these five steps to build and adjust a finger joint jig for clean, evenly spaced cuts. Accurate measurements are essential before cutting, and these tips for measuring furniture properly can help reduce sizing errors during larger builds.
- Measure The Blade Kerf: Cut a matching pin, measure the blade kerf, and test its fit in a scrap slot before building the jig.
- Build The Jig Base: Cut the plywood base, raise the blade slightly, create the slot, trim the pin, and glue it securely in place.
- Set The Pin Spacing: Place a kerf-width spacer between the pin and the blade, position the jig, clamp it, and confirm it stays square and flat.
- Cut The Finger Joints: Make the first cut, move each new slot onto the pin, and repeat until both matching board edges are complete.
- Test and Adjust: Test scrap joints, move the pin closer for tight fits or farther for loose fits, then leave space for glue.
When to Use Finger Joints in Your Projects
You should reach for finger joints when you need a strong, right-angle corner with maximum glue surface.
They work best for boxes, drawers, and storage builds where the joints carry weight and are subject to twisting or racking forces.
If you’re short on time or still learning, you’ll find them much quicker to cut than dovetails; all you need is a table saw and a basic jig.
Finger joints also shine in longer builds. When you can’t find boards long enough for trim, molding, or large furniture panels, you can join shorter pieces end to end.
This gives you straight, warp-resistant stock without having to spend extra on full-length lumber. Speaker cabinets, tool chests, and utility crates are all solid candidates for this joint
Finger Joint vs Box Joint vs Dovetail Joint
These three wood joints connect corners at right angles, but they differ in how you cut them, how they look, and how they handle stress.
| Feature | Finger Joint | Box Joint | Dovetail Joint |
|---|---|---|---|
| Shape | Tapered fingers | Square fingers | Angled pins and tails |
| Main Use | Joining boards lengthwise | Boxes and drawers | Fine drawers and furniture |
| Strength | Large glued surface | Large glued surface | Interlocking shape |
| Handles Best | Pulling and bending | Twisting and racking | Pull-apart pressure |
| Cut With | Router and special bit | Table saw and jig | Saw, chisel, or router |
| Skill Level | Intermediate | Beginner-friendly | Advanced |
| Speed | Moderate | Fast | Slow |
| Appearance | Often hidden | Clean and geometric | Traditional and decorative |
Tips for Stronger Finger Joints
Keeping your finger joints strong and flexible takes just a few minutes of daily care. These five tips will help you build grip, protect mobility, and reduce stiffness over time.
- Tendon Glides: Extend your fingers straight, make a hook fist, return to straight, then form a full fist. Repeat 5 to 10 times daily to keep your tendons and joints moving smoothly.
- Rubber Band Resistance: Pinch your fingers and thumb together, loop a rubber band around them, and slowly spread your hand open against the pull. This builds strength in the small muscles around each joint.
- Table Finger Lifts: Place your hand flat on a table and lift each finger one at a time. Hold for 1 to 2 seconds, then lower. This targets individual finger control and flexibility.
- Warm Up Before Activity: Soak your hands in warm water or use a warm compress for 10 to 15 minutes before any exercise. Heat loosens stiff joints and makes stretching safer.
Conclusion
A finger joint gives you one of the strongest glue bonds in woodworking without needing years of experience or expensive hand tools.
You now know the different types, when to use them over dovetails, and how to pick the right variation for your build.
If you’re putting together shop drawers, storage boxes, or joining short boards into longer stock, this joint will hold up under daily use.
Start with a straight finger joint on your next box project. A table saw, a simple jig, and some wood glue are all you need.
Got a project in mind? Grab some scrap wood, set up your jig, and give your first finger joint a try this weekend.
Have you used a finger joint before, or do you have a favorite woodworking project planned? Share your experience, tips, or questions in the comments below.
Frequently Asked Questions
What is The Weakest Joint in Carpentry?
A butt joint is usually the weakest because it offers little glued surface and depends heavily on fasteners for strength.
What is the Japanese Method of Joining Wood?
Japanese wood joining uses precise interlocking cuts, called Kigumi or Sashimono, to connect timber without nails, screws, or sometimes glue.
What Country is Known for Woodworking?
Japan is widely known for woodworking, supported by extensive forests, skilled carpentry traditions, and precise interlocking joinery passed through generations.