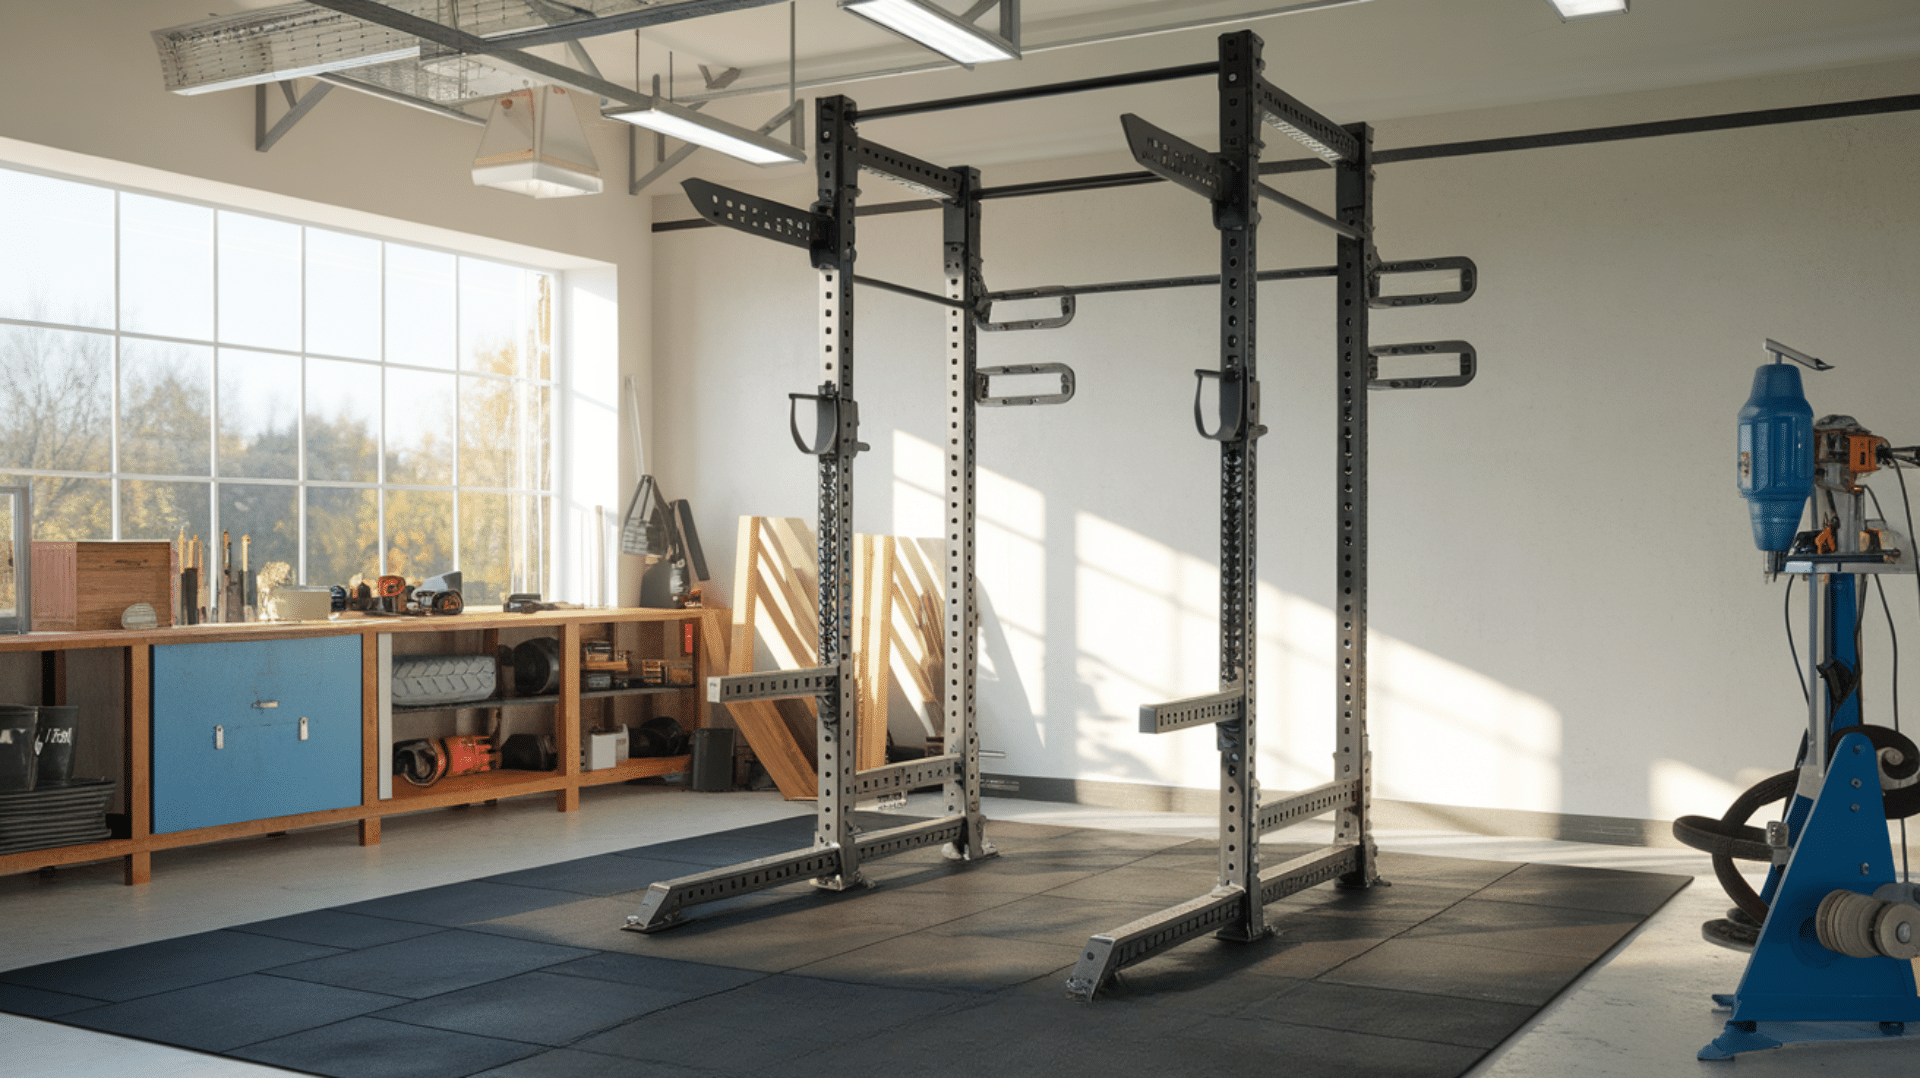
A diy squat rack was one of the first things I wanted to make when I started lifting at home, and you might feel the same way if you want a simple setup without spending a lot.
In this guide, I’ll show you how to build a homemade squat rack that’s sturdy, safe, and easy to put together with basic tools.
You’ll learn how to plan your build, pick the right materials, measure each piece, and assemble everything step by step. I’ll also share tips that helped me avoid common mistakes and keep the project quick and stress-free.
My goal is to give you clear, practical instructions so you can set up a rack that fits your space and your budget.
By the end, you’ll know exactly what to do and feel ready to build your own setup.
What You’ll Need for This DIY Squat Rack
Gather your materials and tools before you start. Having everything ready saves trips to the store and helps the whole project move smoothly.
1. Steel and Metal Components
Below is a complete list of steel and metal materials you’ll need for this build:
- 11-gauge steel tubing (2.5″ x 2.5″): Main upright posts and back cross members
- 11-gauge flat bar steel: Bracket plates for bolting support arms
- 1-inch steel tubing: Pull-up bar assembly
- 2.5″ x 2.5″ tubing sections: 17-inch support arms (4 pieces)
- Angled support pieces: Approximately 14 inches each for stability bracing
- 3/4-inch bolts with washers and locking washers: For assembling all connections
- Metal cutting oil: To keep drill bits cool during the drilling process
2. Required Tools for the Build
This project requires only three main power tools plus some essential accessories:
- Welder: MIG welder (110V works fine for garage shops, like the ESAB Rebel 215)
- Drill press: For precise hole drilling (Delta or similar brand recommended)
- Metal chop saw: To cut all steel pieces to exact lengths
- 1-inch metal drill bit: For drilling J-hook holes in upright posts
- Step drill bit: To expand holes to 1-1/8 inch for more effortless J-hook movement
- 3/4-inch drill bit: For support arm bolt holes
- Measuring tape and marker: For marking drill points
- Clamps: To secure your centering jig to the drill press
- Safety equipment: Welding helmet, safety glasses, and work gloves (avoid gloves on drill press)
How to Build a DIY Squat Rack?
These steps follow the exact order from my build video, with timestamps so you can pause and follow along. Each part builds on the last, giving you a sturdy half rack for a fraction of the cost.
Step 1: Make the Centering Jig
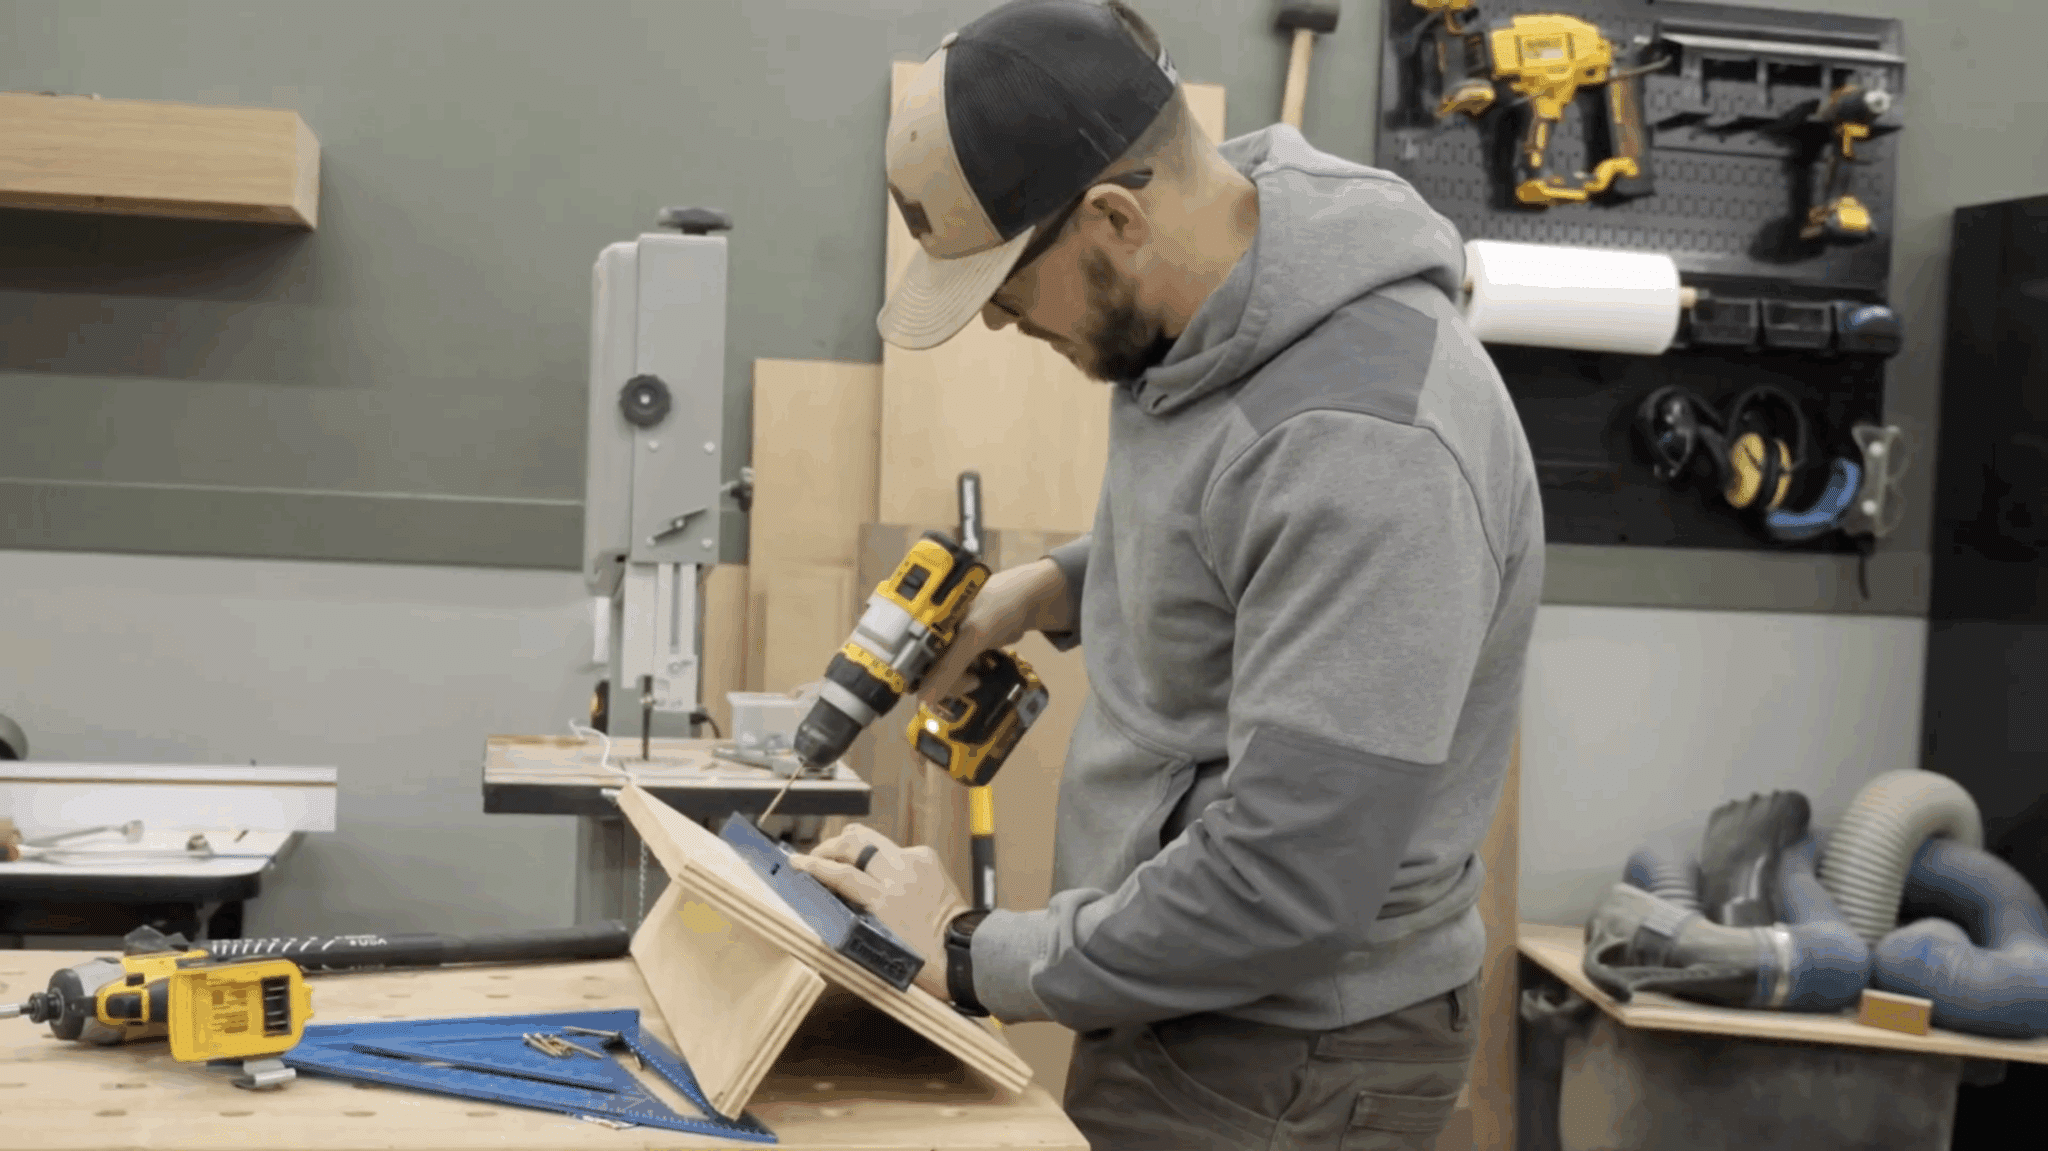
Start by cutting a simple jig that serves as a fence for your drill press, ensuring every hole is perfectly centered and aligned.
This jig clamps directly to your drill press table and eliminates the need to measure and mark each drilling position, saving you hours of tedious setup time.
The jig makes sure the holes in all four posts line up so the J-hooks slide through perfectly every time.
Without this jig, you’d struggle with inconsistent hole placement, which could make your rack unsafe or unusable for adjustable-height settings.
Step 2: Cut All Steel Pieces
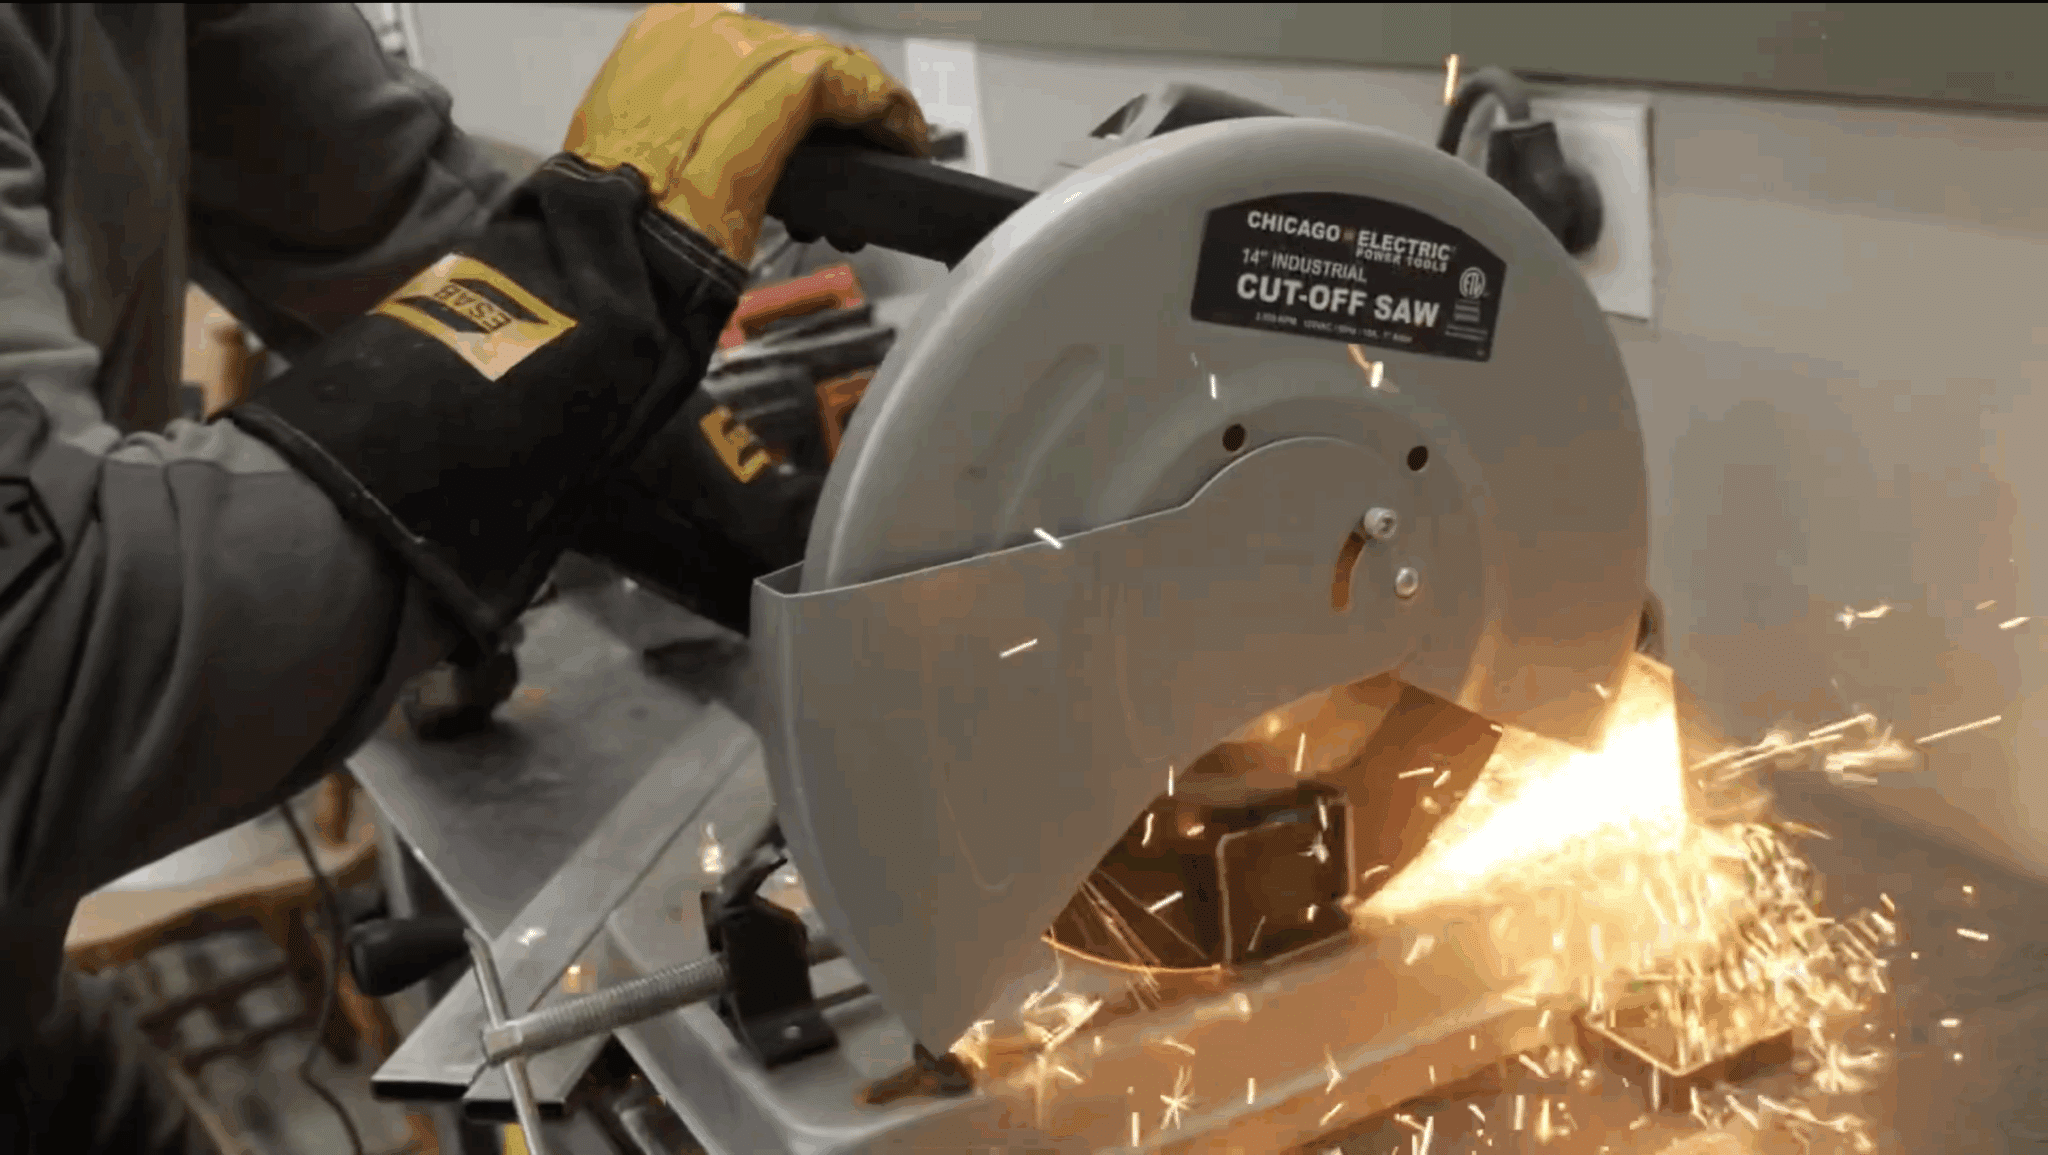
Use your metal chop saw to cut all the 2.5″ x 2.5″ steel tubing to the required lengths for uprights, supports, and cross members. Measure twice and cut once to ensure accuracy.
The four main upright posts need to be identical in length for a level rack.
Cut the 17-inch support arms that will hold the weight brackets, along with the angled stability braces that extend about 14 inches from the base.
Don’t forget to cut the back cross members that span the top and bottom of the rear uprights for structural integrity.
Step 3: Drill 1″ Upright Holes
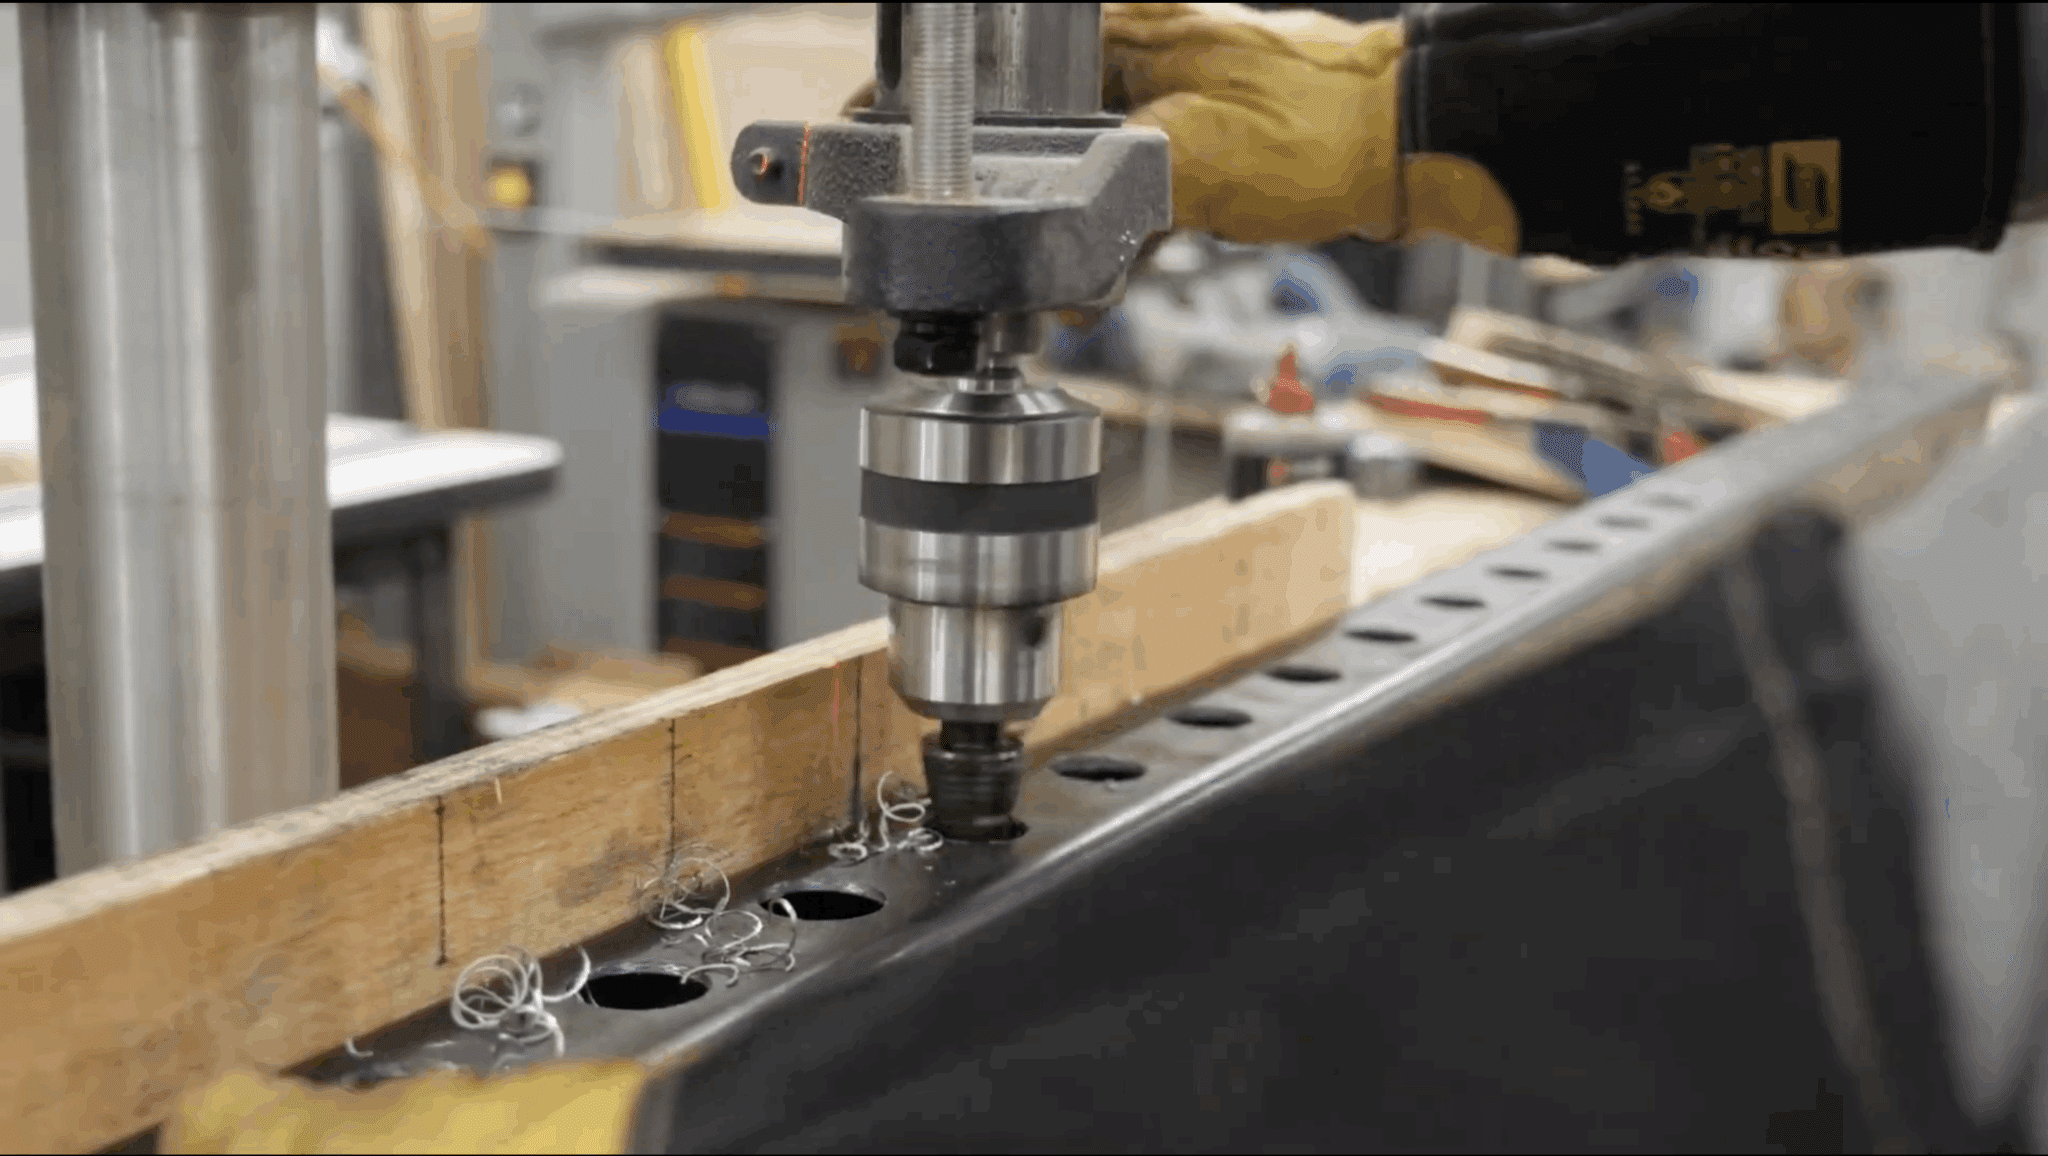
Begin drilling with your 1-inch metal drill bit to create the initial J-hook holes in all four upright posts using your centering jig.
Apply metal cutting oil generously to your drill bit to prevent overheating and extend the life of your bit during this extensive drilling process. Test-fit your J-hooks after drilling a few holes.
You’ll likely find they’re too snug to slide in and out smoothly at this stage.
This is normal; you’ll address the tight fit in the next step by enlarging the holes slightly with a step drill bit.
Step 4: Drill All Upright Rows and Bolt Holes
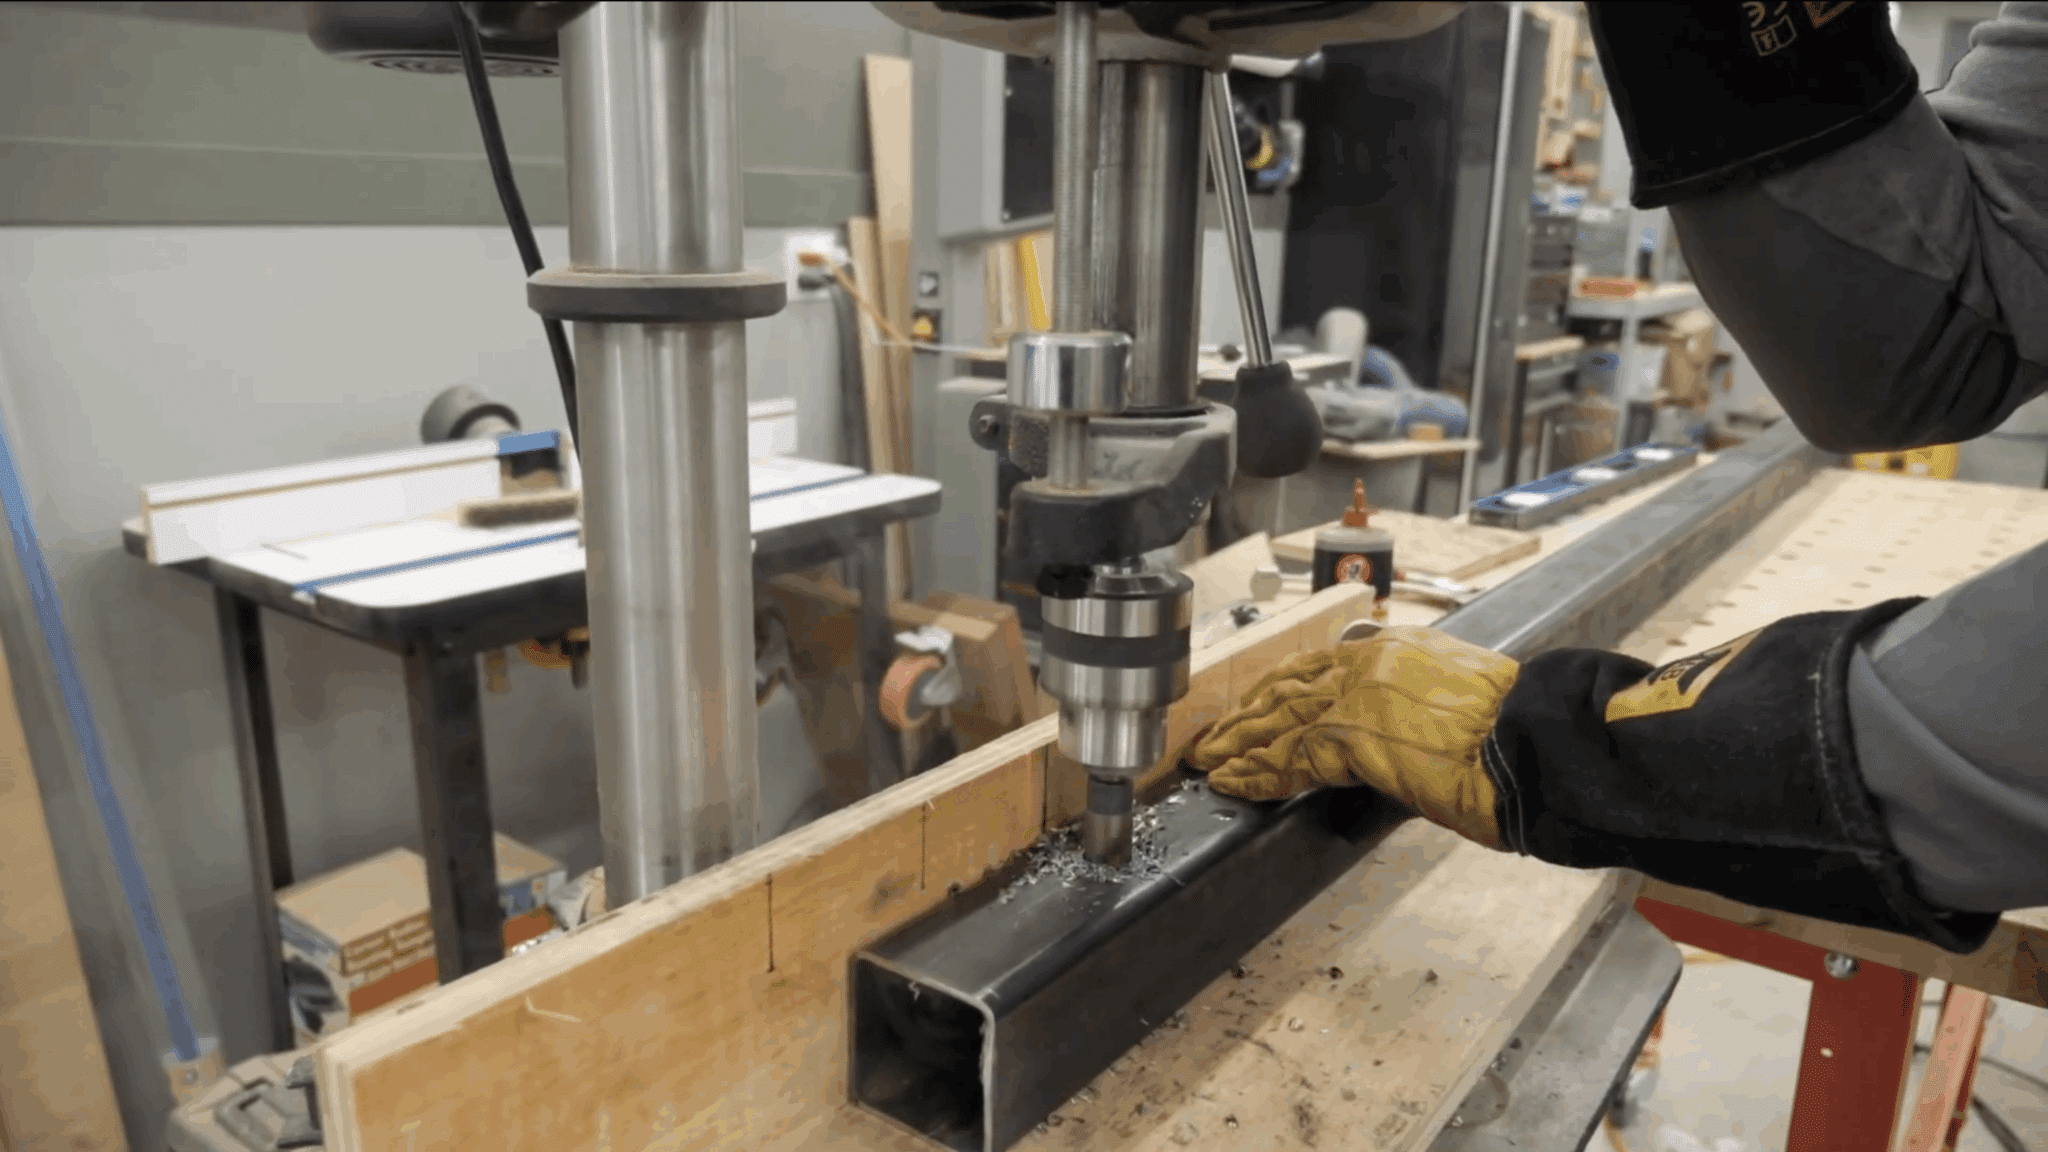
Continue drilling holes down the entire length of all four upright posts, creating rows of adjustment points for different exercise heights.
You’ll drill about 150 holes on both sides of each upright. It’s tedious, but it’s key to adjustability.
Space your holes consistently so that J-hooks and safety bars can be adjusted in small increments for bench pressing, squatting, and other exercises.
Use a step bit to widen each 1-inch hole to about 1-1/8 inches so the J-hooks slide smoothly while staying secure.
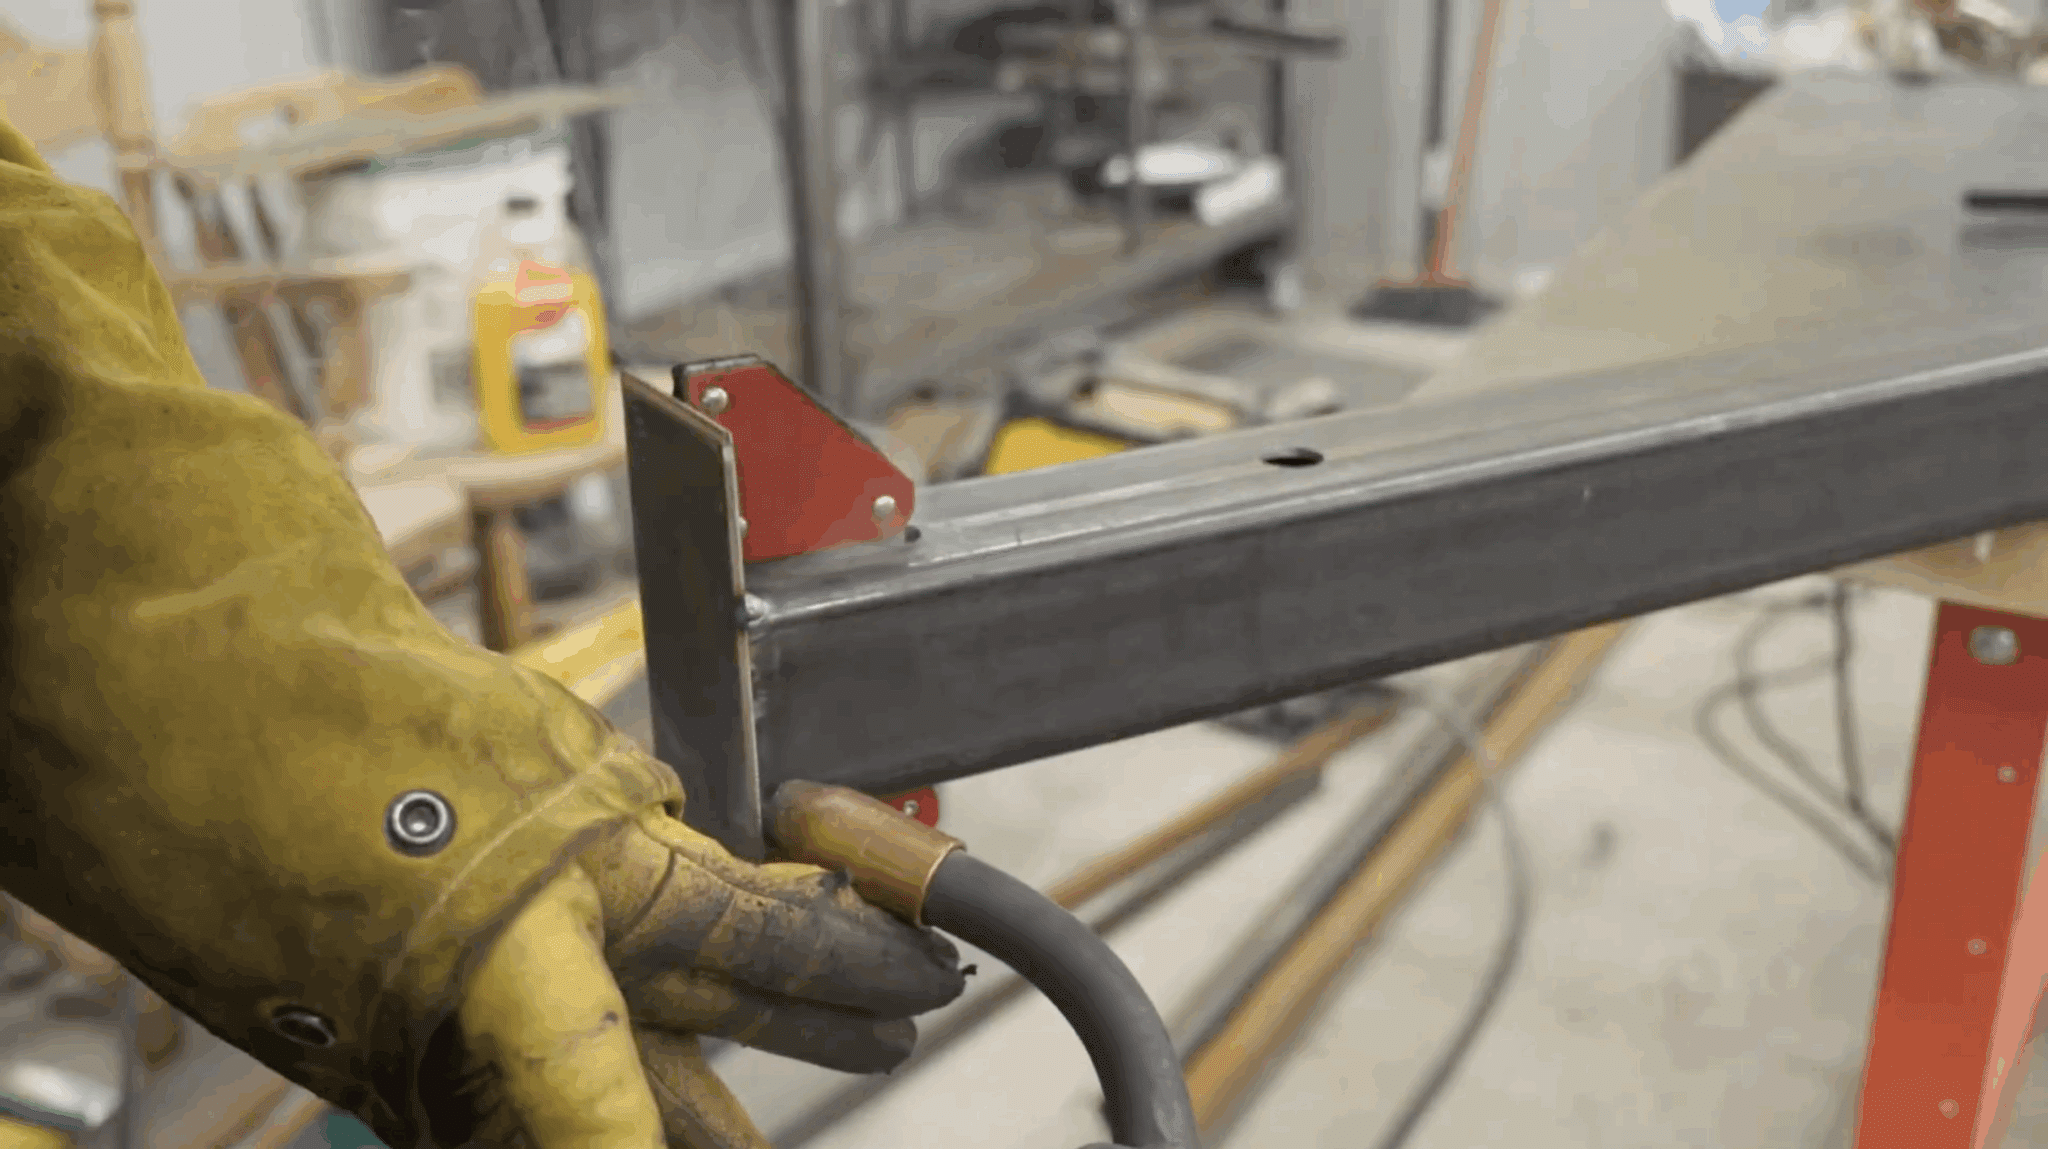
Step 5: Weld Flat Bar onto Support Pieces
Weld the 11-gauge flat-bar steel brackets to the ends of your 17-inch support beams, starting with tack welds at the corners.
These flat brackets serve as the connection points where bolts secure the support arms to the main upright posts of the rack.
Start with corner tack welds to hold everything in place, then run continuous welds along the sides of the flat bar.
Even if you’re new to welding like I was, these welds don’t need to be perfect since the bolts, not the welds, carry the structural load.
Step 6: Add Tack Welds for Strength
Apply additional tack welds on the flat surfaces of your brackets before running full welds around the corners for maximum strength.
Experienced welders recommend tack-welding the flat parts first to prevent movement, then welding around corners, as this creates stronger, more reliable joints.
This technique prevents warping and keeps your brackets square and aligned during welding and later use.
Take your time with this step; good welds here ensure your support arms can handle heavy loads safely without structural concerns or failures.
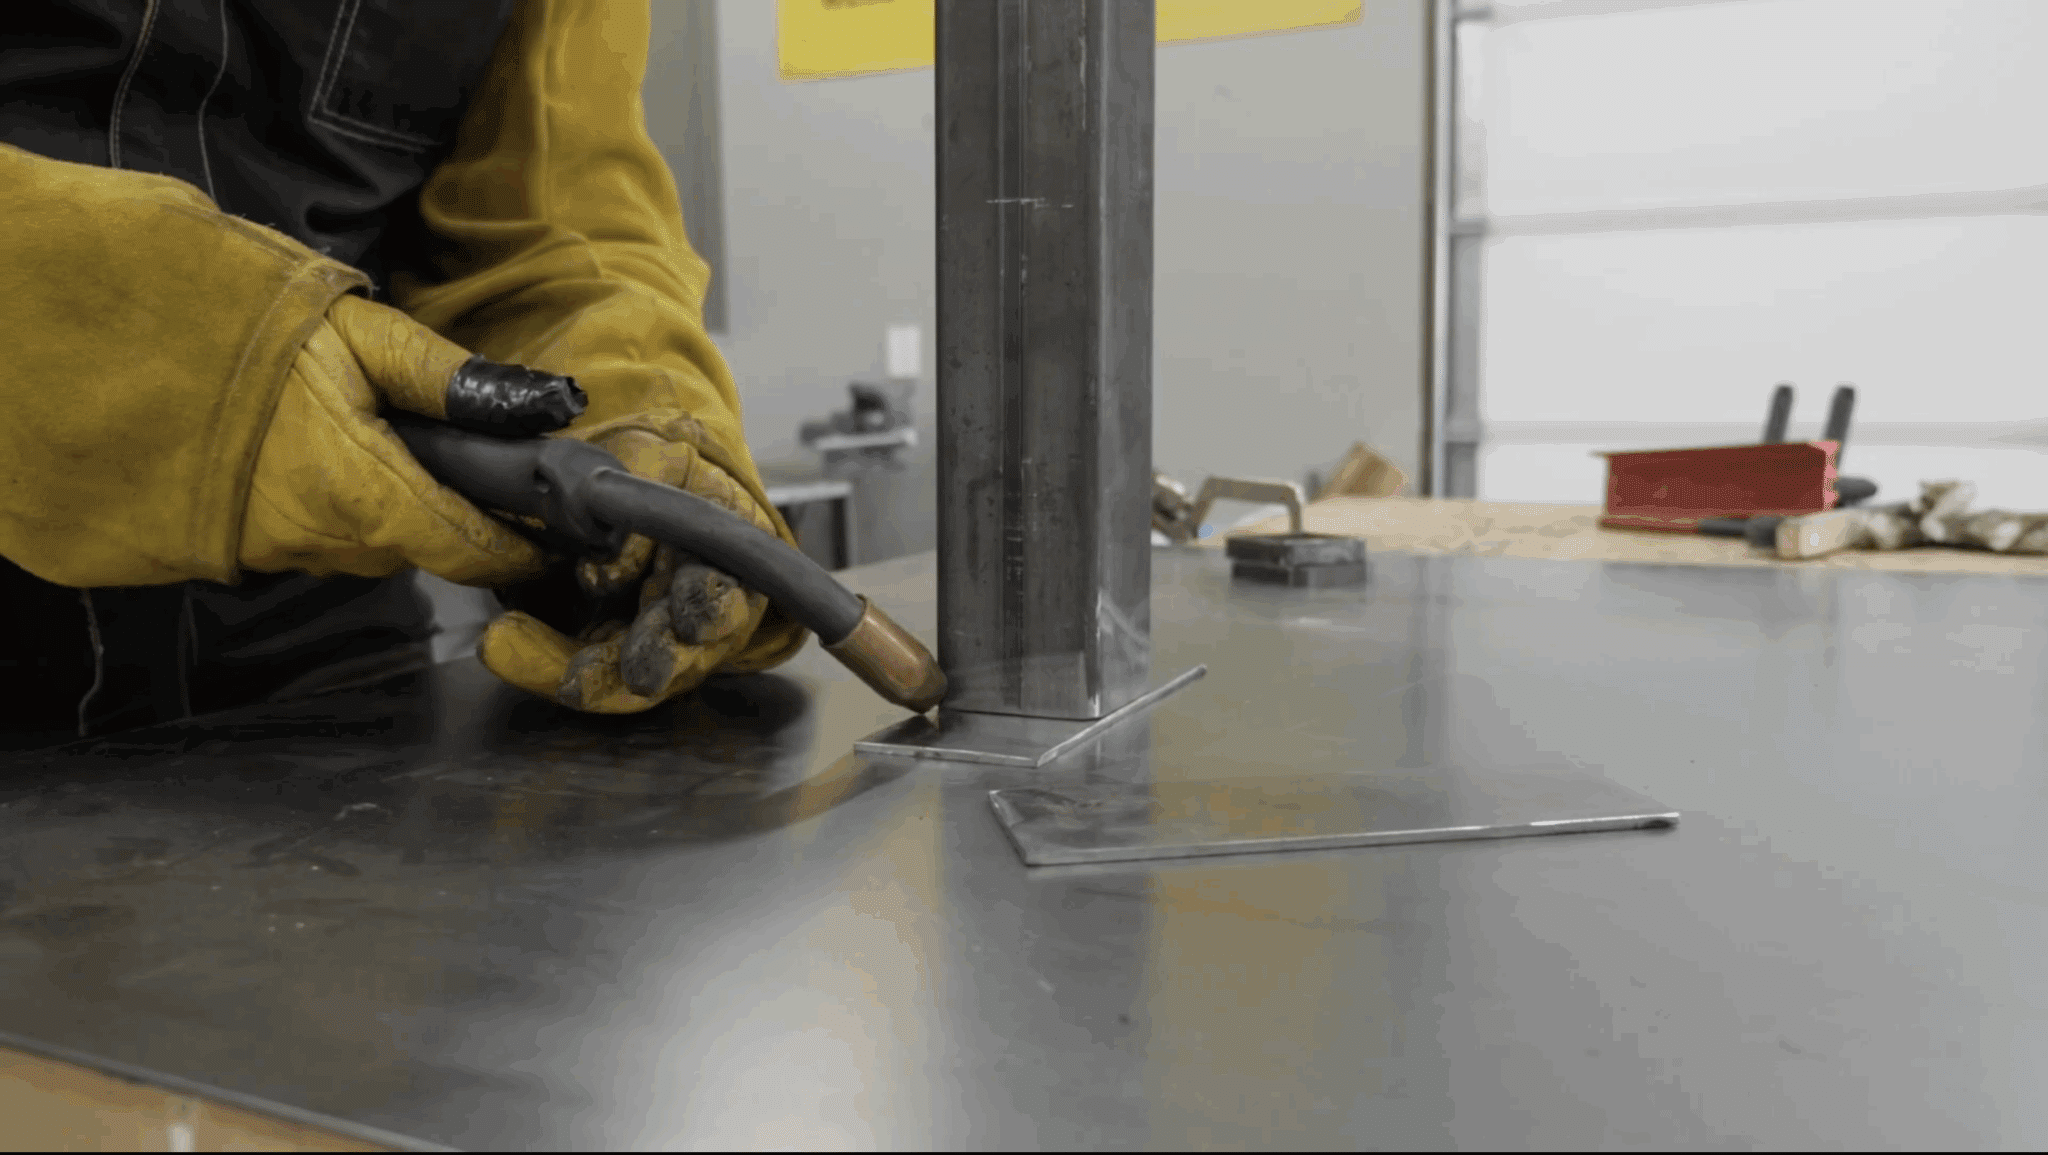
Step 7: Add Angled Side Braces
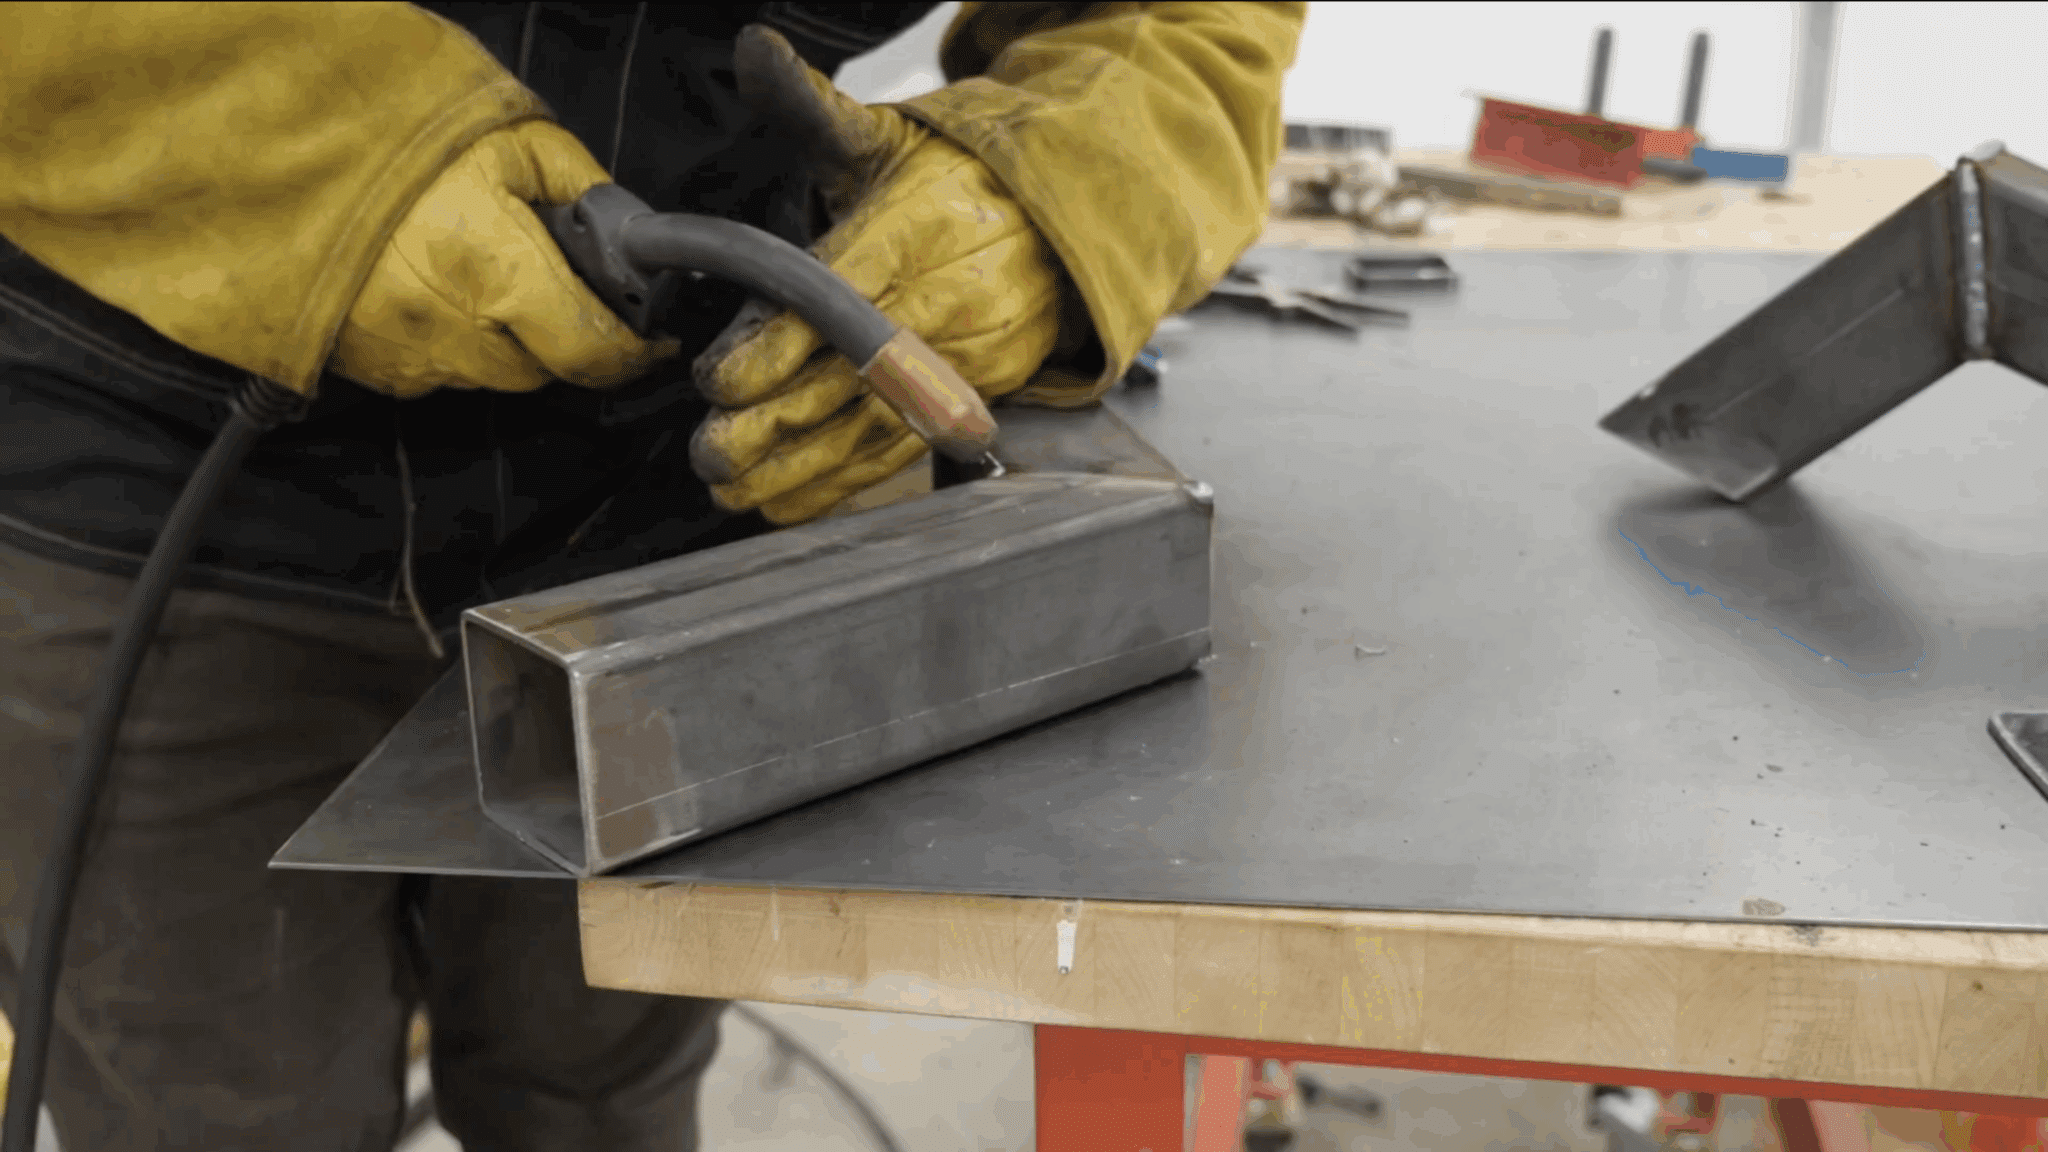
Cut and weld angled side braces that extend about 14 inches forward from the base to keep the rack from tipping when you rack weight on the front.
Bolt these braces to the uprights with 3/4-inch hardware, then drill matching holes and weld any areas that need extra support.
After that, weld the top and bottom back cross members between the rear uprights.
These horizontal pieces keep the uprights from twisting or spreading, so make sure both are level and square before welding.
Step 8: Dry-Fit All Components
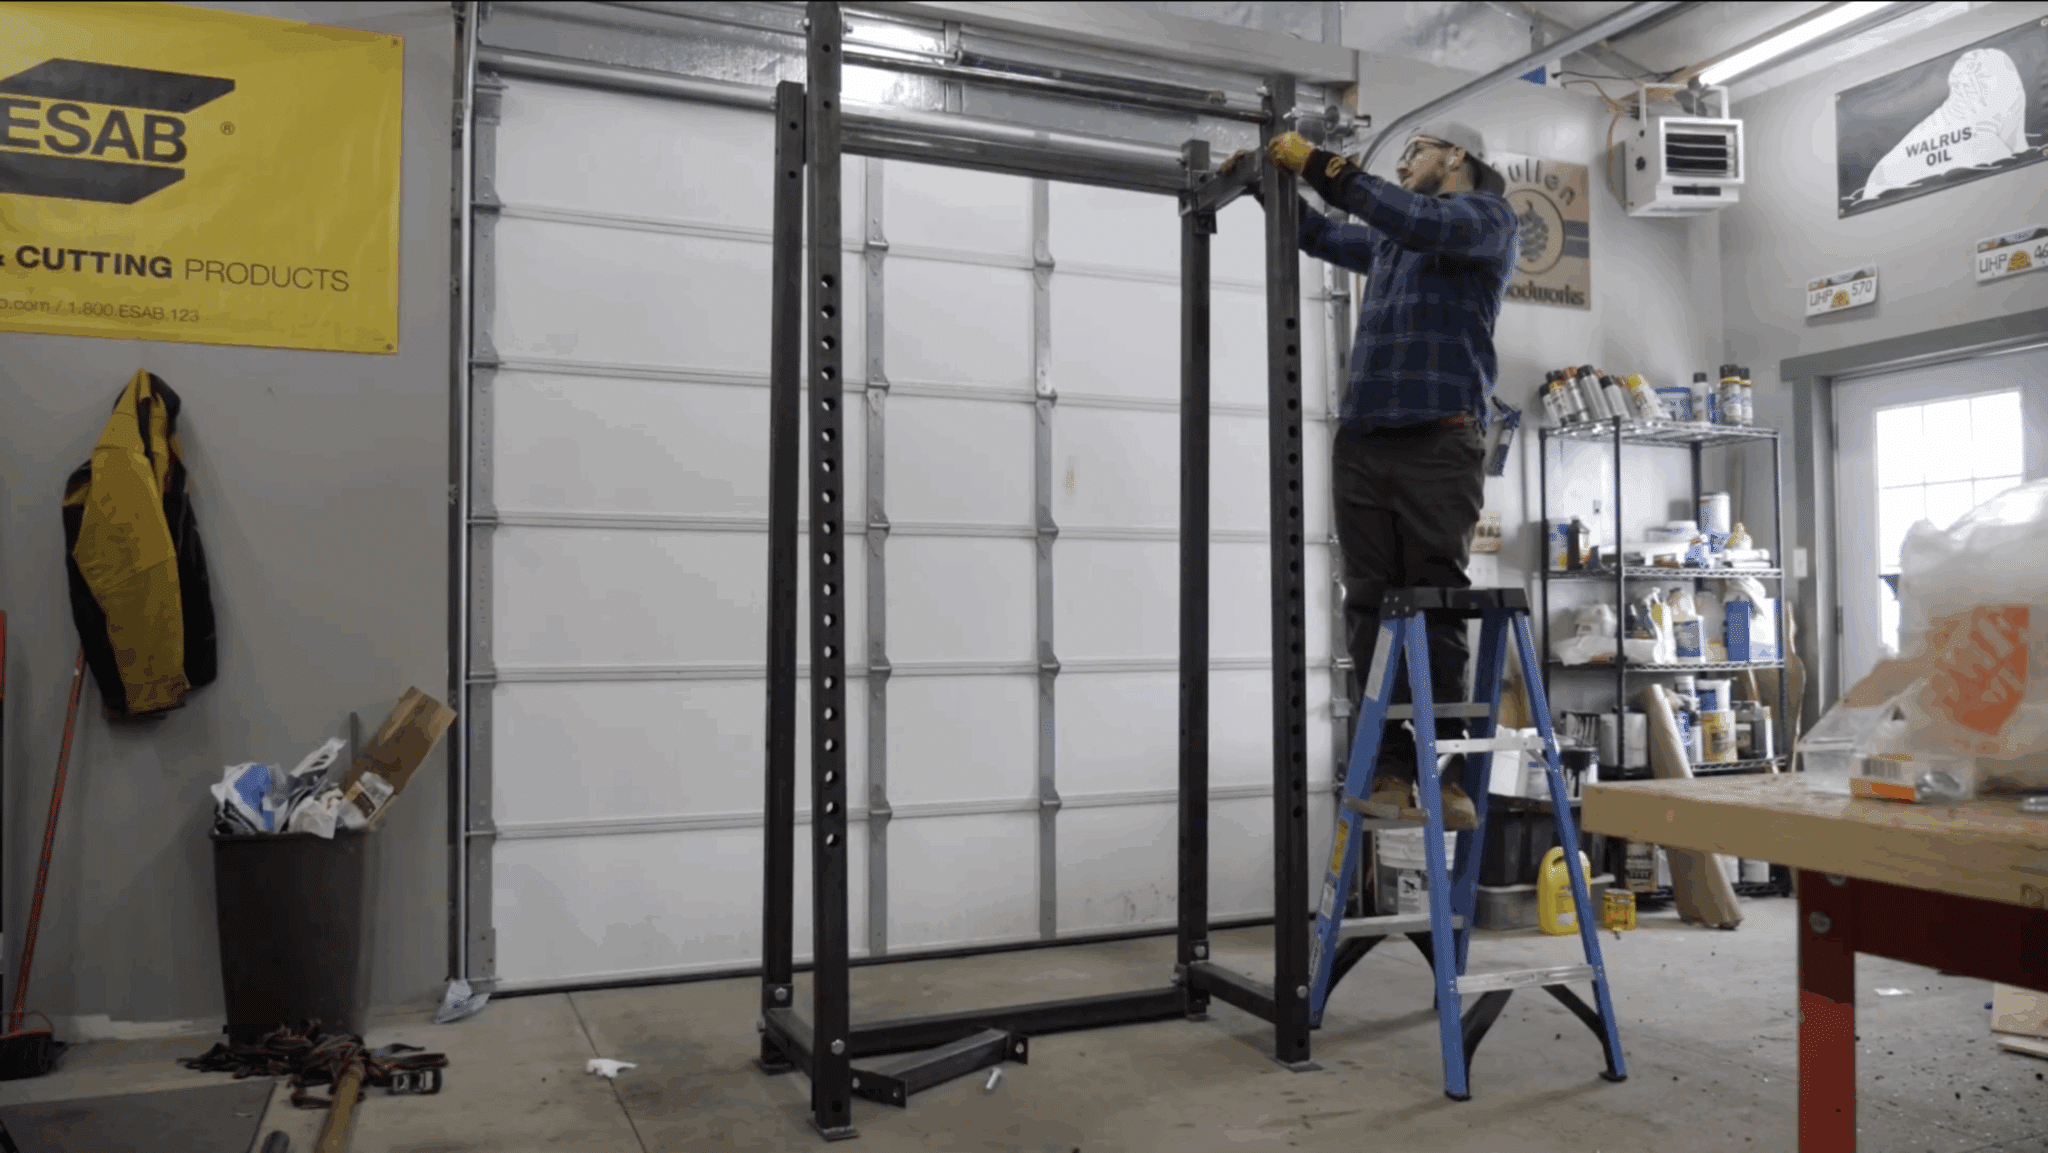
Before painting, assemble all the pieces without fully tightening the bolts to verify that everything fits correctly and aligns properly.
Make sure all bolt holes line up, the rack sits level, and the J-hooks slide smoothly through the holes.
This is your chance to catch any issues, misaligned holes, warped pieces, or spacing problems before you commit to painting and final assembly.
Make any necessary adjustments or corrections now, as it’s much easier to fix problems before paint than after everything is finished and coated.
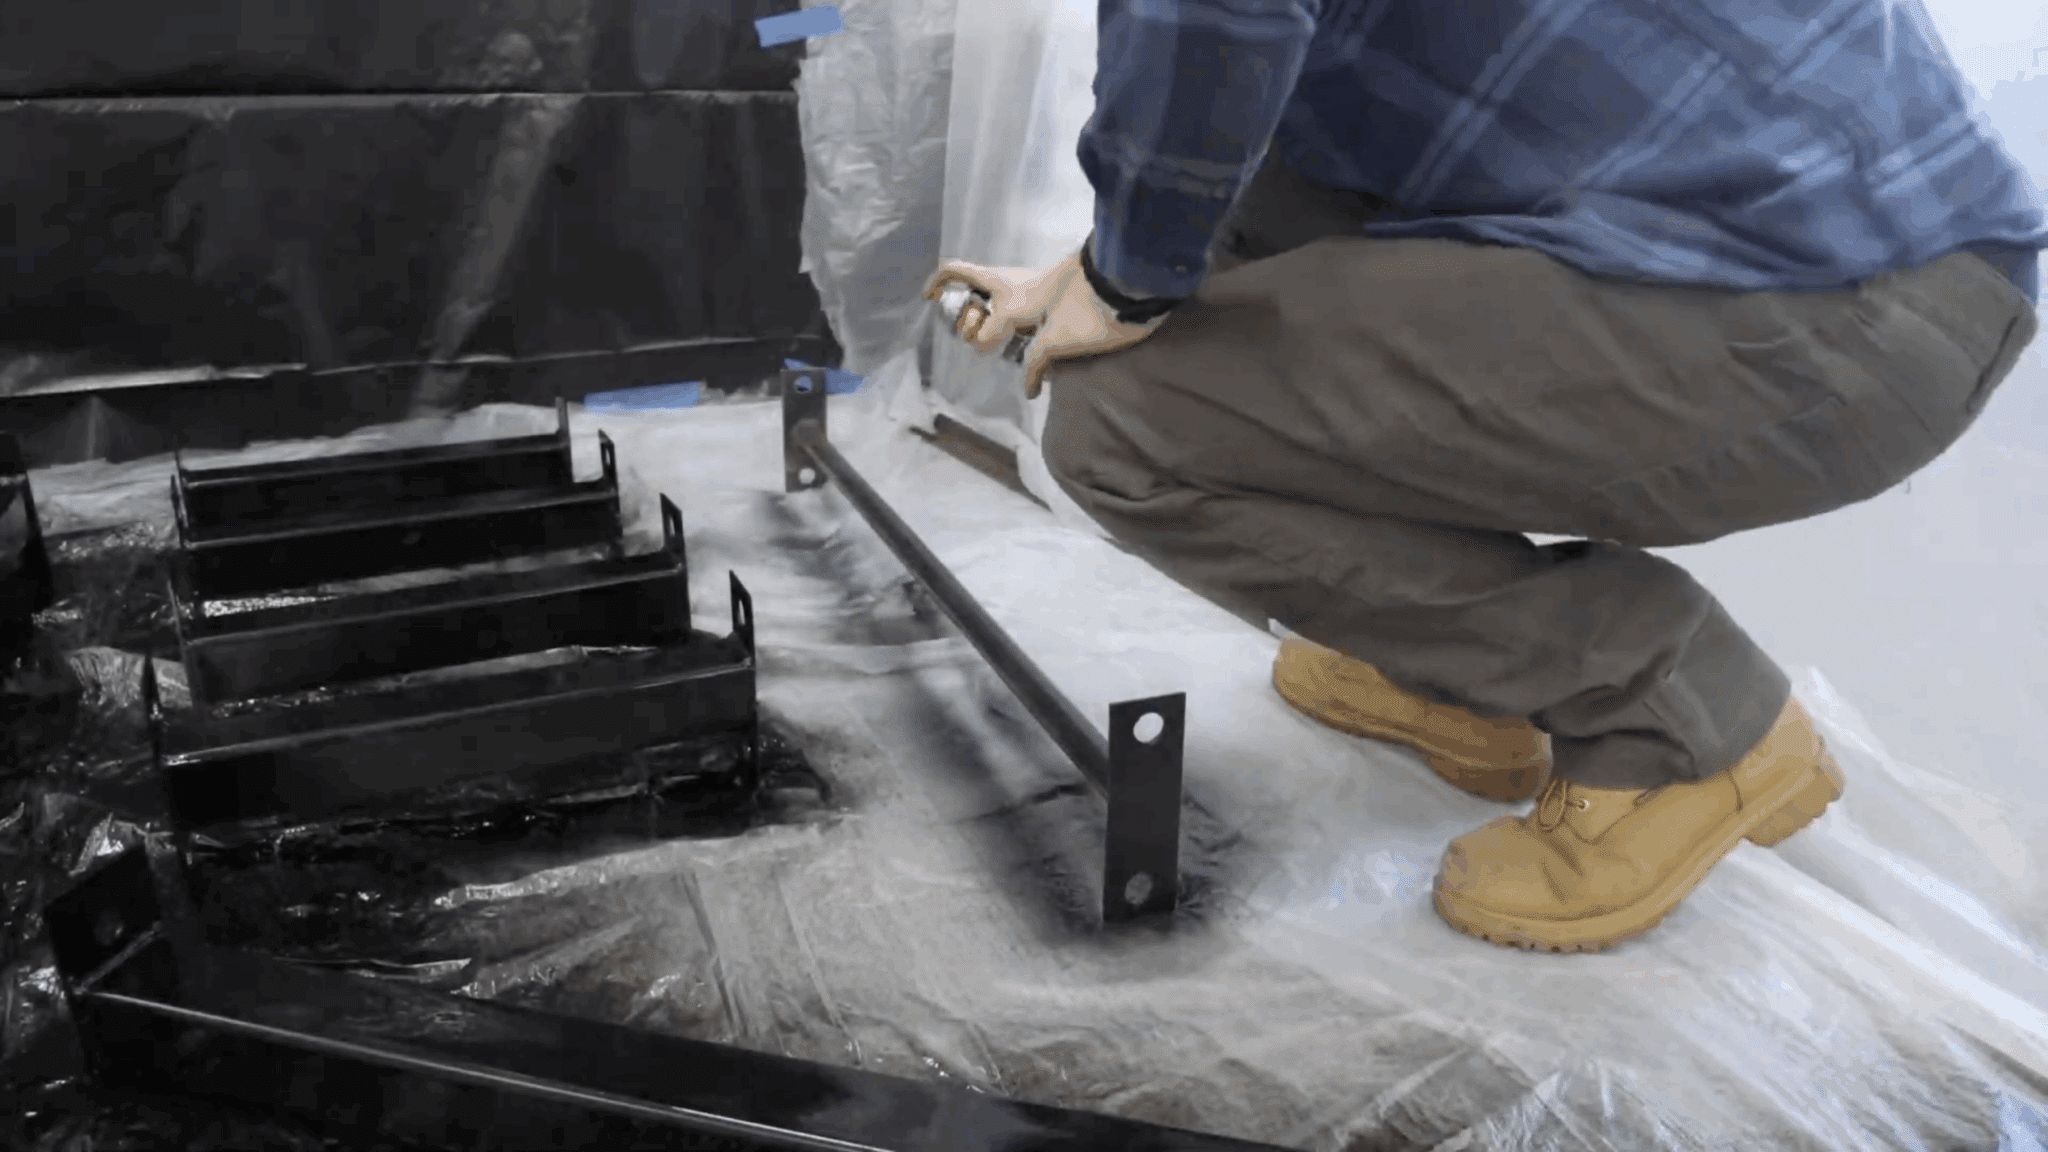
Step 9: Paint the Entire Rack
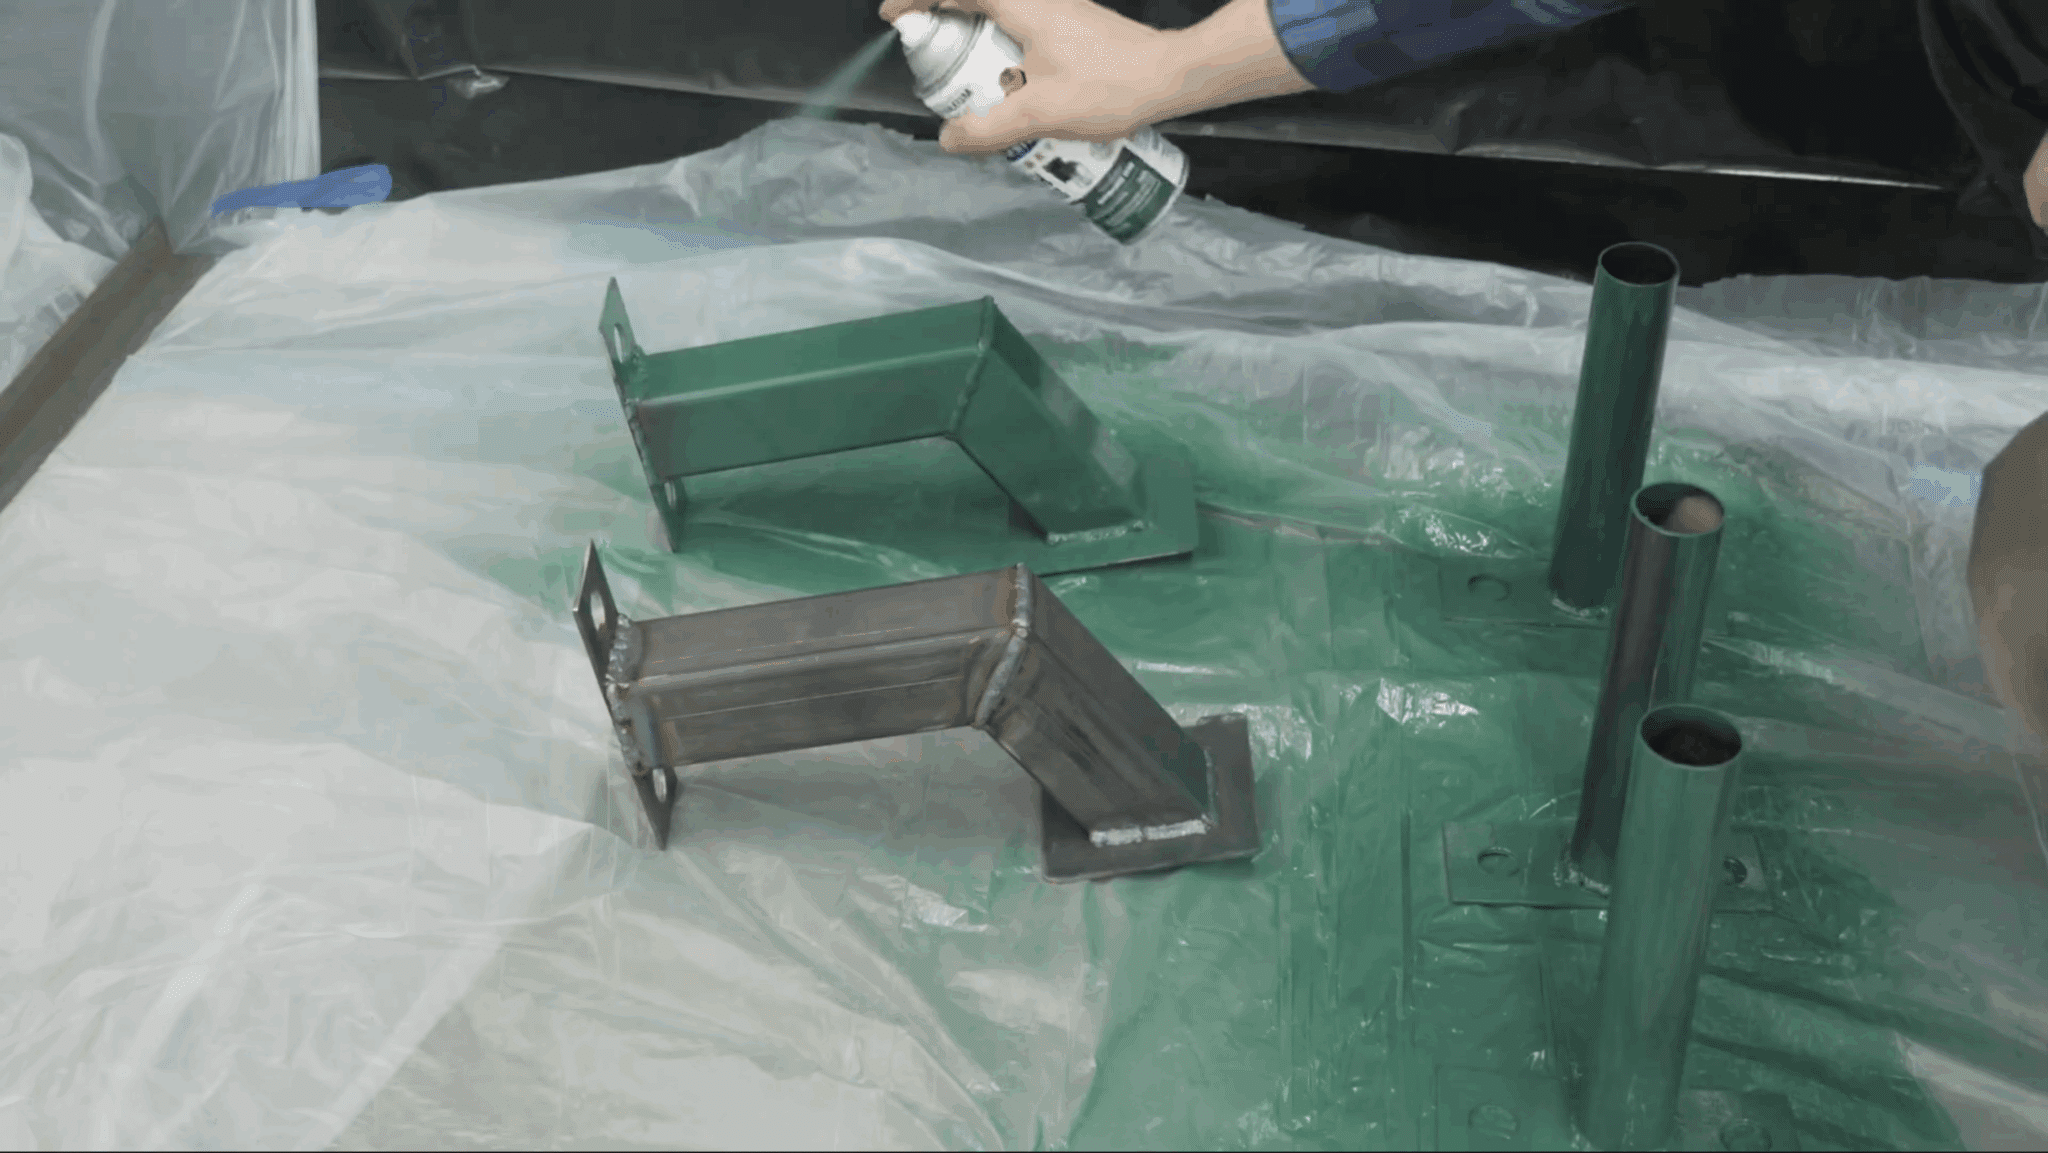
Disassemble the rack and set up tarps in your workspace, then spray paint all components with high-gloss metal paint in your chosen colors.
I used four cans of green spray paint and two cans of black to create a professional two-tone finish that looks as good as commercial racks.
Use thin, even coats to avoid drips. Several light coats give better results than one heavy coat.
Let each coat dry completely before applying the next, and paint in a well-ventilated area while wearing appropriate respiratory protection for safety.
Step 10: Coat Pull-Up Bar with Bed Liner
Apply truck bed liner spray to the pull-up bar instead of regular paint to create a textured, non-slip gripping surface.
The bed liner coating provides much better grip than smooth painted metal, preventing your hands from slipping during pull-ups and chin-ups.
This textured finish improves comfort and safety, especially when your hands get sweaty during hard workouts.
Spray several coats of bed liner, allowing proper drying time between coats until you achieve a thick, durable texture that will last through years of use.
Step 11: Apply Clear Protective Finish
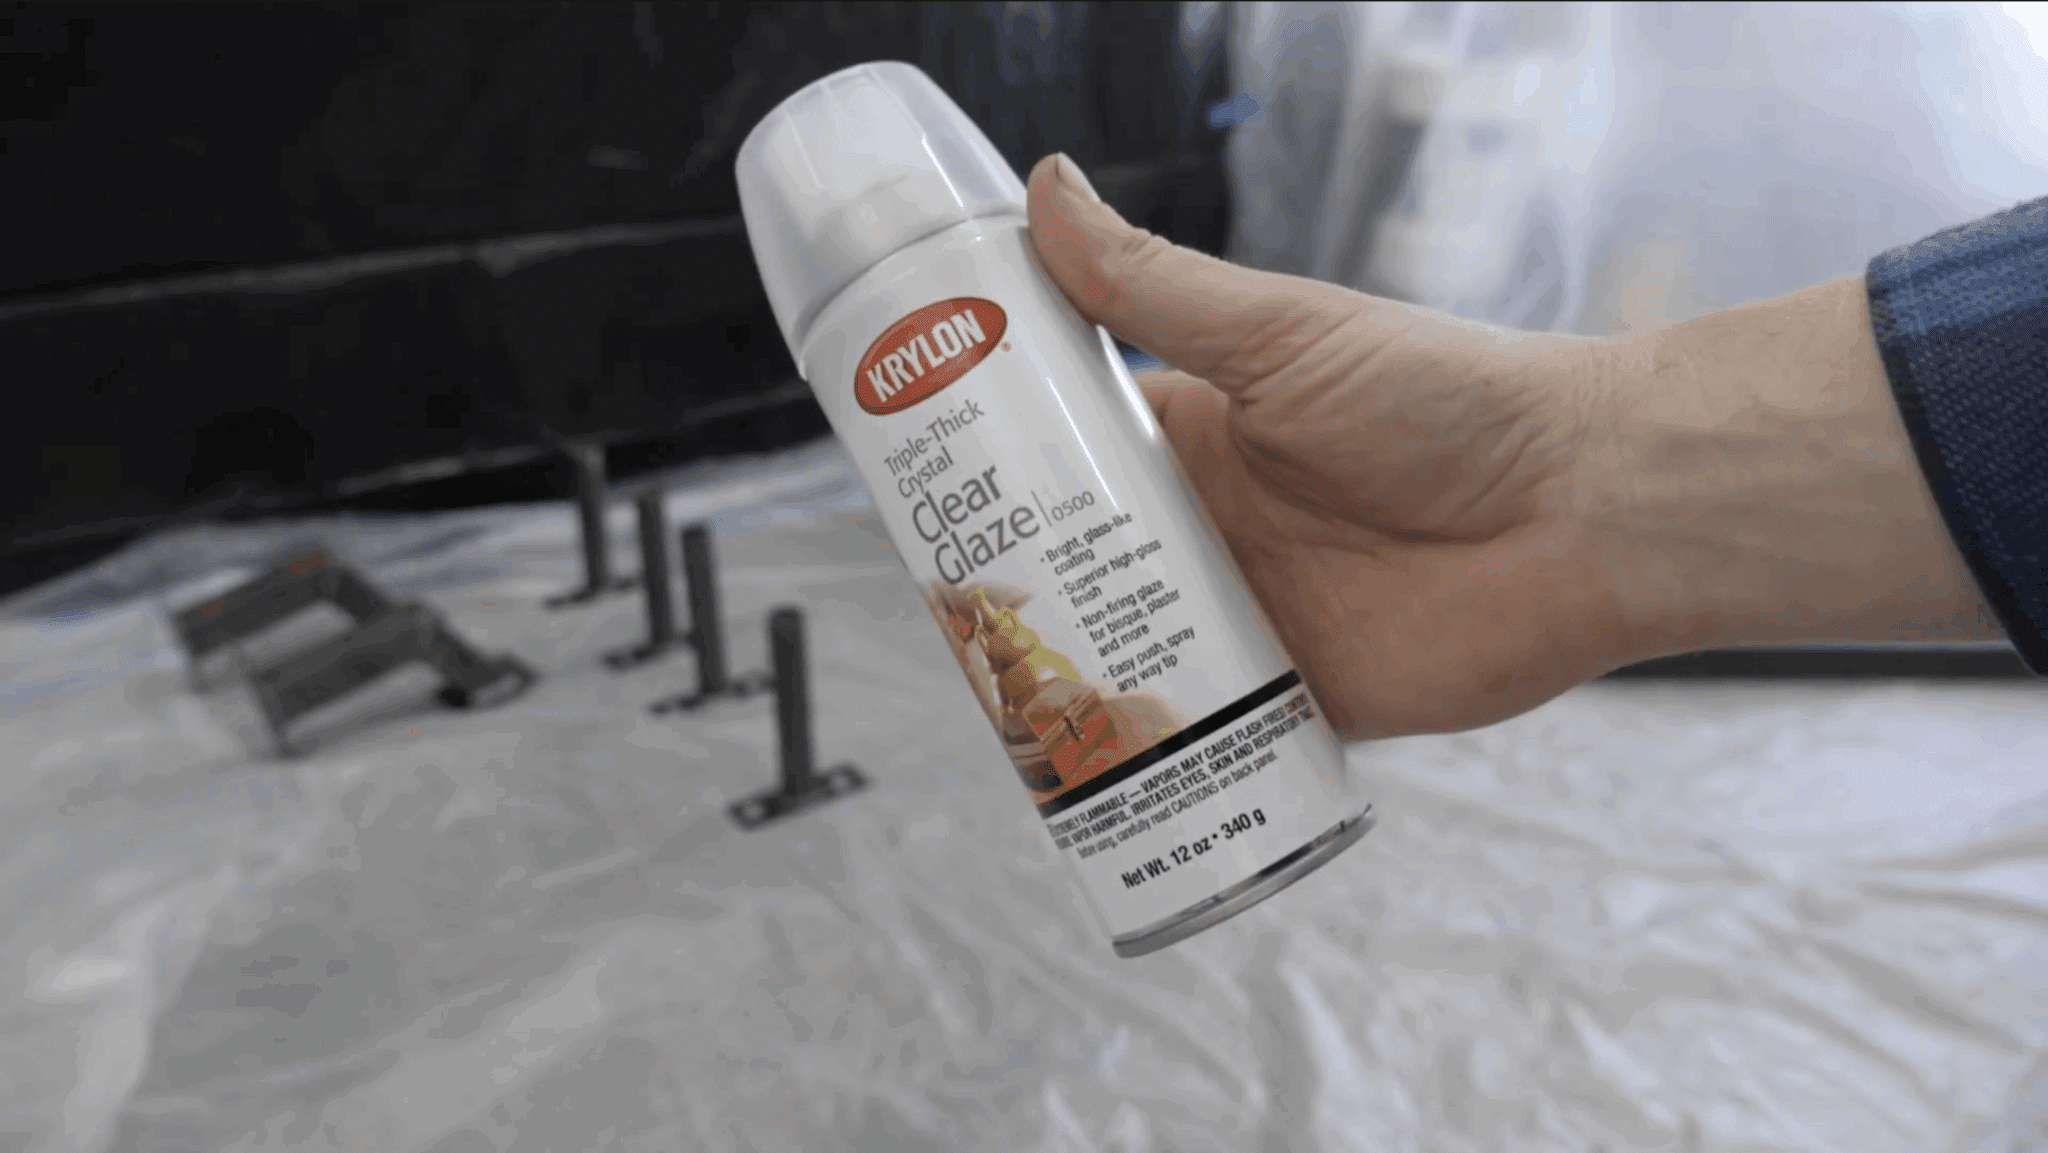
Once the base paint is fully dry, apply a clear high-gloss protective finish over all painted surfaces to add shine and scratch resistance.
This clear coat seals the paint and creates a more rigid surface that resists scratching from weights, J-hooks, and moving attachments on the metal.
The rack will get scratched over time, but this protective layer helps your paint last much longer.
Allow the clear coat to cure for a full 24 hours before handling or assembling to ensure maximum hardness and durability.
Step 12: Assemble with 3/4″ Hardware
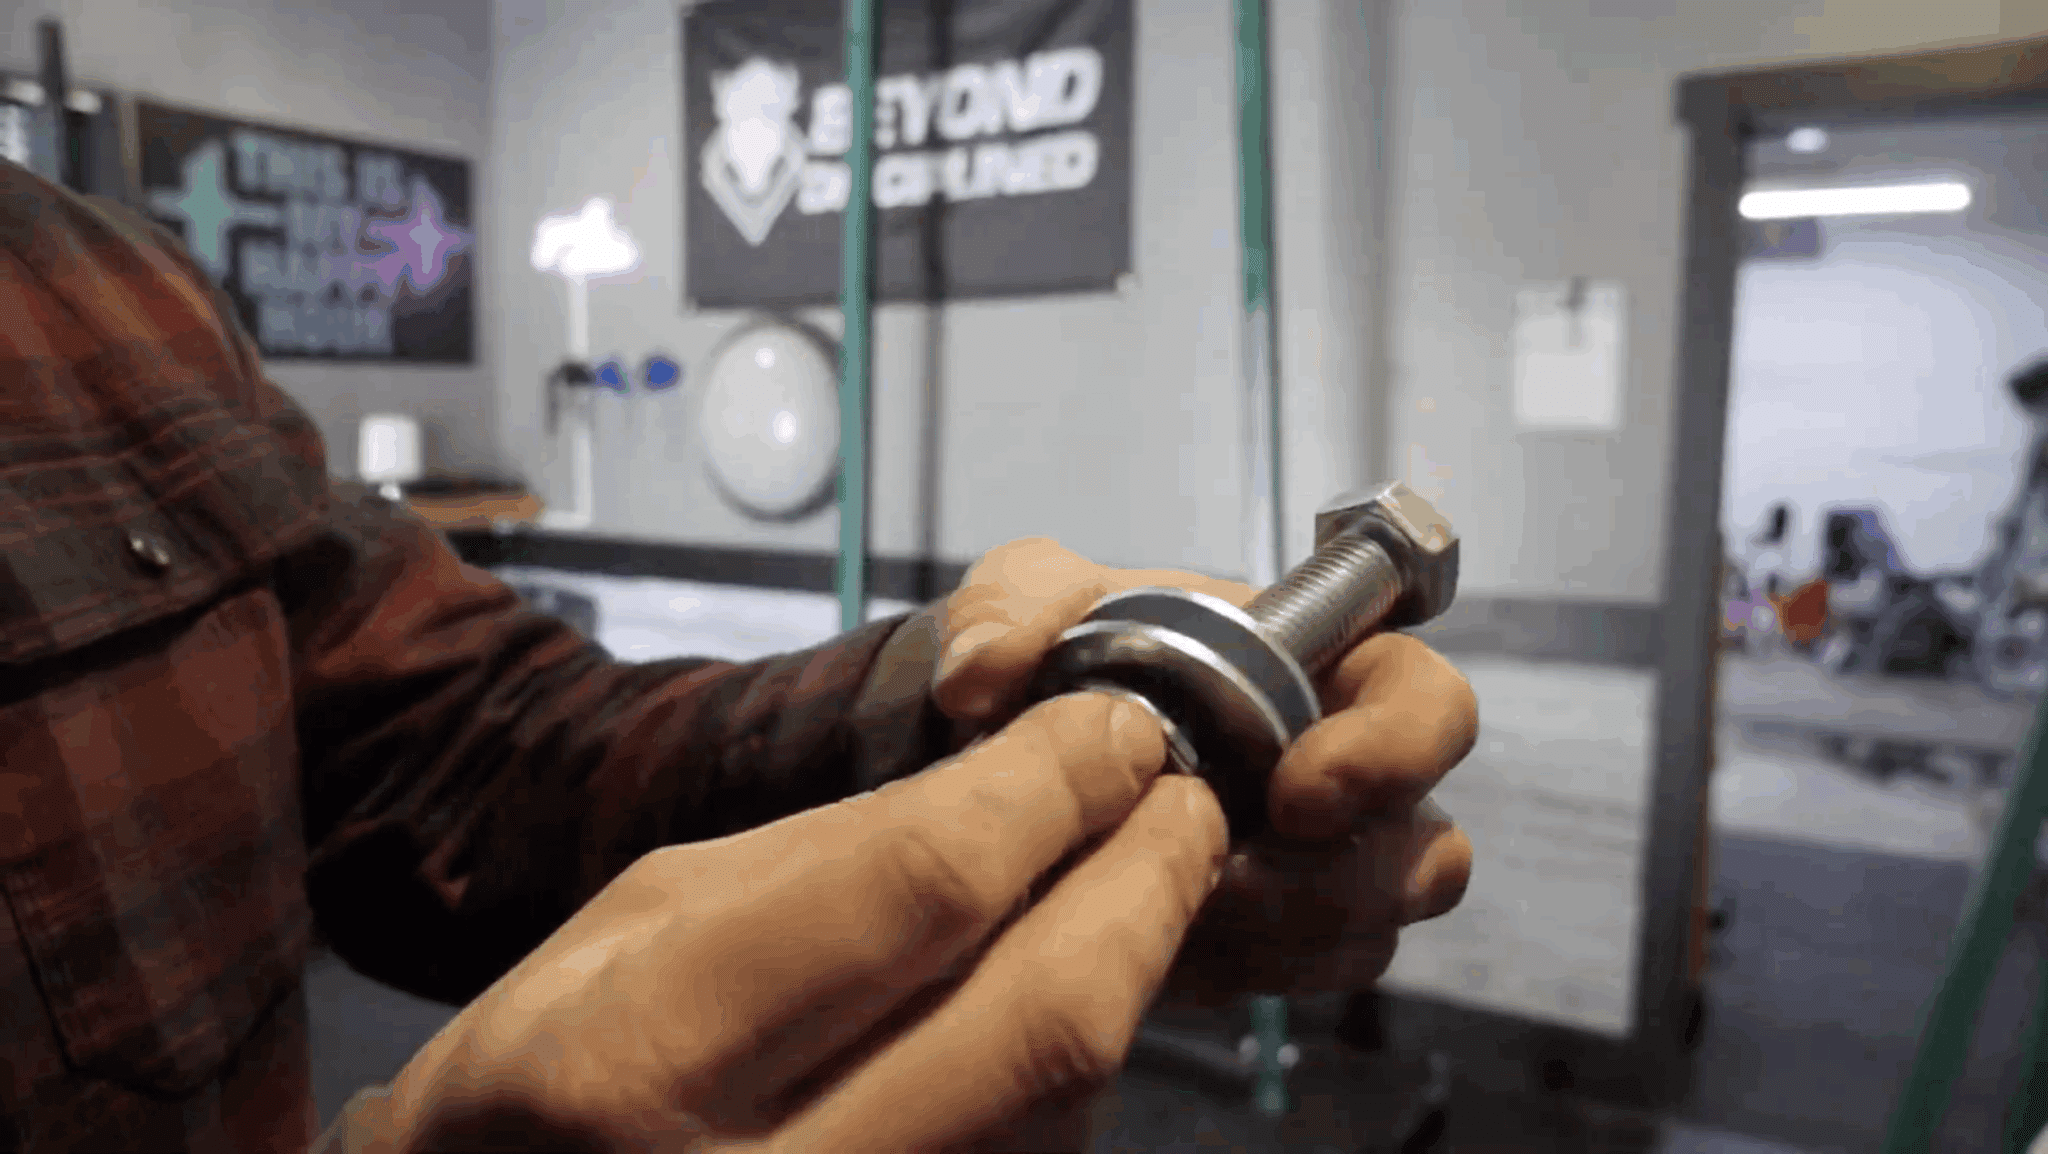
Begin final assembly using 3/4-inch bolts with washers on both sides, plus a locking washer and nut to secure each connection point.
Start by loosely threading all bolts through their respective holes without fully tightening. This allows the structure to naturally settle into proper alignment.
Locking washers are important because they keep bolts from loosening over time due to vibration and heavy racking.
Work through each connection point and make sure every bolt has the right washer setup before tightening in the next step.
Step 13: Align and Tighten All Bolts
Once all bolts are loosely in place, check that the rack is square and level, then systematically tighten each bolt to its final torque.
Over-tightening one area too early can pull the frame out of square, so tighten slowly and check alignment often.
Use a socket wrench or impact driver to ensure all bolts are tight enough to eliminate any movement or wobbling in the assembled structure.
Double-check each connection after tightening, since a loose bolt under load can be dangerous and weaken the whole rack.
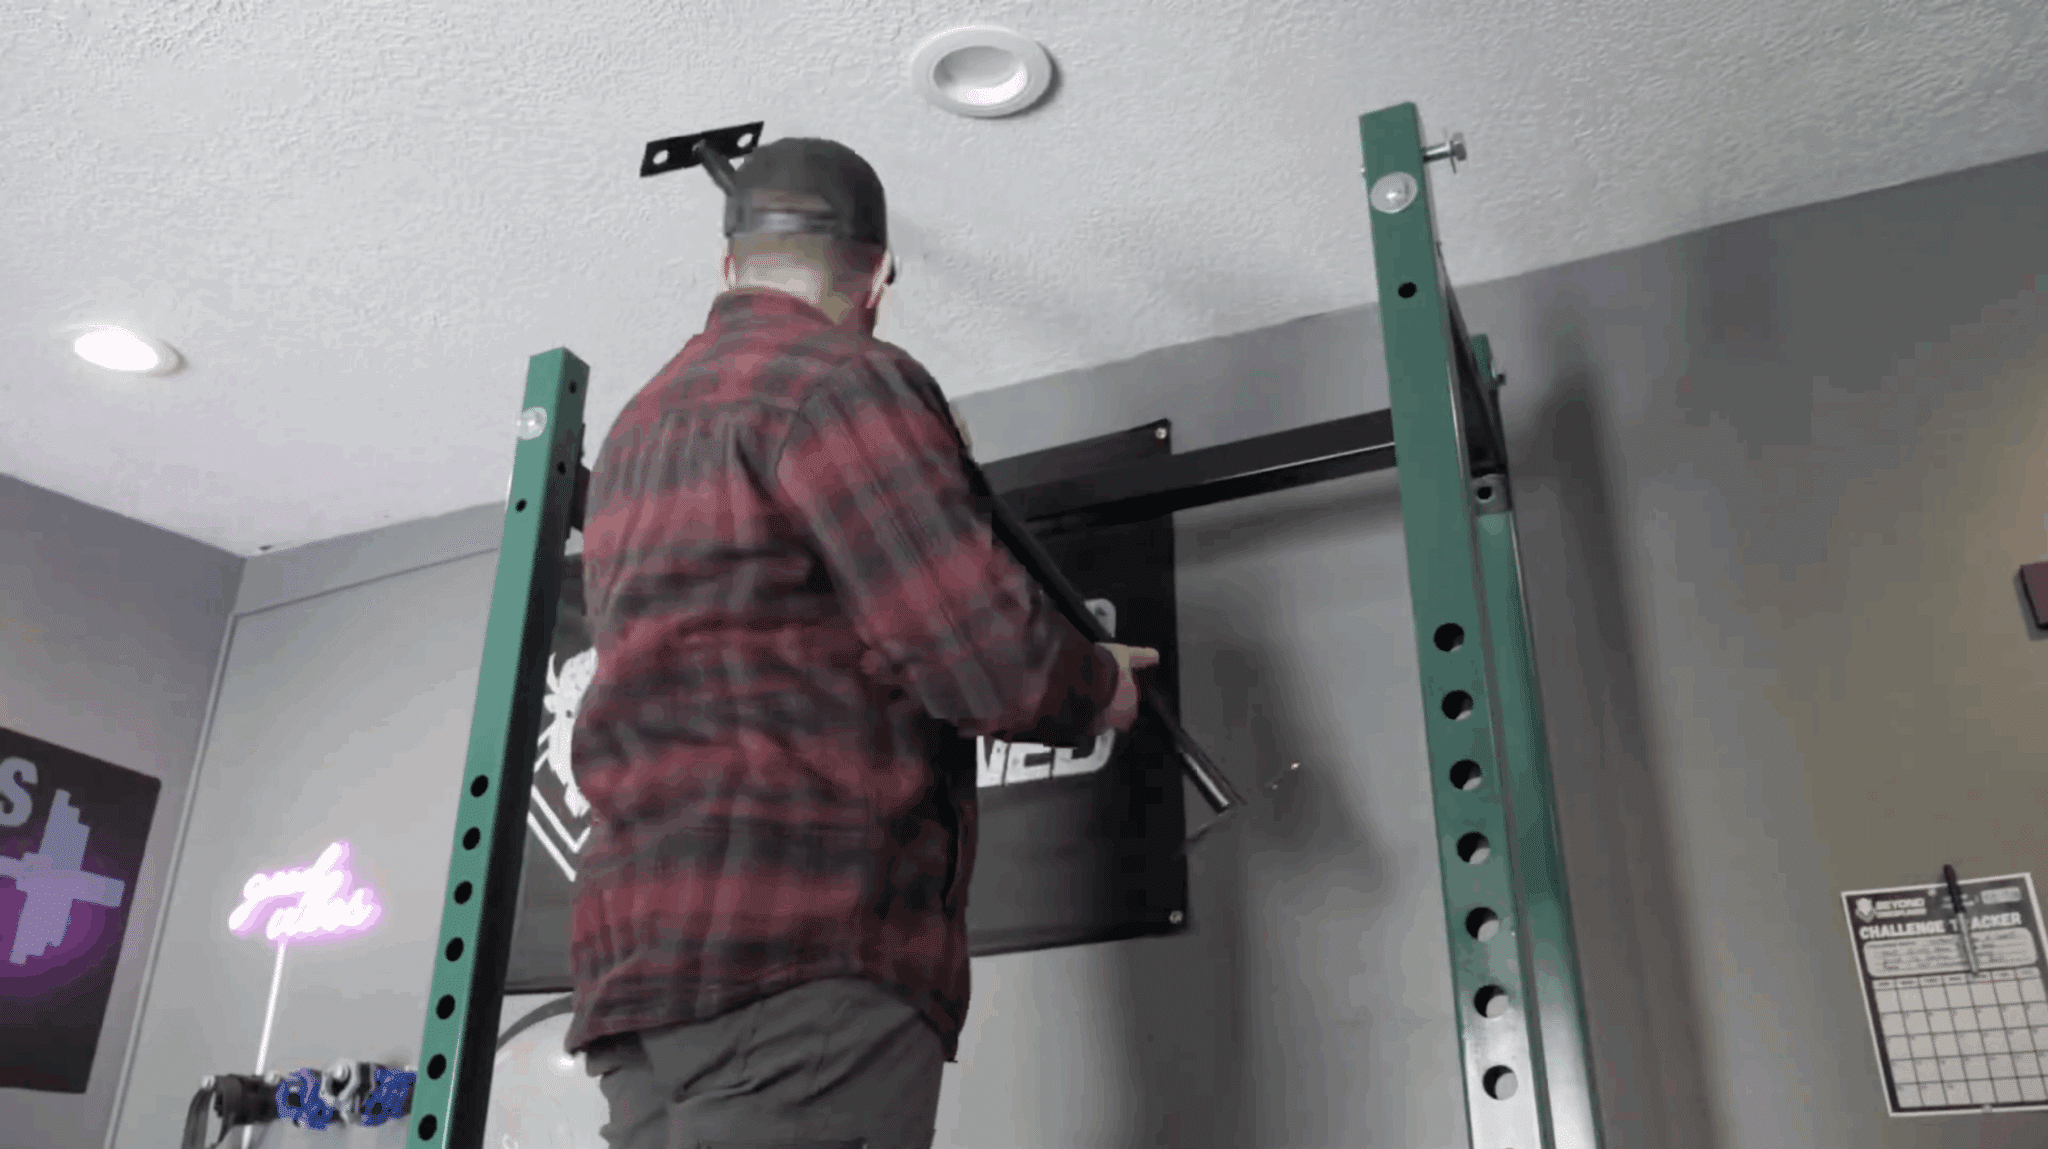
Step 14: Perform Strength Test

Test the pull-up bar with your full body weight to verify that the welds hold and that the overall structure is stable and secure under load.
I successfully performed multiple pull-ups at 215 pounds without any flexing, creaking, or signs of structural weakness in the welds or connections.
Start by loading the J-hooks with light weight and work up to your normal load.
Make sure the rack handles it safely. Watch for unusual sounds, movement, or flexing. A solid rack should feel steady with no issues.
This tutorial is based on a helpful video by @Mullenthemaker. You can check out the original video on their YouTube channel here or watch it below.
Safety Tips for a Homemade Squat Rack
Regular checks and good habits keep your rack safe and steady. These simple steps help prevent injuries and protect your equipment.
- Inspect all bolts and hardware often to make sure nothing has loosened.
- Look for cracks, stress marks, or bending in any metal parts.
- Check that the rack sits flat on the ground without wobbling.
- Test the J-hooks and safety bars to be sure they slide and lock correctly.
- Avoid dropping heavy weights directly onto the rack.
- Keep the rack clean and dry to prevent rust.
- Replace worn parts right away instead of waiting.
- Make sure your lifting area is clear and has enough room for movement.
- Always rack and unrack the bar with control to reduce stress on the frame.
How to Maintain Your DIY Squat Rack?
Keeping your diy squat rack in good shape is simple, but it does take steady care. I start by checking all bolts and hardware every few weeks to make sure nothing has loosened from regular use.
You should also look over the uprights, braces, and J-hooks for any signs of bending, cracks, or worn edges.
Wipe down the metal often to remove chalk, sweat, and dust, since buildup can lead to rust over time.
If you spot scratches in the paint, touch them up right away to protect the steel underneath. I also keep the floor around the rack clean so dirt doesn’t grind into the base.
If any parts feel rough or stick, a light coat of lubricant helps them move smoothly.
With small, consistent checks, your homemade squat rack will stay strong and safe for years.
Conclusion
Building a diy squat rack at home takes time, but it’s one of those projects that pays off every time you train.
You get a setup that fits your space, your budget, and your needs without relying on commercial gear.
By following each step carefully, checking your work as you go, and staying patient with the drilling and welding, you end up with a rack that feels solid and safe for everyday lifting.
I hope this guide helps you start your own build and avoid the mistakes I ran into.
When you finish, you’ll not only have a strong homemade rack, you’ll also have the satisfaction of knowing you built it yourself from start to finish.