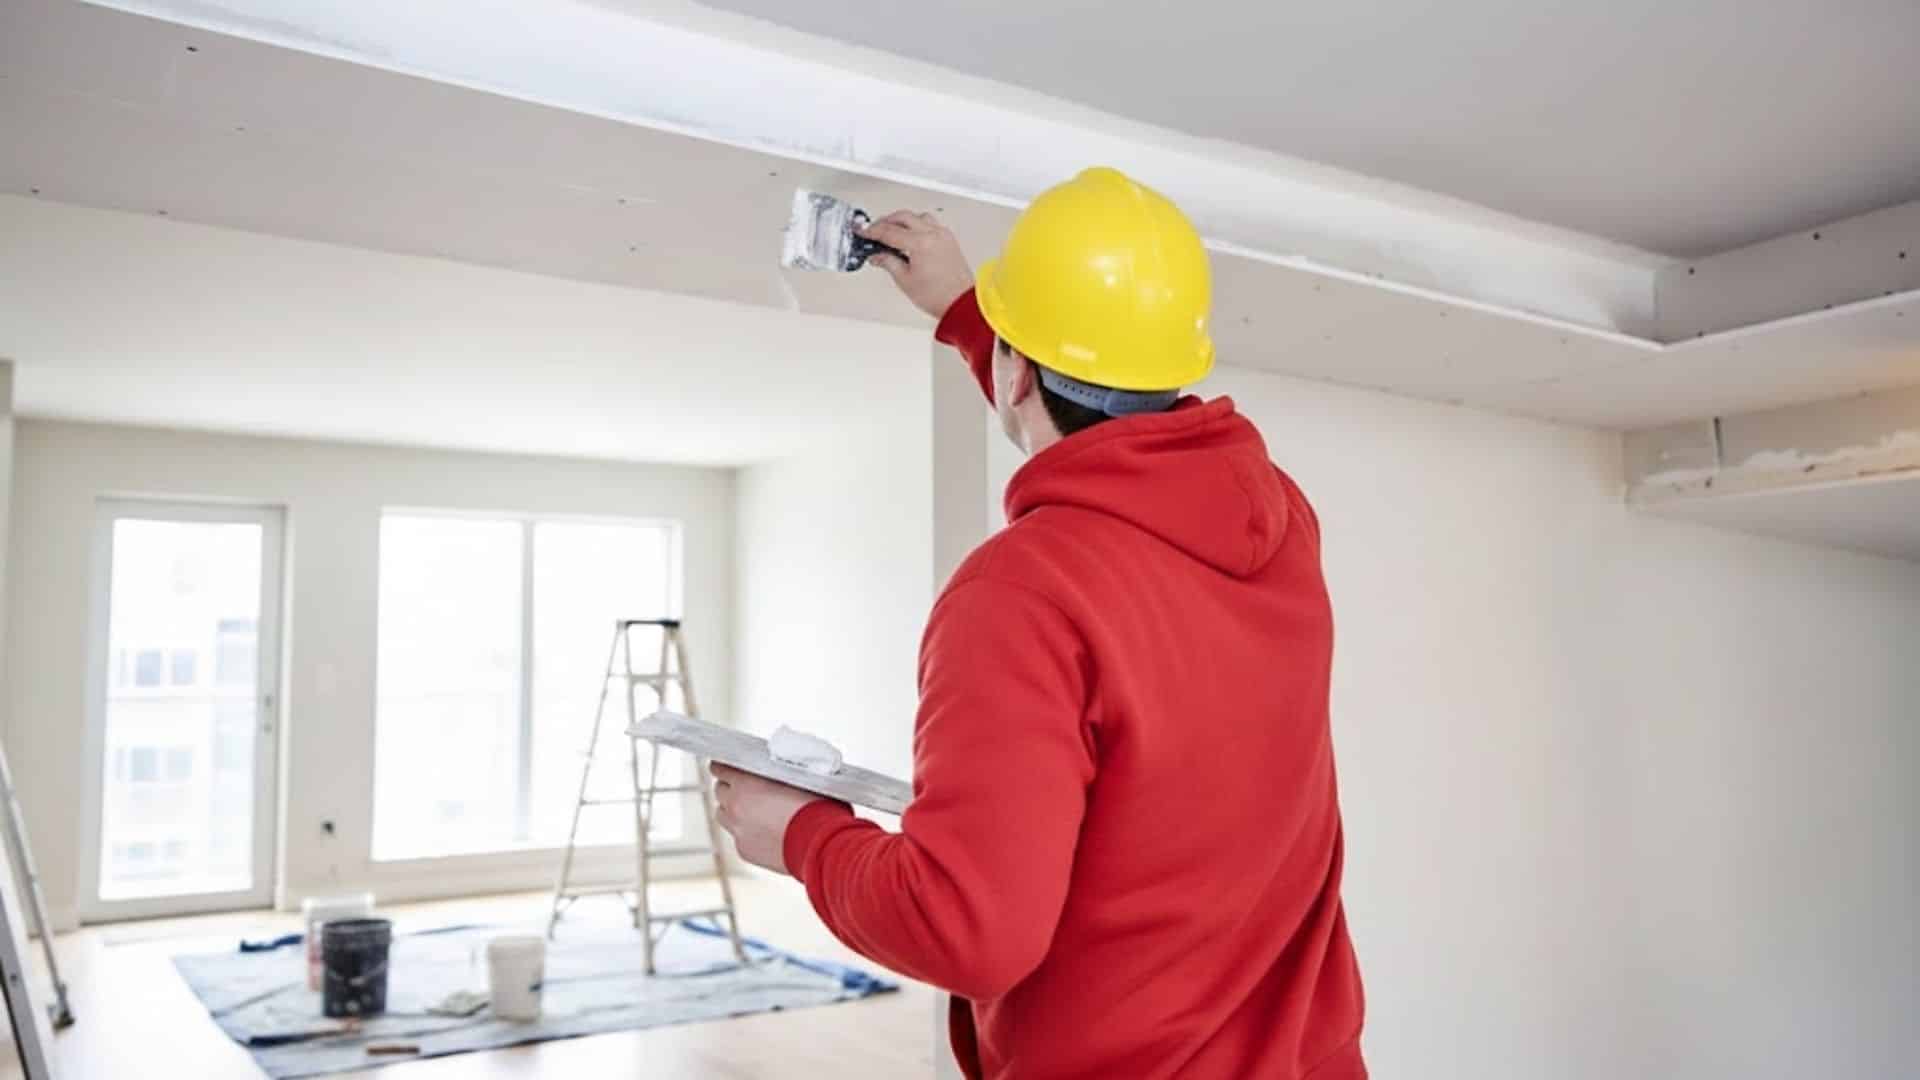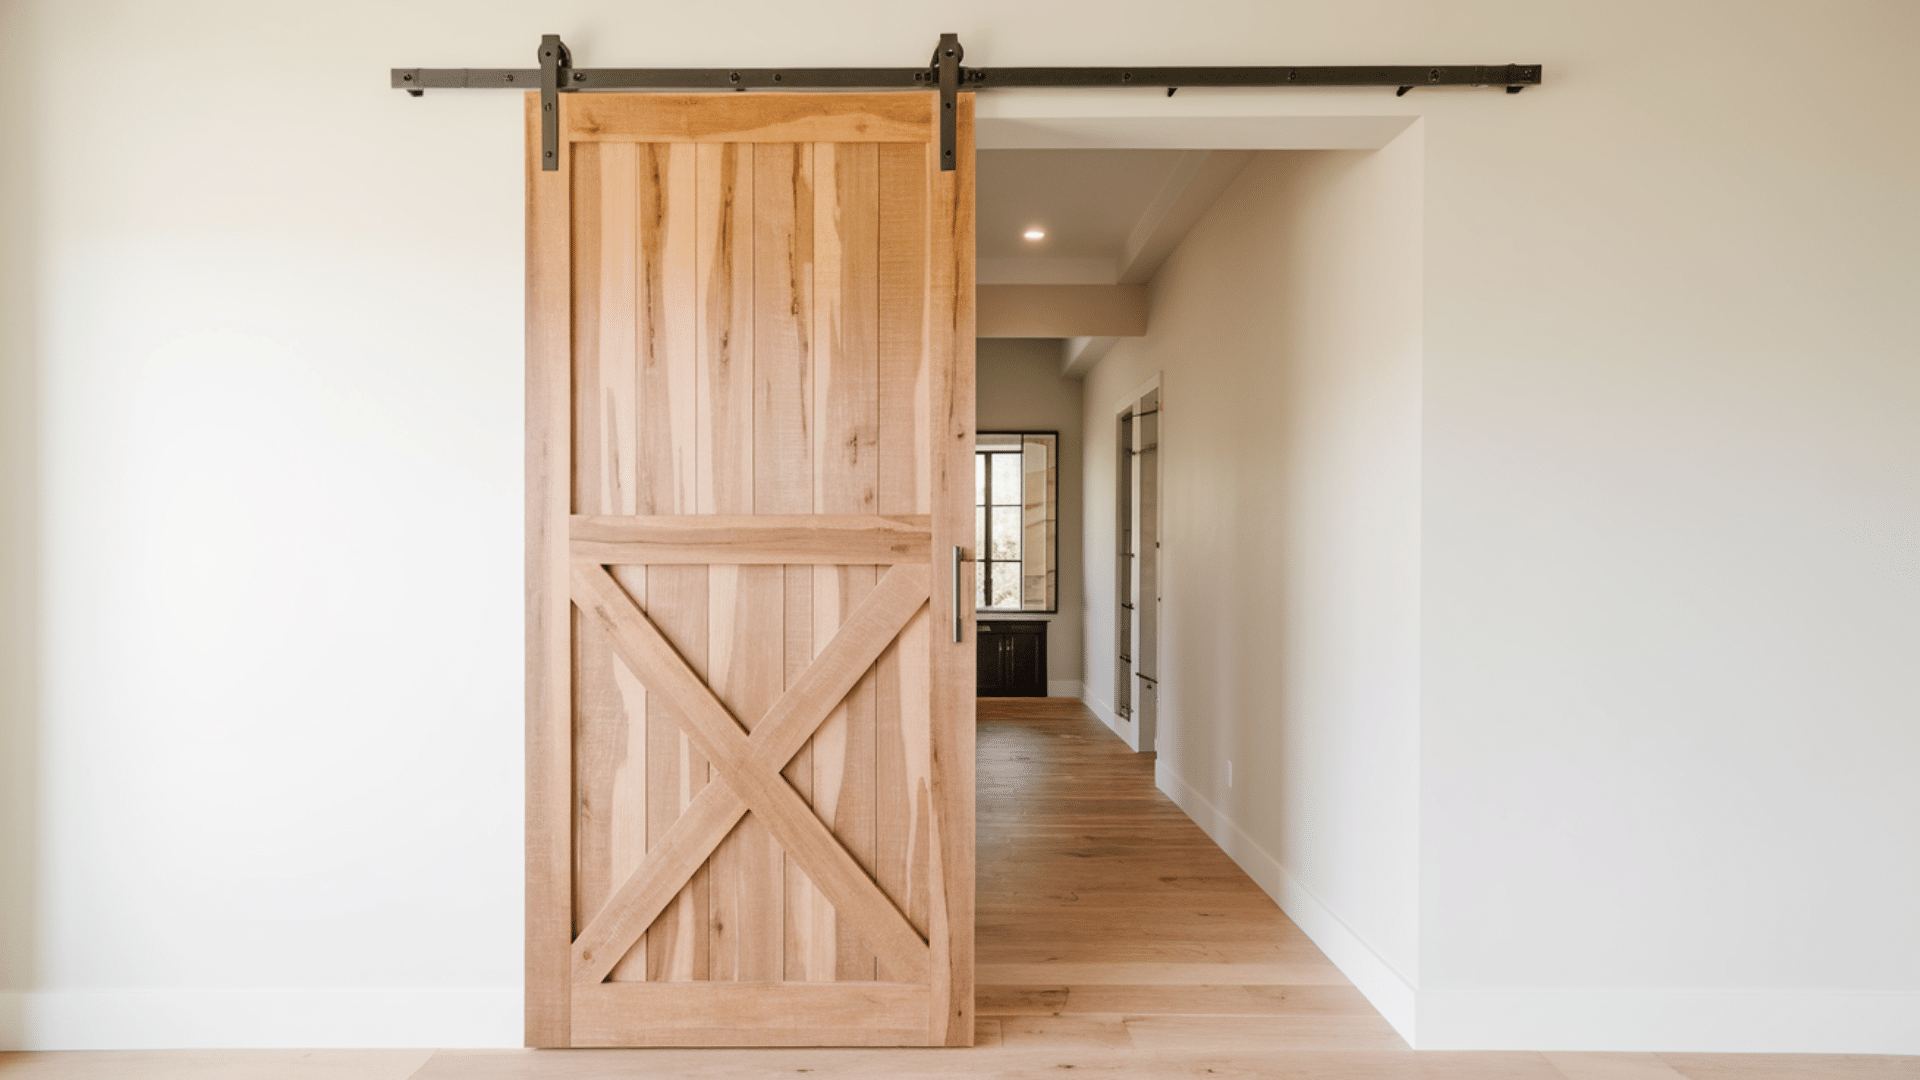
A diy barn door is a project I enjoy because it gives you a lot of control over the look and size without making things complicated.
If you want something that saves space and still feels sturdy and practical, making your own door is a great place to start. You don’t need special skills. You just need clear steps and a plan that shows you what to do next.
In this guide, I’ll walk you through the basics so you can build a door that fits your home.
You’ll learn how to measure your space, pick the right tools, and put the door together piece by piece. I’ll also show you how to install it so it slides smoothly.
By the end, you’ll have the confidence to start your own project and build a door that works well for your space.
How to Measure Your Space Before Building?
Measuring your space the right way is the first step to building a diy barn door that fits well.
Start by measuring the width and height of your doorway from edge to edge, and write down each number so nothing gets mixed up.
Your door should be wider and taller than the opening, so add a few extra inches on each side to get the right overlap. This helps the door close fully and cover the frame.
Next, look at the wall space above your doorway because the track needs enough room to sit level and move freely.
The track should be at least twice the width of your door so it can slide all the way open.
Take your time with each step, because common mistakes, like rounding numbers or skipping wall space, can cause gaps, uneven sliding, or a poor fit.
Tools and Materials You Need for a DIY Barn Door
You don’t need expensive tools to build a diy barn door. This list keeps things simple so you can gather everything before you start.
- Tape measure
- Pencil and straight edge
- Circular saw or miter saw
- Drill and drill bits
- Wood boards for the frame and panels
- Wood screws
- Wood glue
- Clamps for holding pieces in place
- Sandpaper or an electric sander
- Stain or paint
- Clear sealer or topcoat
- Sliding barn door hardware kit
- Level
- Safety gear like goggles and gloves
How to Build a DIY Barn Door?
Before getting into the building process, it helps to understand the flow of the project. These steps guide you from planning and cutting to framing, finishing, and installing your barn door.
Step 1: Measure the Opening and Plan the Door Size
Start by measuring the full width and height of the opening you want to cover. If the opening is large or connects two rooms, double barn doors may be the best option.
Each door should be wide enough to meet in the middle without leaving gaps, and tall enough to create a balanced, grand look.
Each door was made 1 meter wide and 2200 mm tall, which added height and presence to the room.
Accurate measurements are essential because they guide the cutting, framing, and installation that follow.
Step 2: Choose the Back Panel Material and Cut to Height
Select a strong base material for the door. Marine-grade plywood works well because it has a thin hardwood grain layer that looks high-end while staying affordable. T
his type of plywood also adds warmth and texture to the room. After choosing your material, use a circular saw to cut it down to the height you planned.
Plywood can splinter slightly when cut, so smooth the edges with an orbital sander to remove chips and raised fibers.
A well-prepped back panel ensures the frame and trim will sit neatly later.
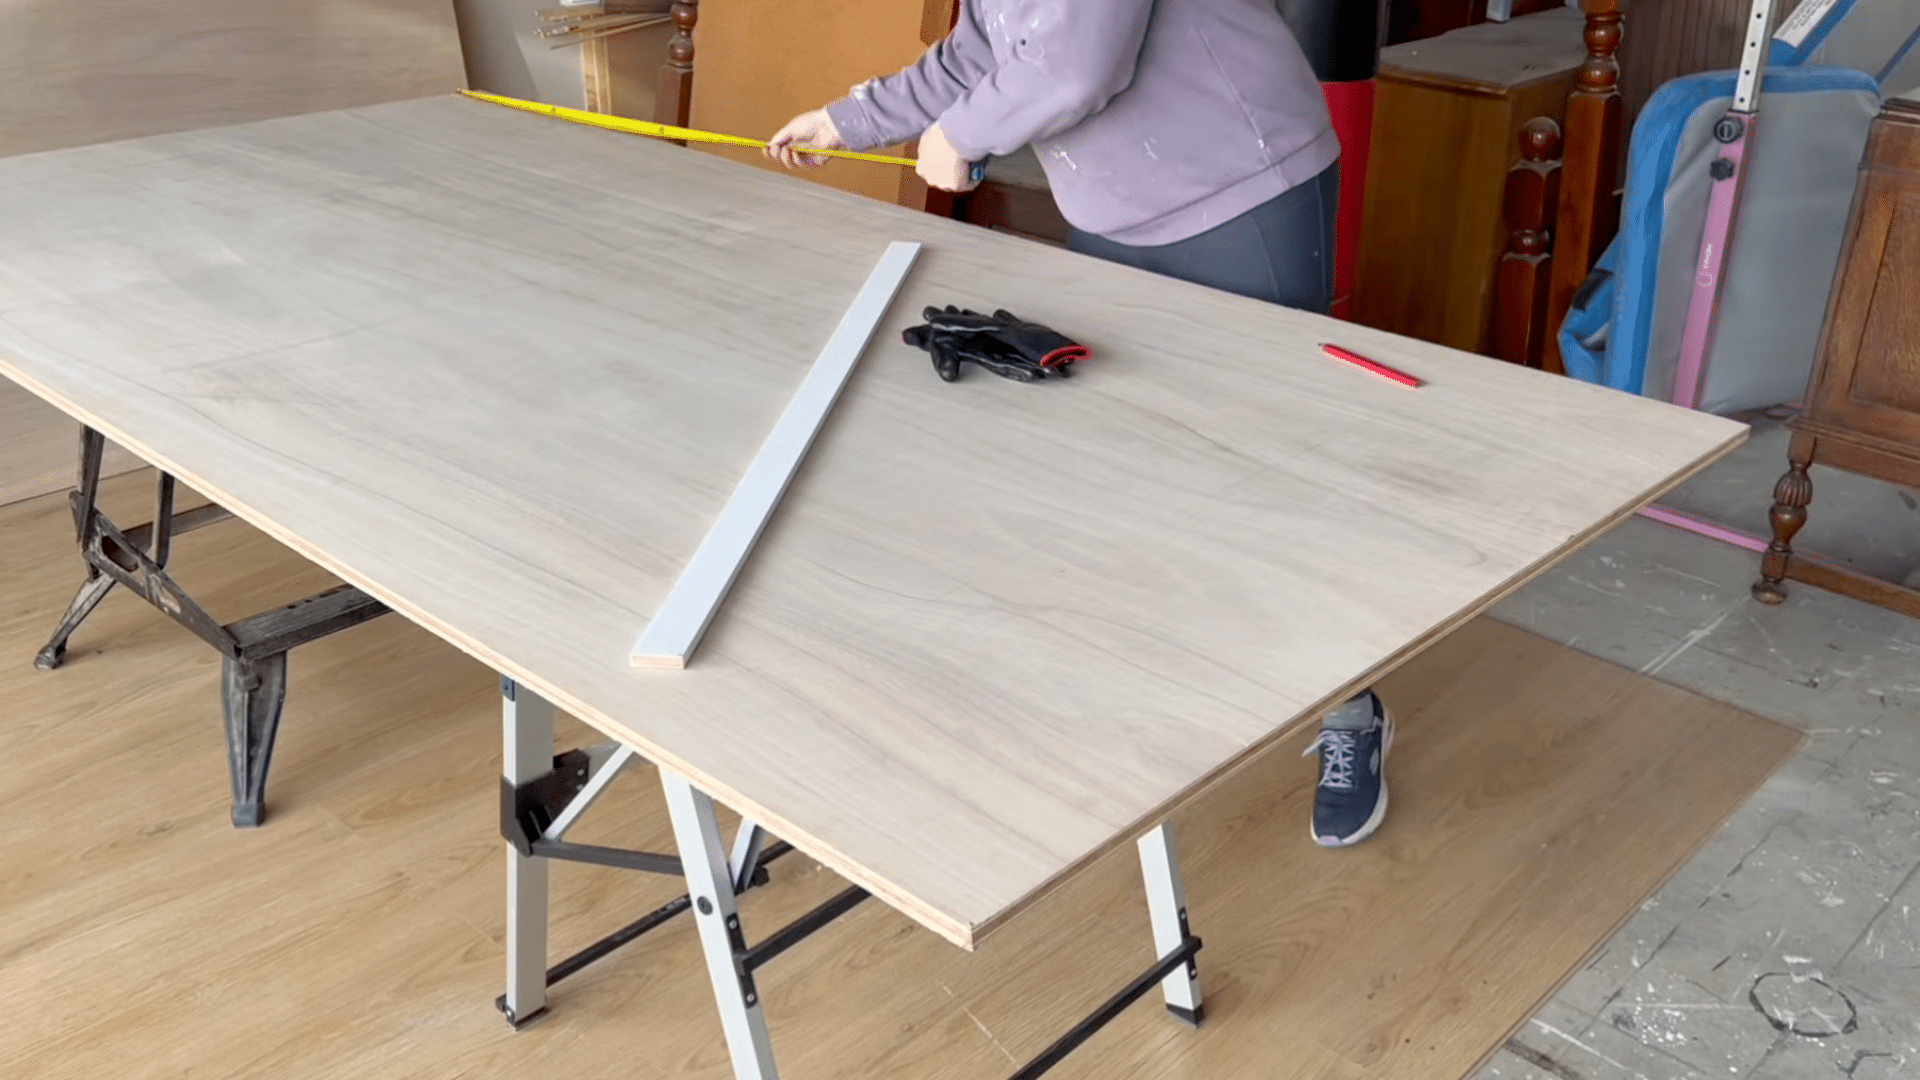
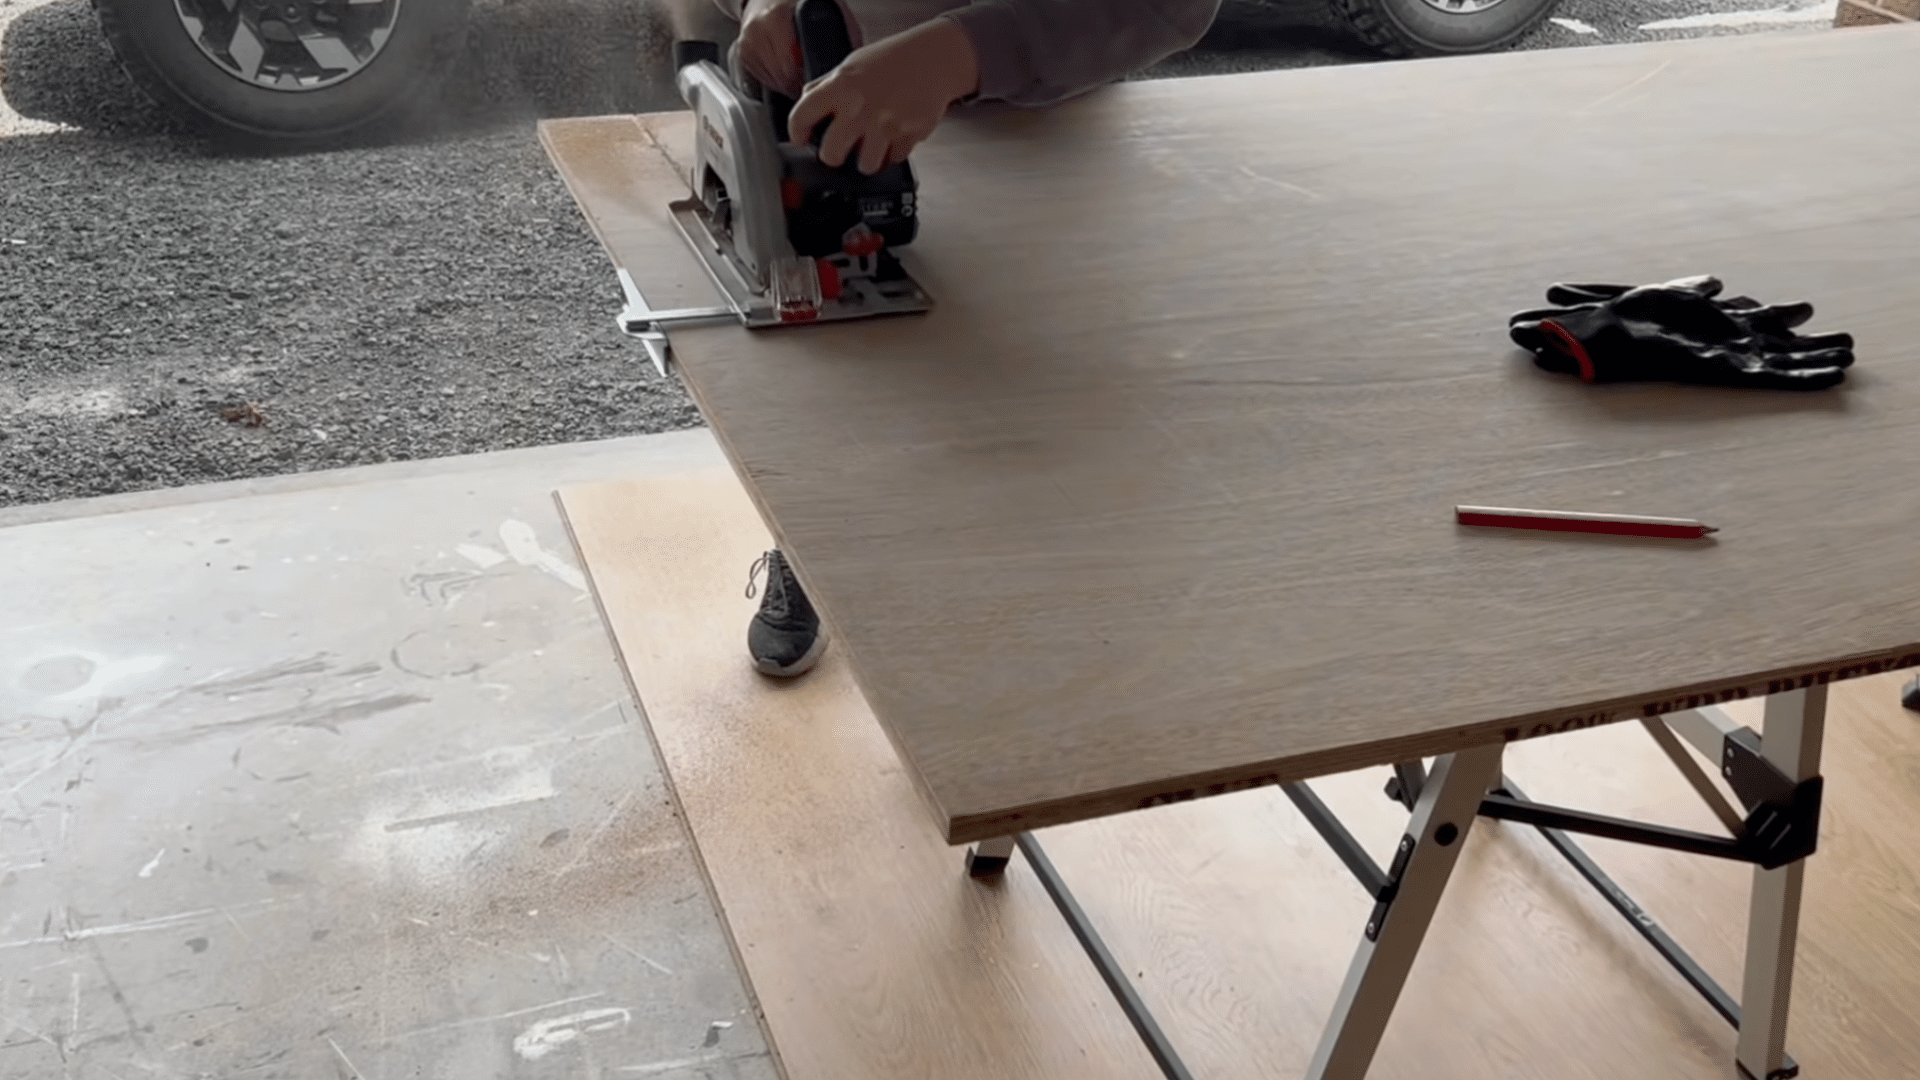
Step 3: Cut the Panels to Width Using a Straight Guide
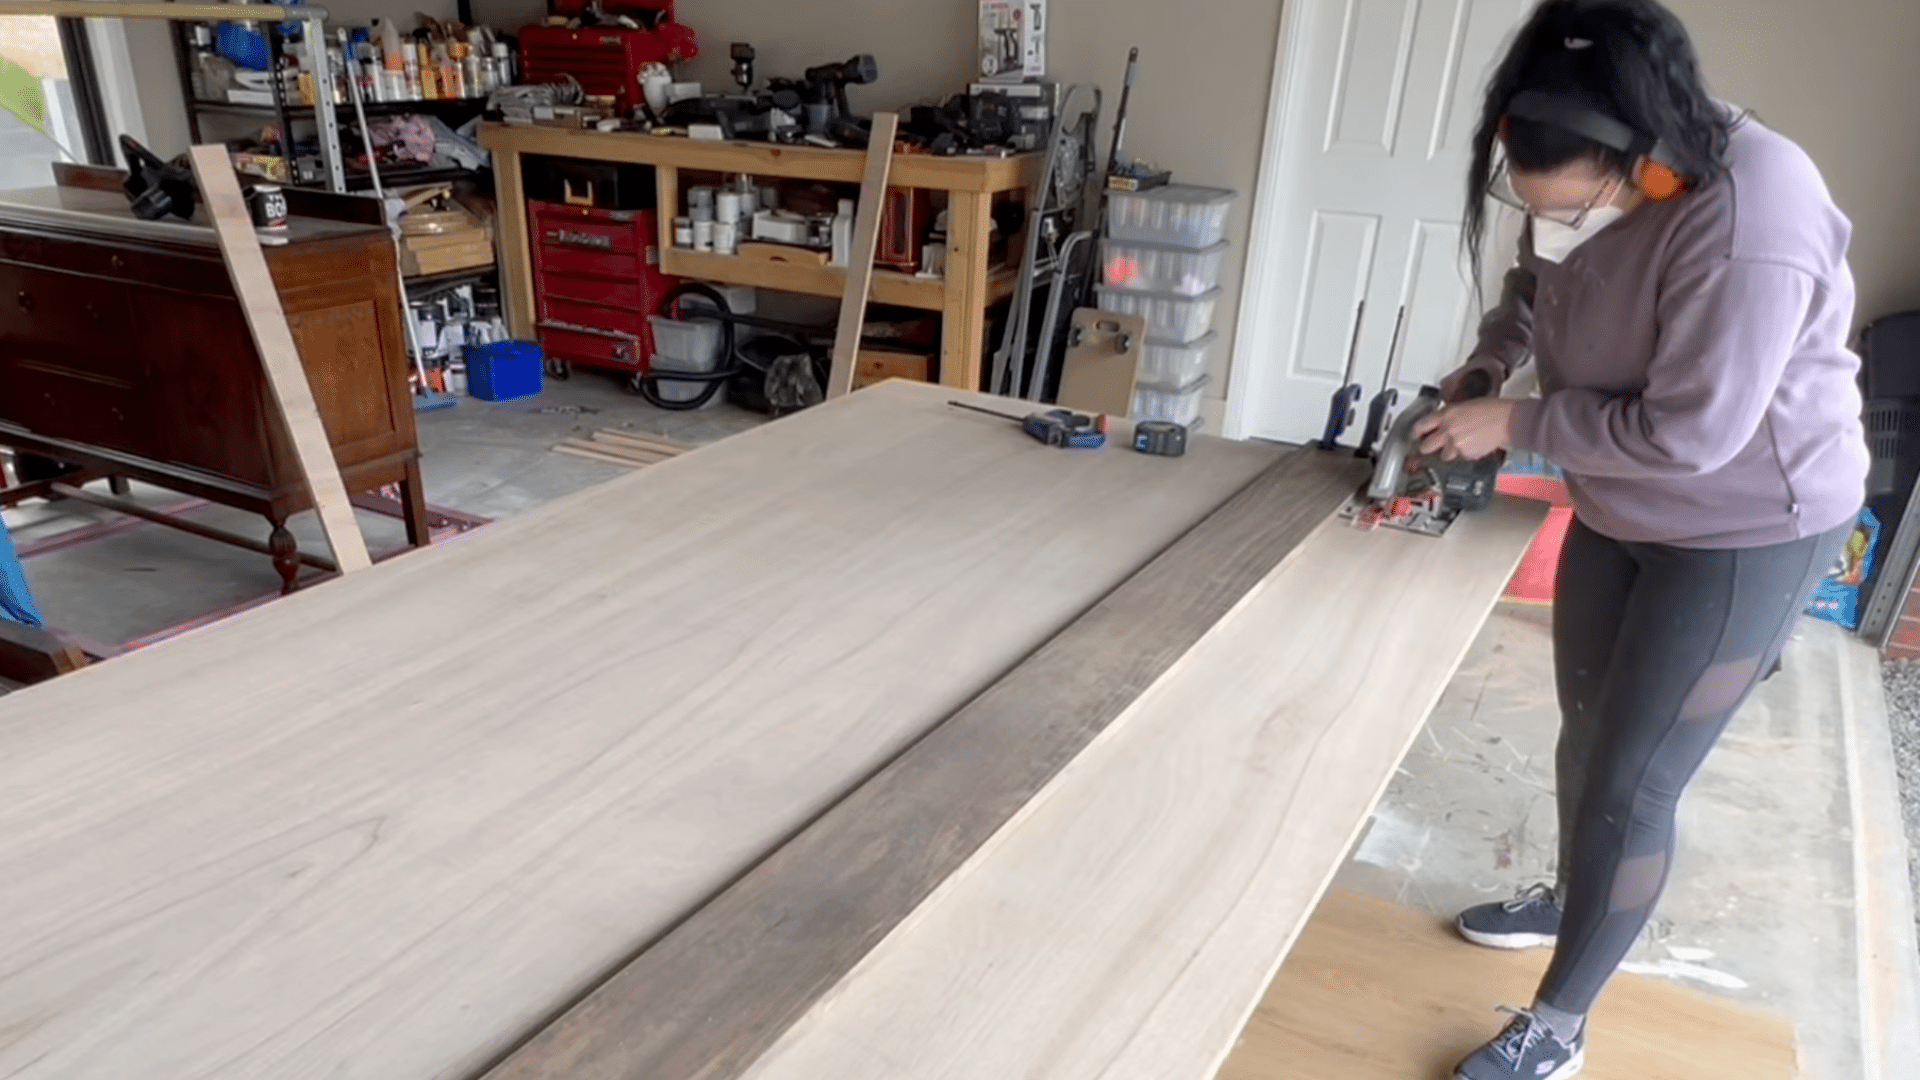
To get a perfectly straight cut across the width, measure and mark the required width several times across the panel.
Clamp a long, straight board to use as a guide for your circular saw. Remember to account for the distance from the saw’s edge to the blade, which was 33 mm.
This keeps your line accurate and avoids uneven cuts.
Once the cut is made, sand the edges again to smooth the surface. Repeat the process on the second panel so both doors match exactly in width and height.
Step 4: See Design Styles and Prepare Trim Pieces

Before attaching anything, explore different barn door designs. Common choices include X-shaped frames, paired arrows, and modern geometric layouts.
Tasmanian oak trim strips give a premium look, while pine or MDF work well as budget options.
Cut your trim pieces to the correct lengths using a drop saw and prepare any angled cuts needed for your chosen pattern.
Planning the full layout now helps avoid mistakes and keeps the final design clean and symmetrical.
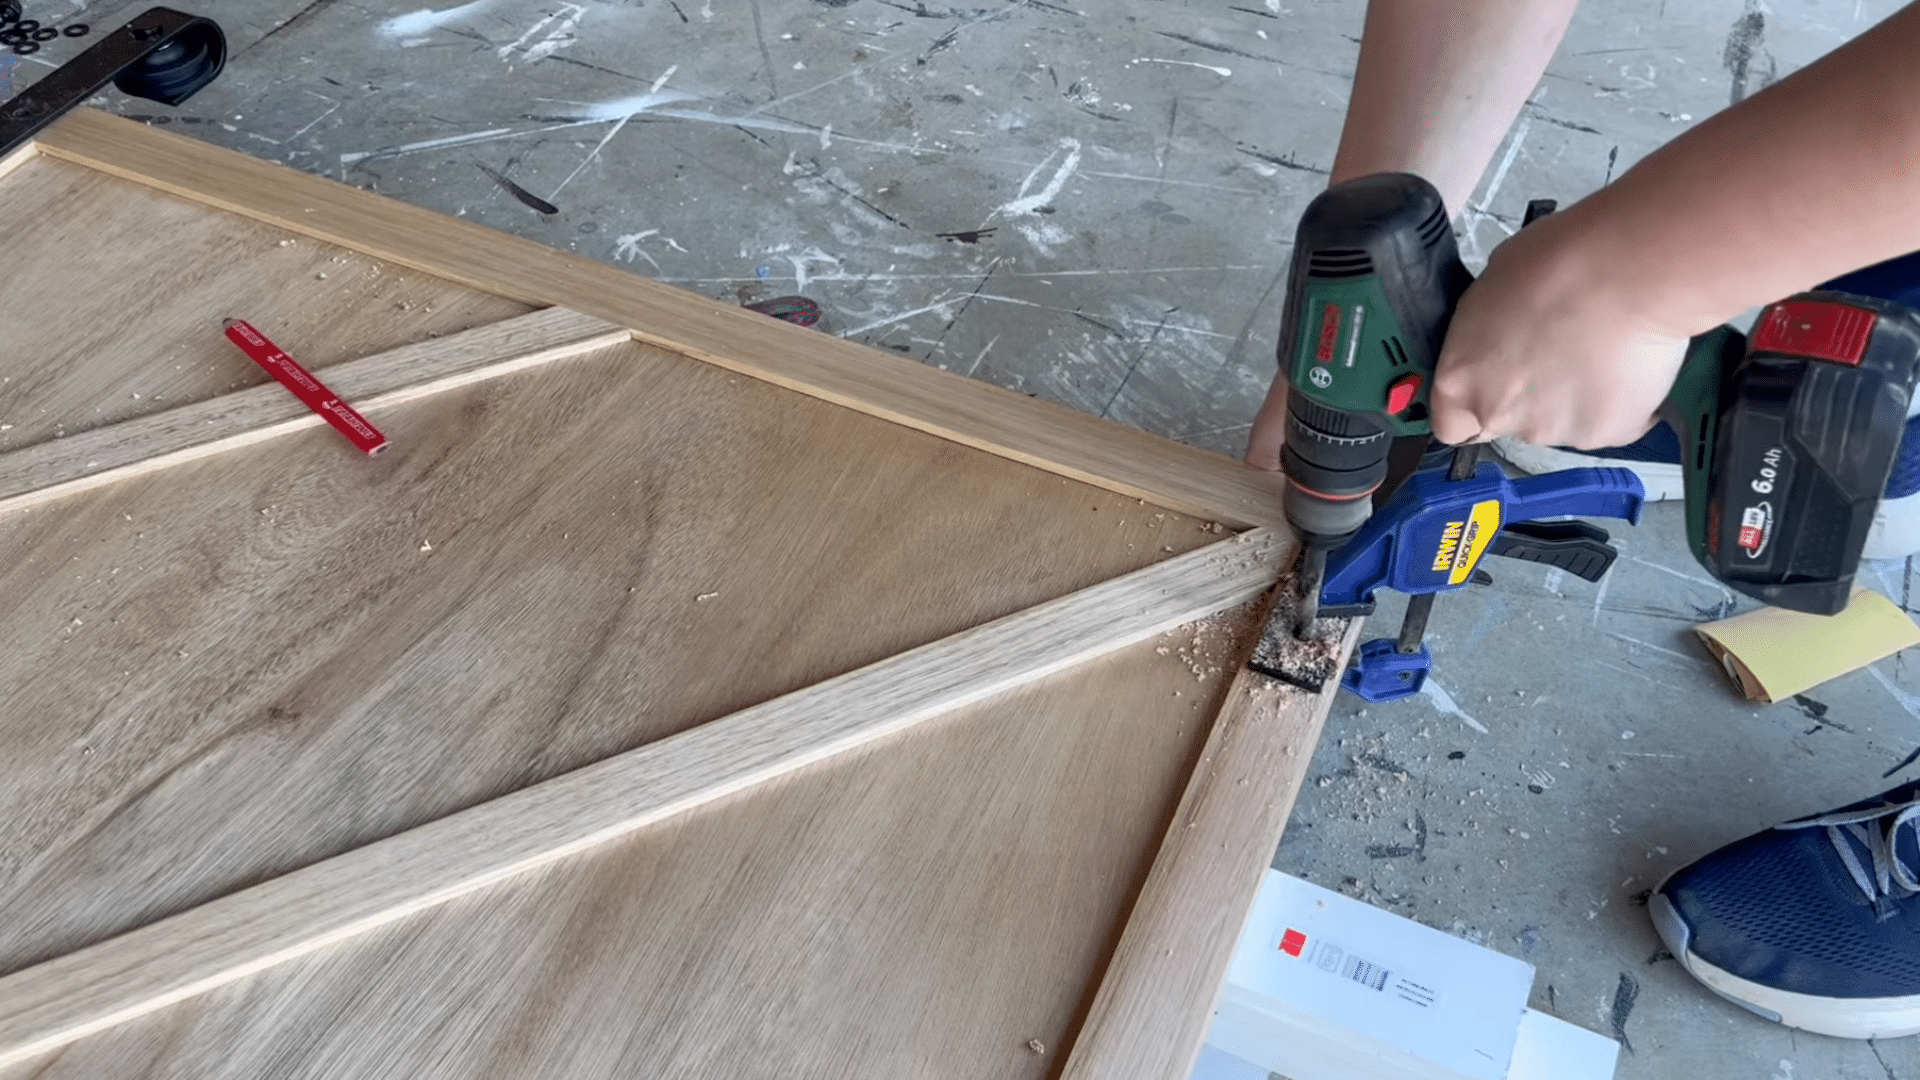
Step 5: Build the Outer Frame Around the Door Panel
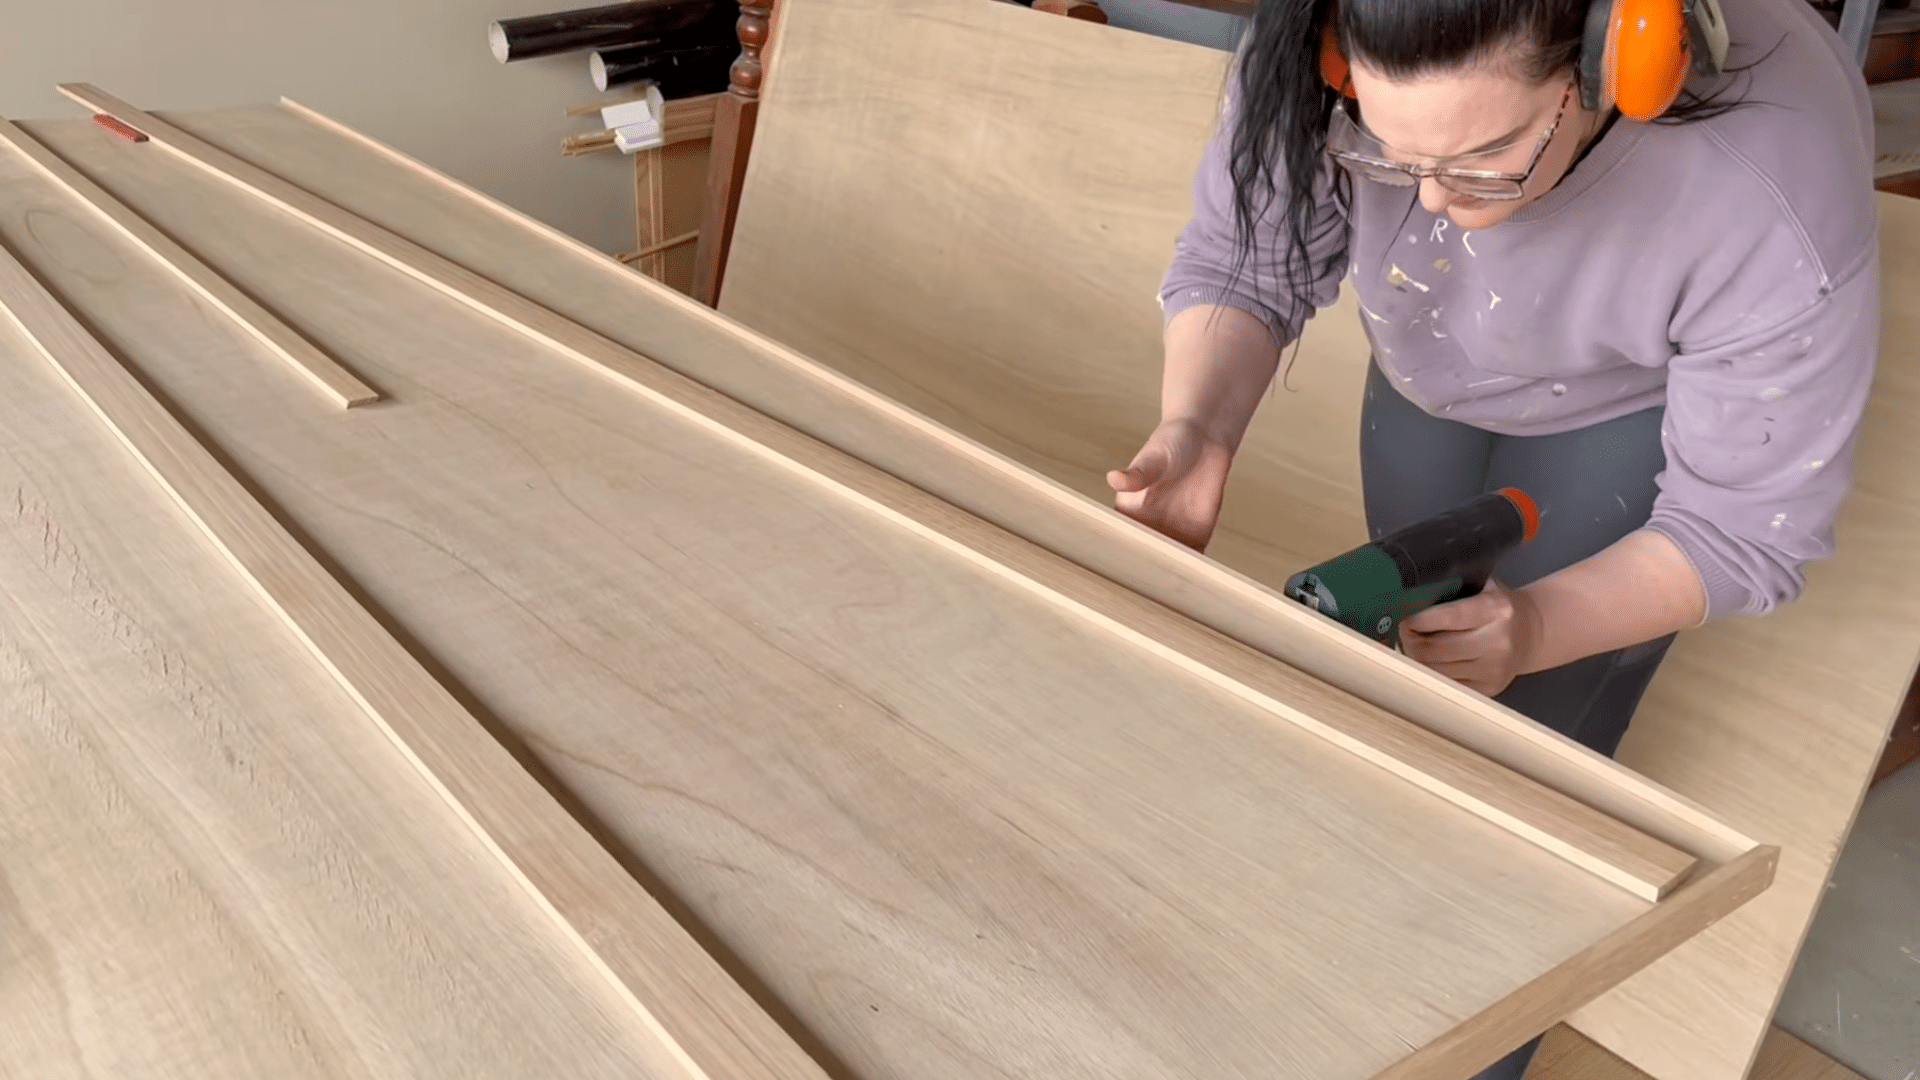
The edges of plywood aren’t always attractive, so adding an outer hardwood frame creates a clean, finished border around the entire door.
Cut each frame piece with 45° angles so they fit together neatly at the corners.
Use construction adhesive (such as Liquid Nails) along with a nail gun to secure the pieces firmly. Avoid using too many nails, as every nail hole will later need wood filler.
Once attached, sand the entire frame to make sure the edges blend smoothly with the rest of the panel.
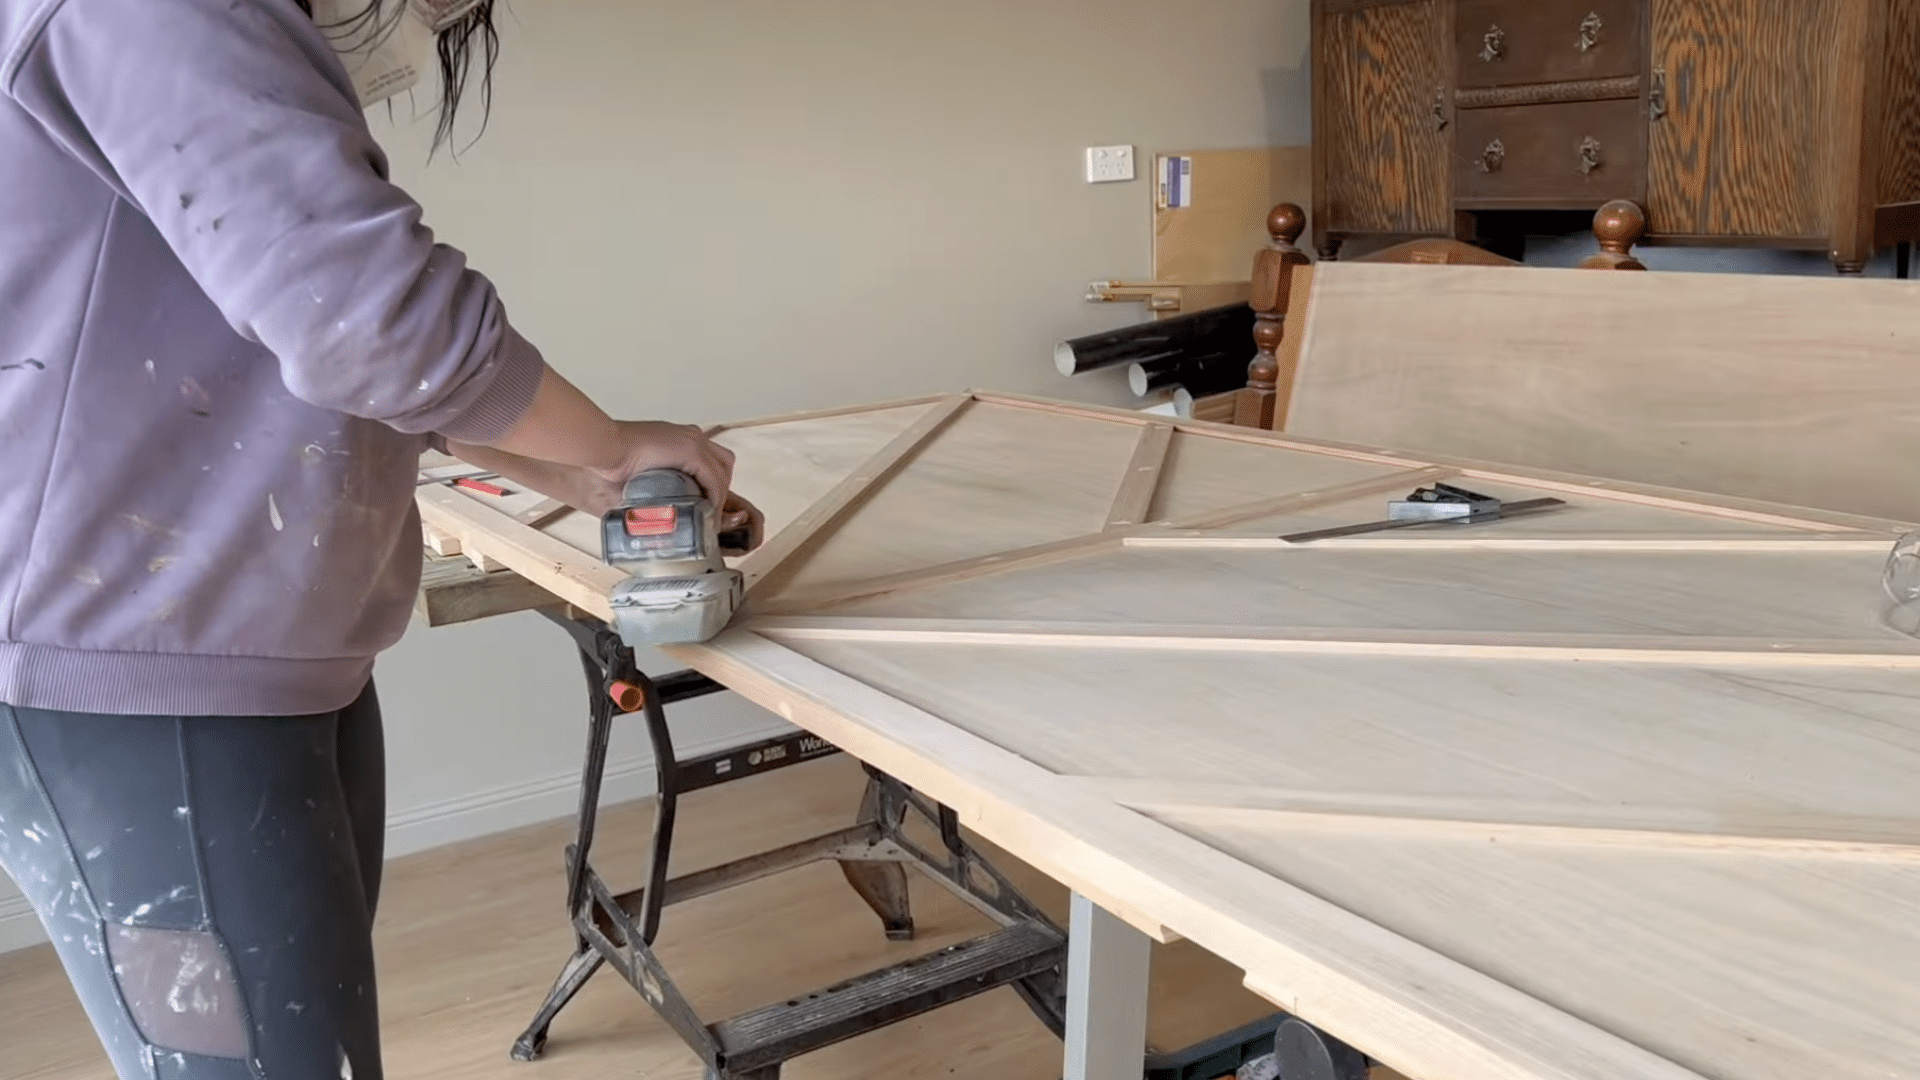
Step 6: Add the Interior Trim Pattern
After building the frame, start shaping the front design. Mark the center line of the door and add the first horizontal board.
Then place diagonal pieces from the corner to the center to create the arrow or X-pattern.
Add smaller diagonal trim pieces to finish the design. Fit each board carefully so no gaps appear between the pieces and the frame.
This layered design gives the door its custom barn-door look and turns the panel into a standout feature in the room.
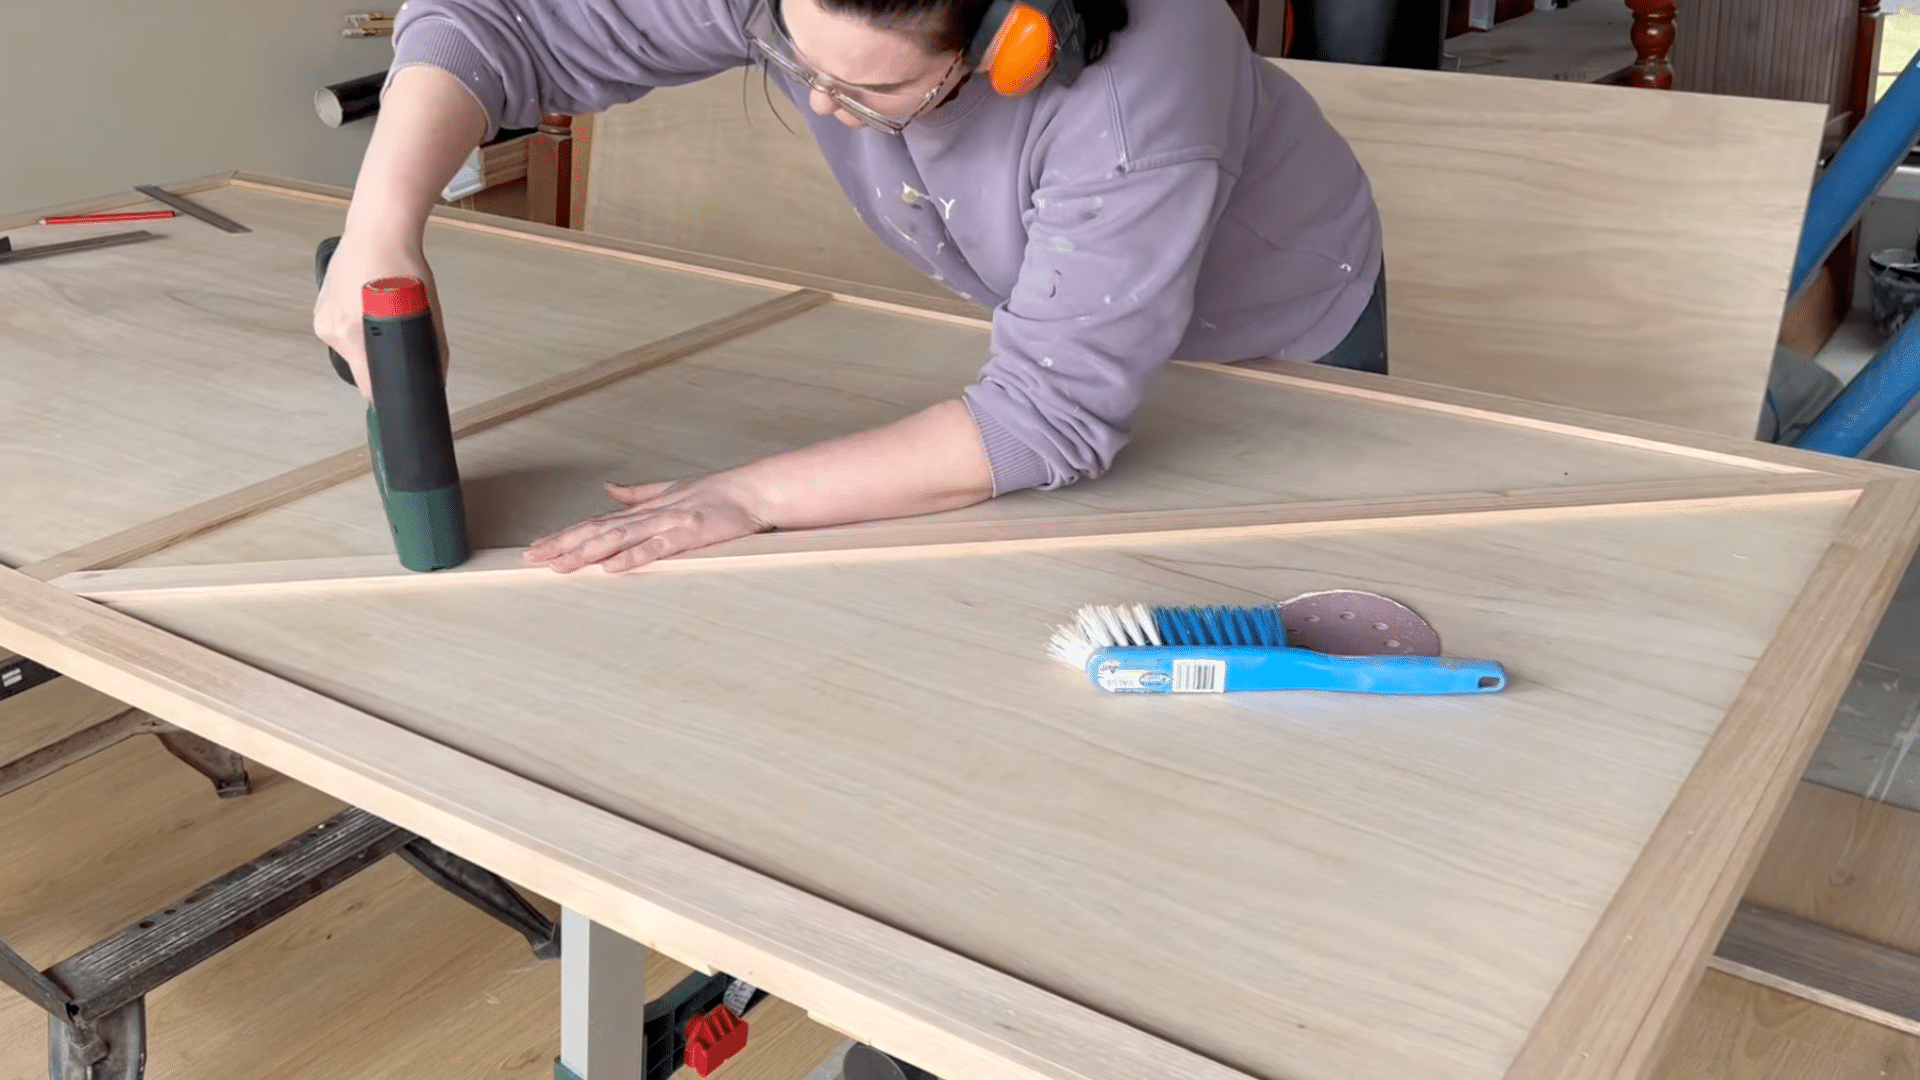
Step 7: Fill Nail Holes, Smooth the Surface, and Prep for Finishing
Use wood filler to fill all nail holes, trim joints, and any visible gaps.
Choose a filler that matches your wood color, especially if you plan to keep a natural timber finish. Once it dries, sand the entire door again, both the main panel and the detailed trim.
Smoothing every surface now prevents bumps and visible marks under the clear coat.
Finally, remove all sanding dust using a blower and a clean microfiber cloth, so the finish goes on evenly.
Step 8: Apply Clear Coats and Sand Between Each Layer
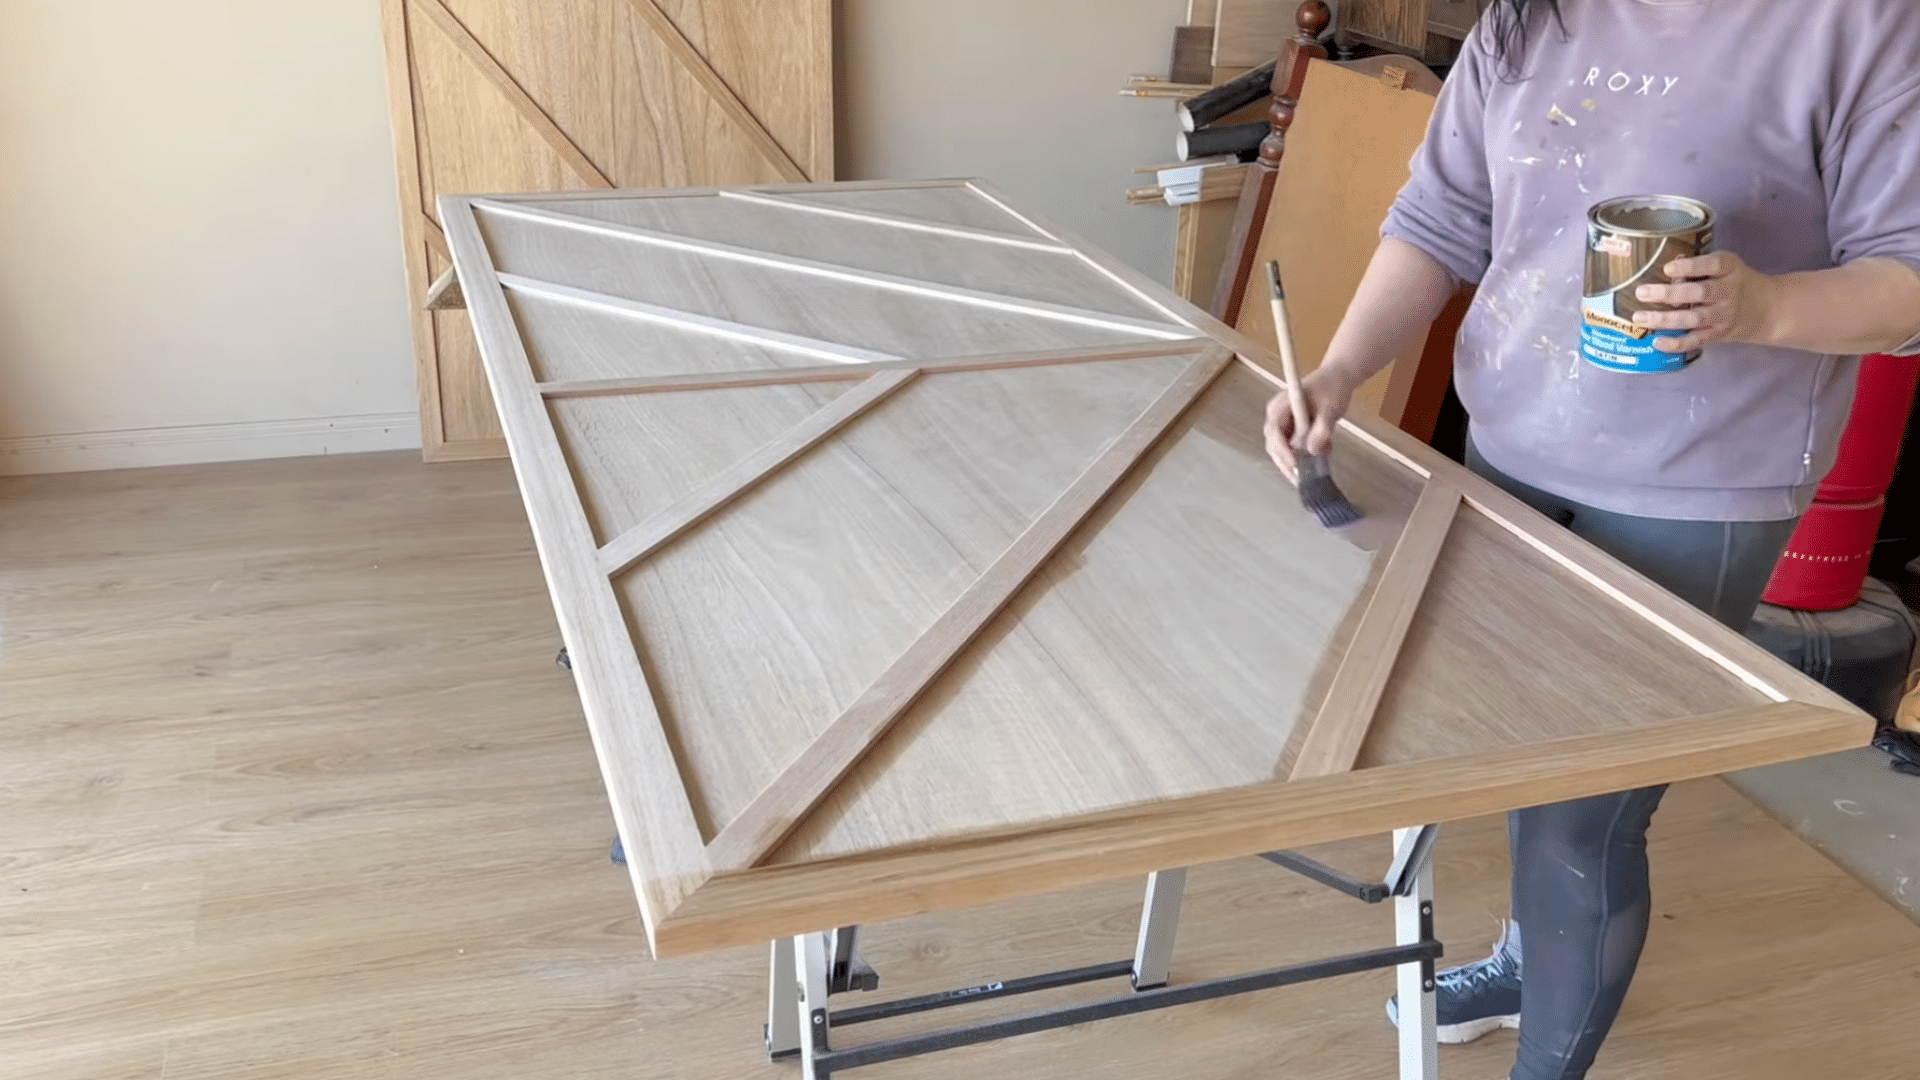
Begin by brushing on the first coat of clear polyacrylic. This first layer often raises the grain of the wood, making the surface feel rough.
Once dry, lightly sand with 400–600 grit sandpaper to smooth it out.
Then switch to spray-on polyacrylic for the remaining coats. Spraying gives a smooth finish without brush marks and builds up a strong protective layer.
A matte finish was used in the video for a soft, natural look, but satin or gloss can be used depending on your style.
Step 9: Install the Hangers, Support Board, and Sliding Track
Attach the hangers to each door by measuring carefully, drilling holes, and tightening bolts with washers. If the bolts are too long for your custom door thickness, trim them using an angle grinder.
Inside the room, install a long support board above the doorway to hold the track.
Locate wall studs (or metal studs using a magnet), drill into the correct points, and secure the board firmly.
Then install the track using the hardware kit. Correct placement ensures the doors hang level and slide smoothly without dragging.
Step 10: Hang the Doors, Add Guides, and Install Handles
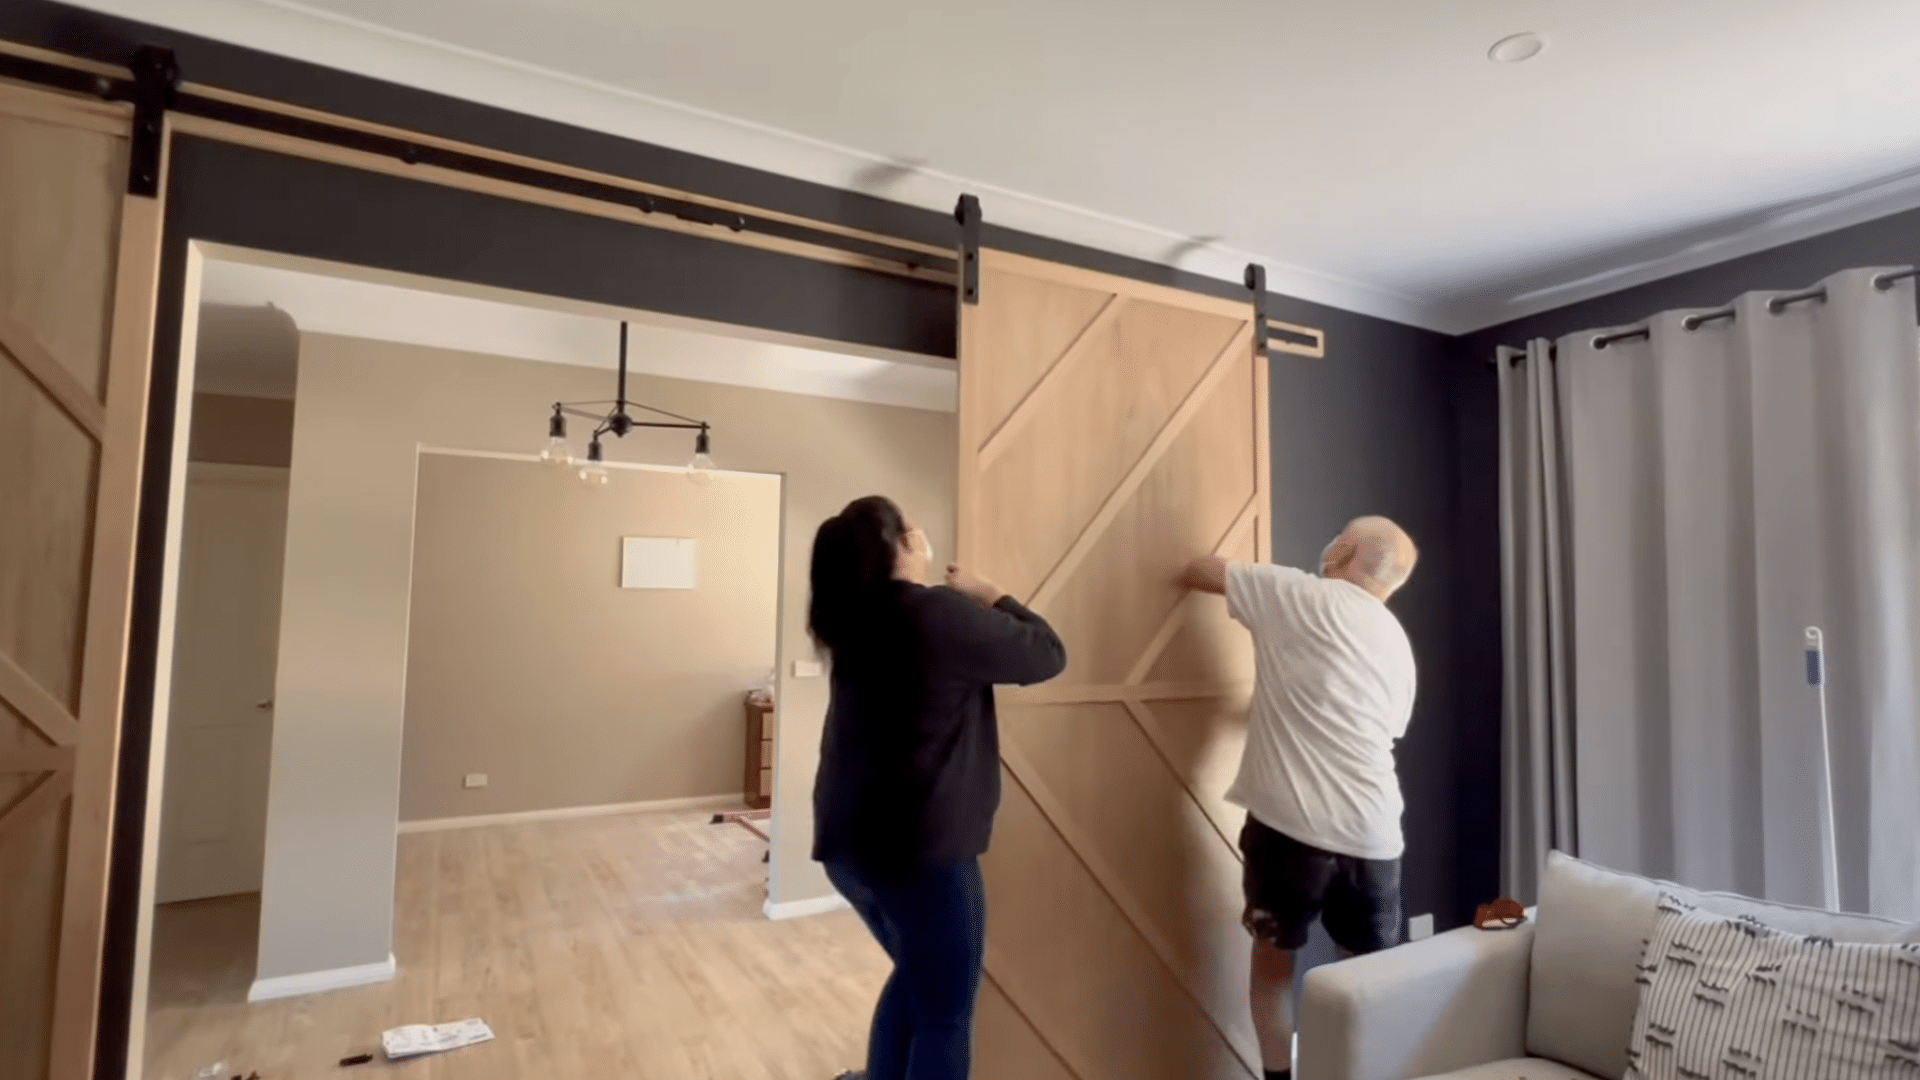
Lift each door and place the hangers onto the track. Once the doors are hung, install the floor guides to prevent the doors from swinging toward or away from the wall.
For concrete floors, drill holes and insert plugs before securing the guide.
Finally, measure and drill holes for the handles, making sure both are mounted at the same height. Tighten the screws by hand to avoid stripping the threads.
Once everything is installed, the doors become a functional and beautiful feature that transforms the space.
This tutorial is based on a helpful video by Refinish With Jade. You can check out the original video on their YouTube channel here or watch it below.
Tips to Keep Your Barn Door Strong and Long-Lasting
A diy barn door can stay in great shape with a little care. These tips help you protect the wood and keep the door sliding smoothly.
- Use a strong finish like polyurethane or a clear sealer to protect the wood from moisture.
- Seal all sides of the door, including edges, to prevent warping or cracks over time.
- Clean the door gently with a soft cloth to remove dust without harming the finish.
- Avoid harsh cleaners that can damage the wood or strip the protective coat.
- Check the hardware every few months to make sure the screws are tight and the rollers move easily.
- Add a small amount of lubricant to the track if the door starts to feel stiff or noisy.
Conclusion
Building a diy barn door becomes easier when you follow each step with patience and a clear plan.
You’ve seen how to measure your space, choose the right tools, and put the door together in a way that feels manageable, even if you’re new to projects like this.
You’ve also learned how to install the door so it slides well and how to care for it so it stays strong for years.
Now that you understand the process, you can move forward with confidence. A barn door doesn’t have to be complicated or costly.
It just requires careful measuring, simple tools, and steady work.
Use these steps as your guide, and you’ll build a door that fits your space, looks good, and feels solid every time you use it.