When I started looking into DIY small craft room ideas, I learned that even a small space can work well with a clear plan and simple steps.
You might want a place that reflects your style, or you may just need a spot to work without things piling up.
In a small room, every inch matters, so practical design and basic organization go a long way.
In this guide, I’m sharing ideas that can help you set up a room that fits the way you like to create.
I’ve also added some effective and easy tips to help you keep the space tidy, because a small craft room works best when items are easy to find and put away.
Things to Think About Before Setting up Your Craft Room
When you start planning your diy small craft room ideas, it helps to look at how you work and what you use most.
A small room can support many projects when you think through the basics first. Start by noticing the tools you reach for every day.
Keep these close to your main desk so you can work without stopping. Then look at the crafts you do most, because each one needs a different setup.
This is where small craft room design layouts come in, since they help you place things in a way that fits your habits.
When you know what you use, how you work, and where things fit, the whole room starts to make sense and supports every project you take on.
DIY Small Craft Room Ideas to Make the Most of Limited Space
Small craft room design layouts can help you use space in a simple and practical way. These ideas keep the room easy to work in and help you avoid clutter.
1. Use Vertical Wall Space
Shelves, hooks, and rails help you store more without using the floor, which matters in a small room.
Tall shelves can hold boxes, jars, and baskets so you can see everything at a glance and avoid digging through piles. Hooks are helpful for scissors, mats, rulers, and tools you reach for often.
When most of your storage is on the wall, your desk stays open for projects, and the room feels less crowded.
It also makes cleanup quicker because everything has a clear place to return to.
2. Create Zones for Different Tasks
Creating small task zones helps you stay focused and avoid moving clutter from one side of the room to the other.
Even in a tiny space, you can set up small areas for cutting, painting, or sewing with simple trays and baskets. Grouping tools by task keeps things from mixing, which saves time when switching projects.
Trays make it easy to move supplies around without creating a mess.
When every zone has a purpose, the whole room feels steady, easier to manage, and much simpler to clean at the end of the day.
3. Fit a Fold-Down Desk
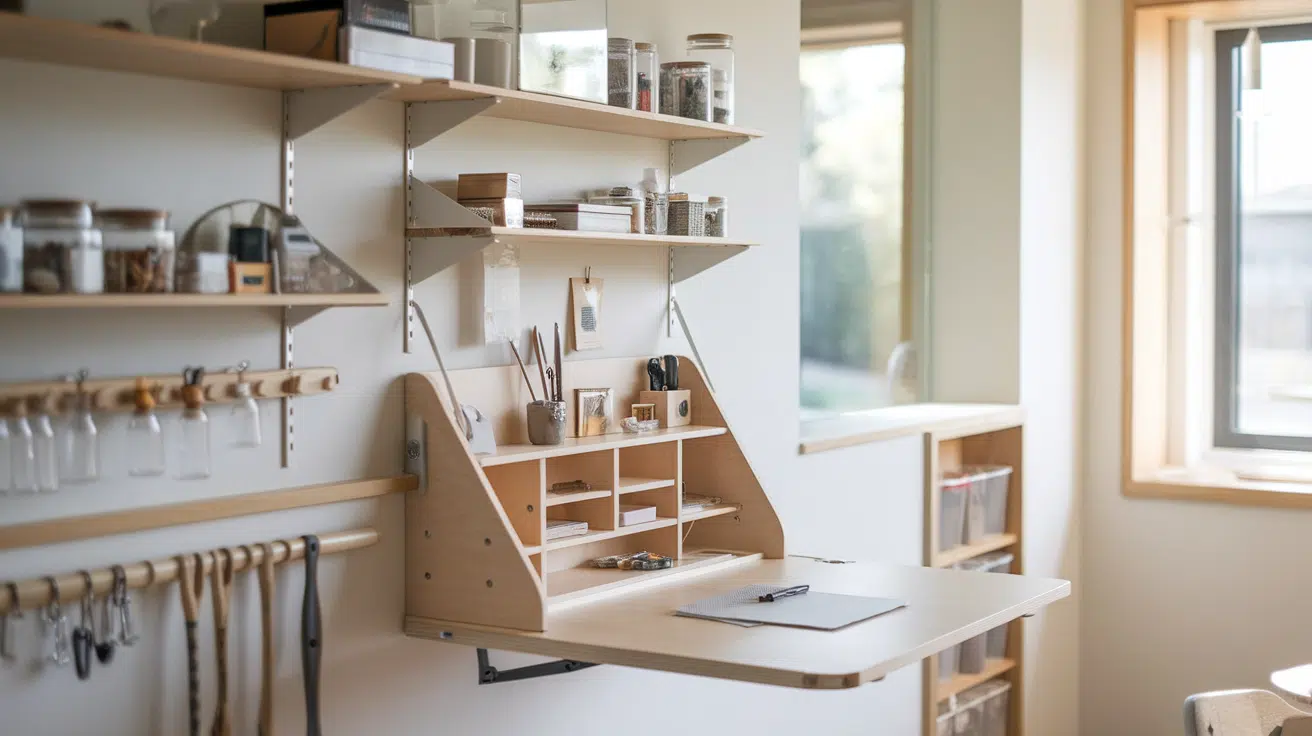
A fold-down desk gives you workspace when you need it and floor space when you don’t, which is helpful in narrow rooms.
Mount it on the wall so it opens out wide for crafting and folds flat when you’re finished. You can add a slim shelf or rail above it for storing your daily tools within reach.
This setup works well in older homes or apartments where every inch matters.
When the desk folds away, the room instantly feels open, calm, and ready for a new project without dragging out more furniture.
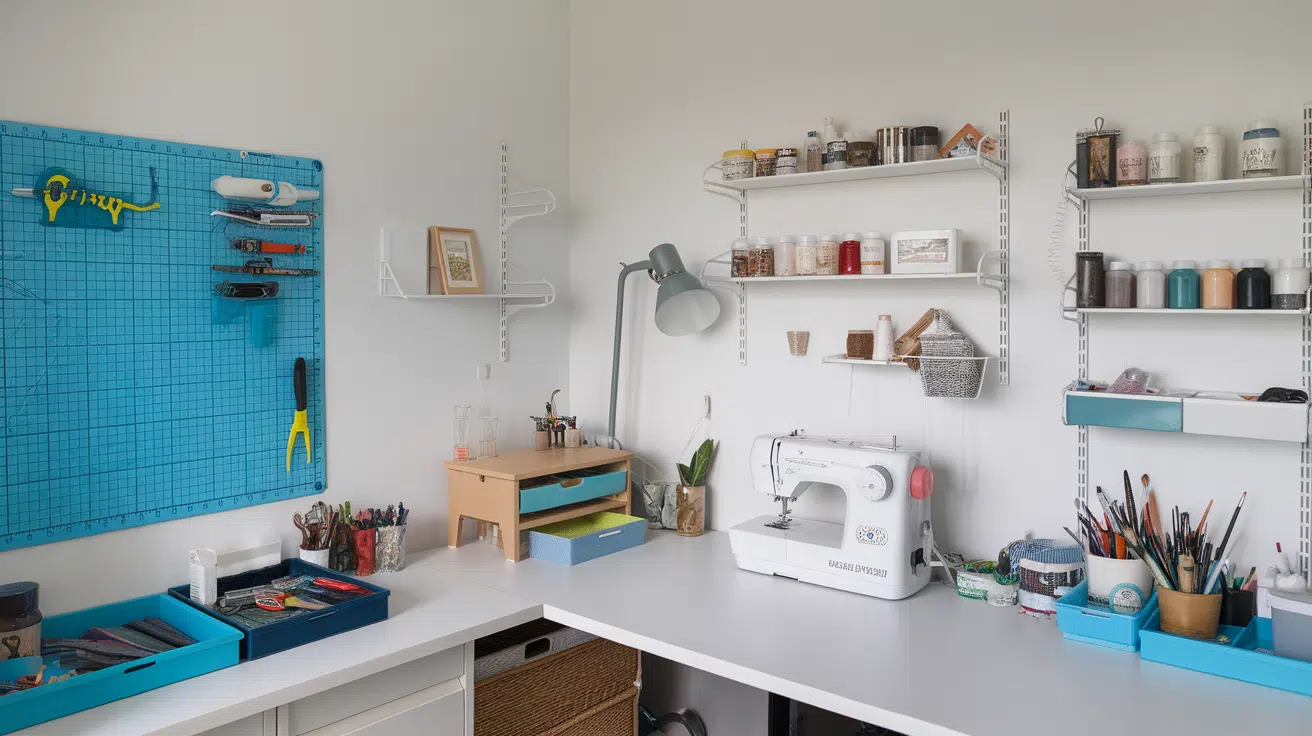
4. Try a Pegboard Storage Wall
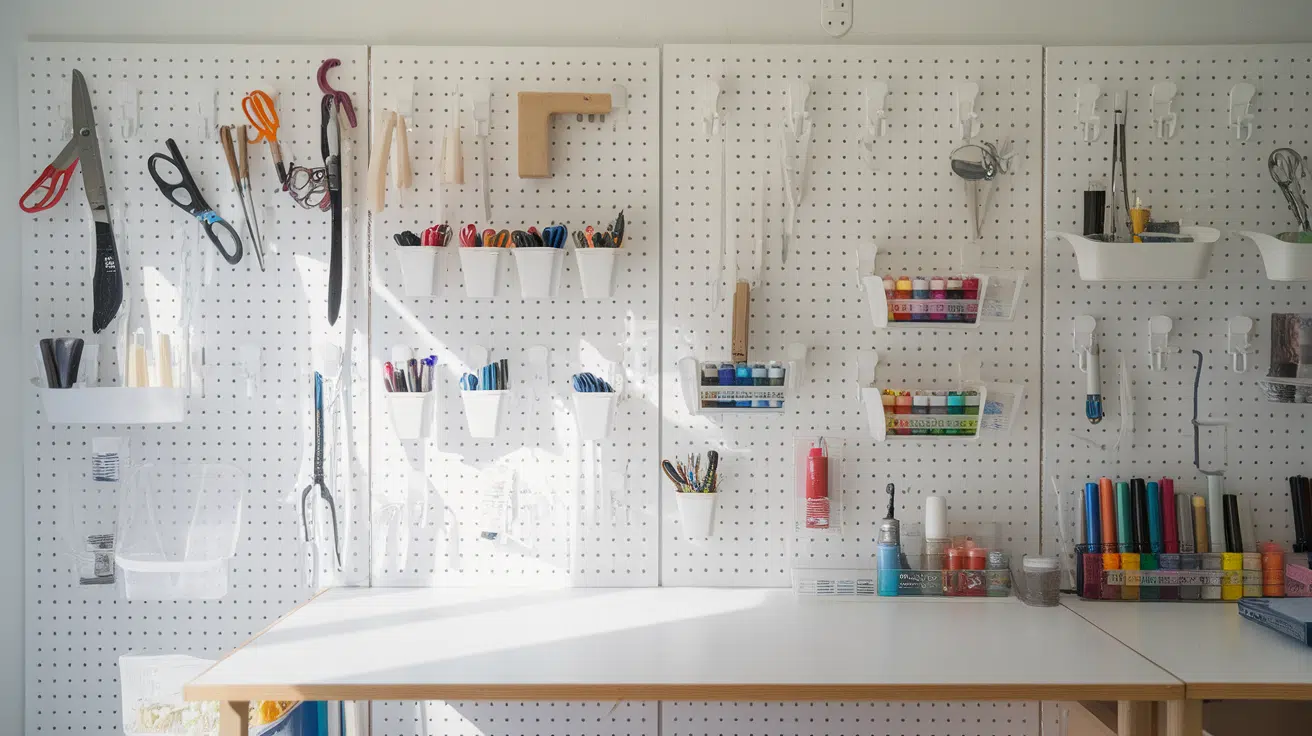
A pegboard keeps your tools in sight and out of crowded drawers, which helps you work faster and stay organized.
You can add hooks, cups, small shelves, and baskets to fit all kinds of supplies, from scissors to paint bottles. Rearranging the layout is simple, so you can adjust it as your craft needs change.
I like how clean it looks, even when fully loaded, because everything hangs in neat lines.
A pegboard also clears space on your desk, reduces clutter, and saves you from searching through bins every time you start a project.
5. Add Clear Bins and Labels
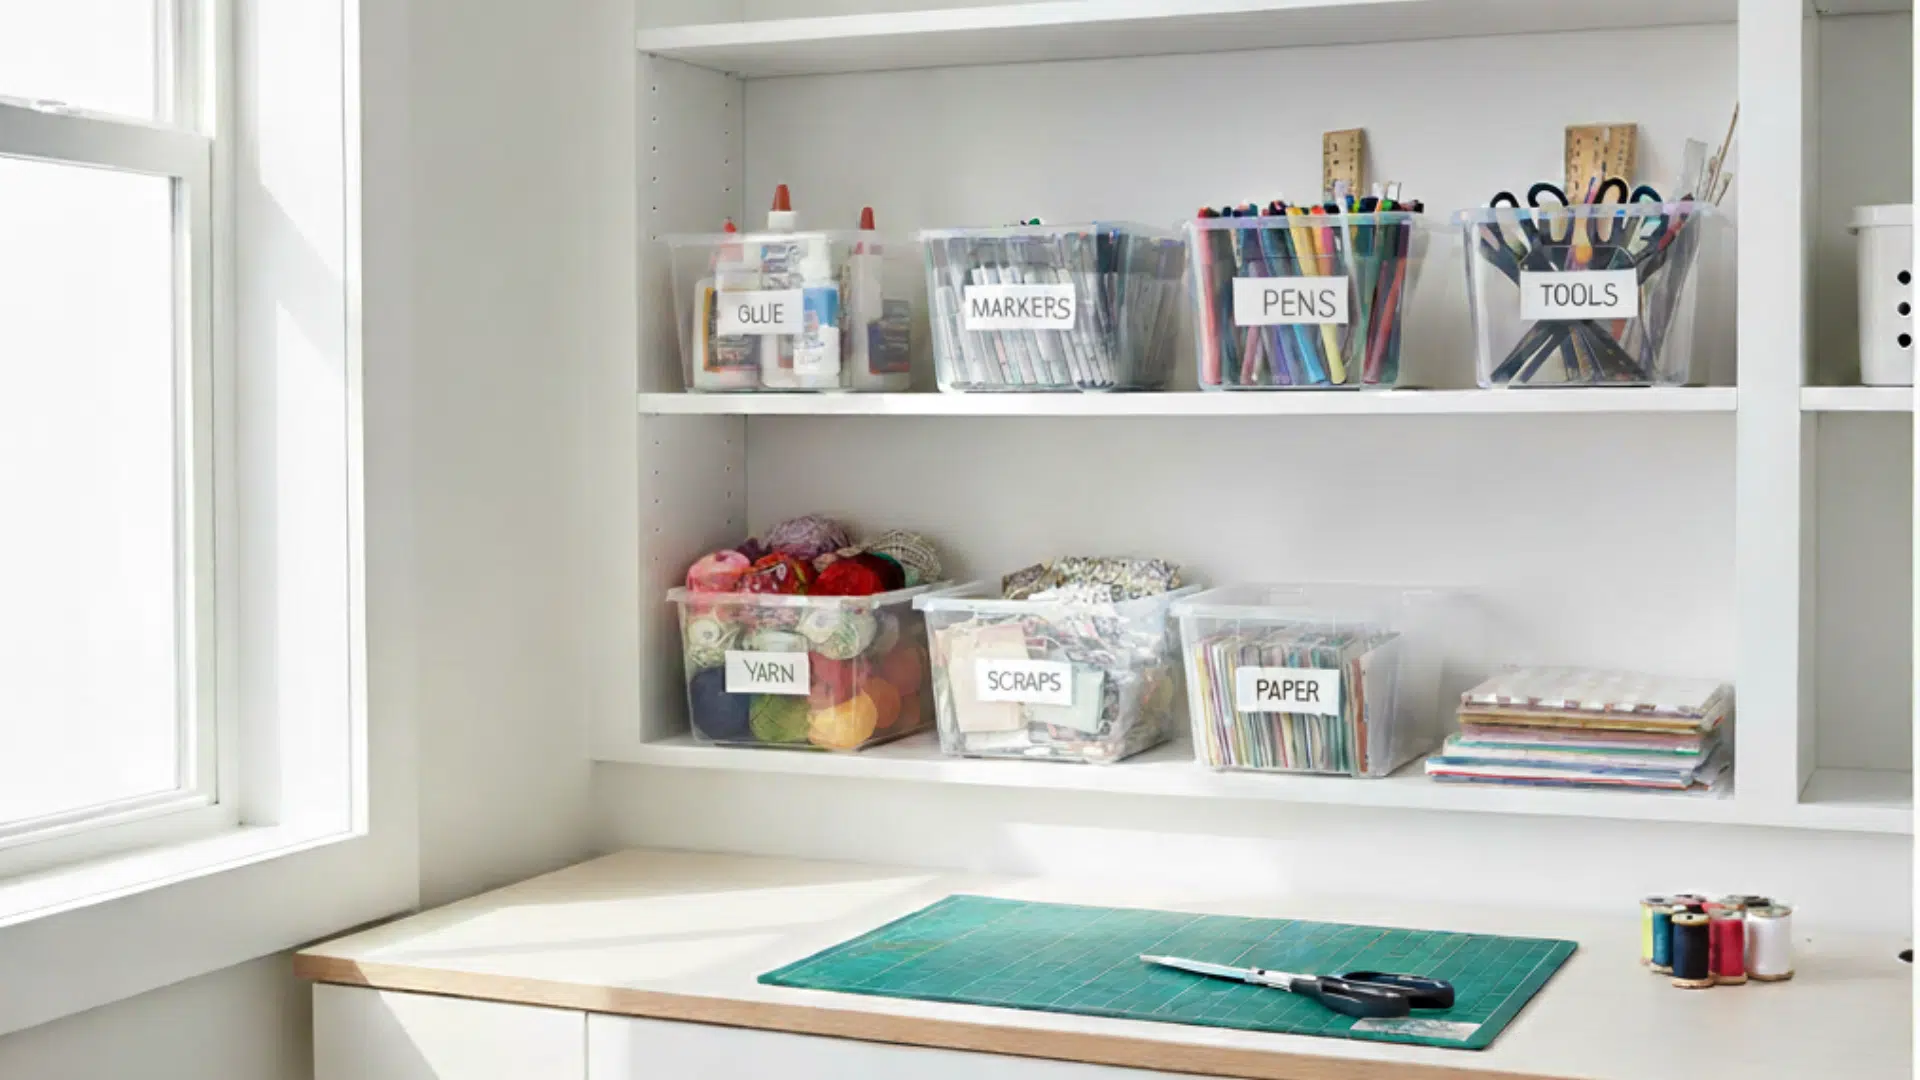
Clear bins make it easy to find what you need without opening every container or digging through stacked boxes. Labels make the system even better by giving every item a set home.
Use small bins for markers, thread, glue, and tape, and larger ones for fabric, paper, or bulky tools.
Stacking bins helps you use your shelves more effectively and keeps things from sliding around.
When everything has a visible spot to return to, the room stays cleaner, and cleanup after a craft session becomes quick and simple.
6. Use Rolling Carts
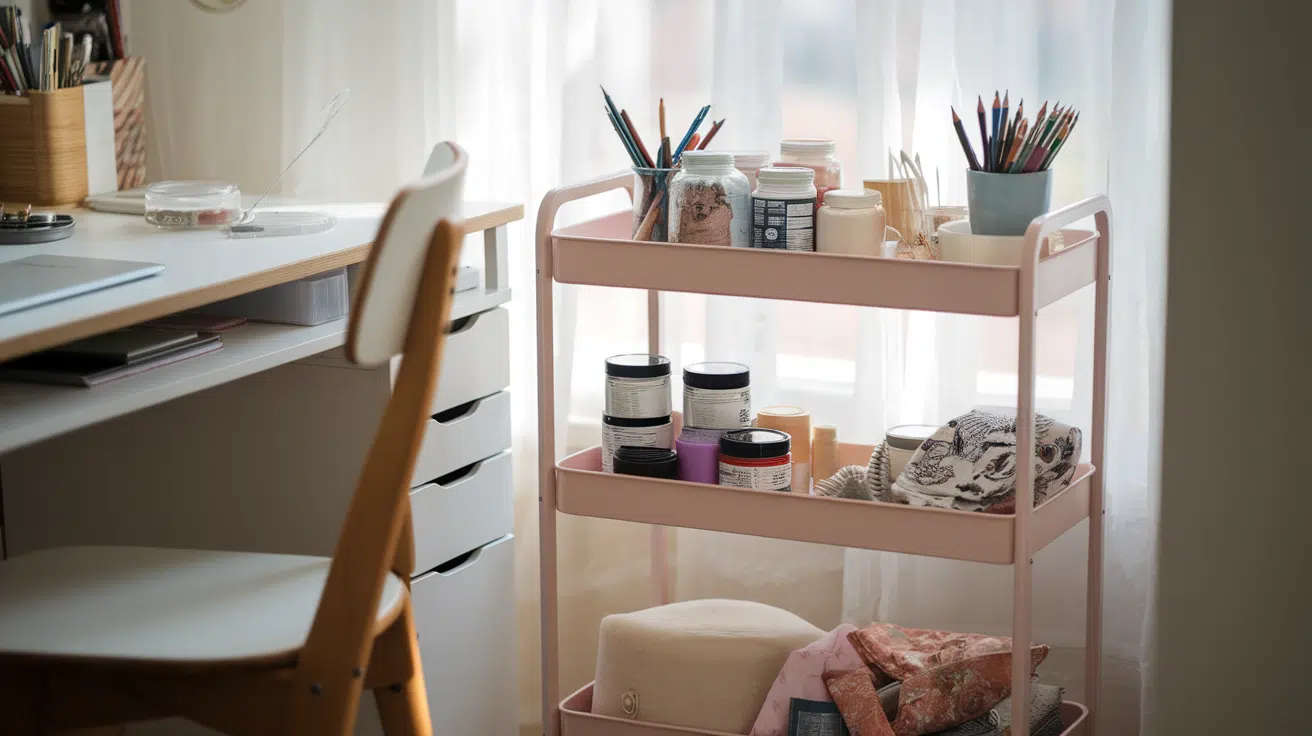
Rolling carts work well in small craft rooms because they move with you and tuck away when you’re done.
You can load them with your most-used supplies so everything stays together instead of spreading across the desk. While working, pull the cart beside you to keep tools within reach.
When you’re finished, roll it into a corner or closet to clear the floor. This keeps clutter off every surface and makes the room feel more open.
It also helps you clean up faster without losing track of where your tools belong.
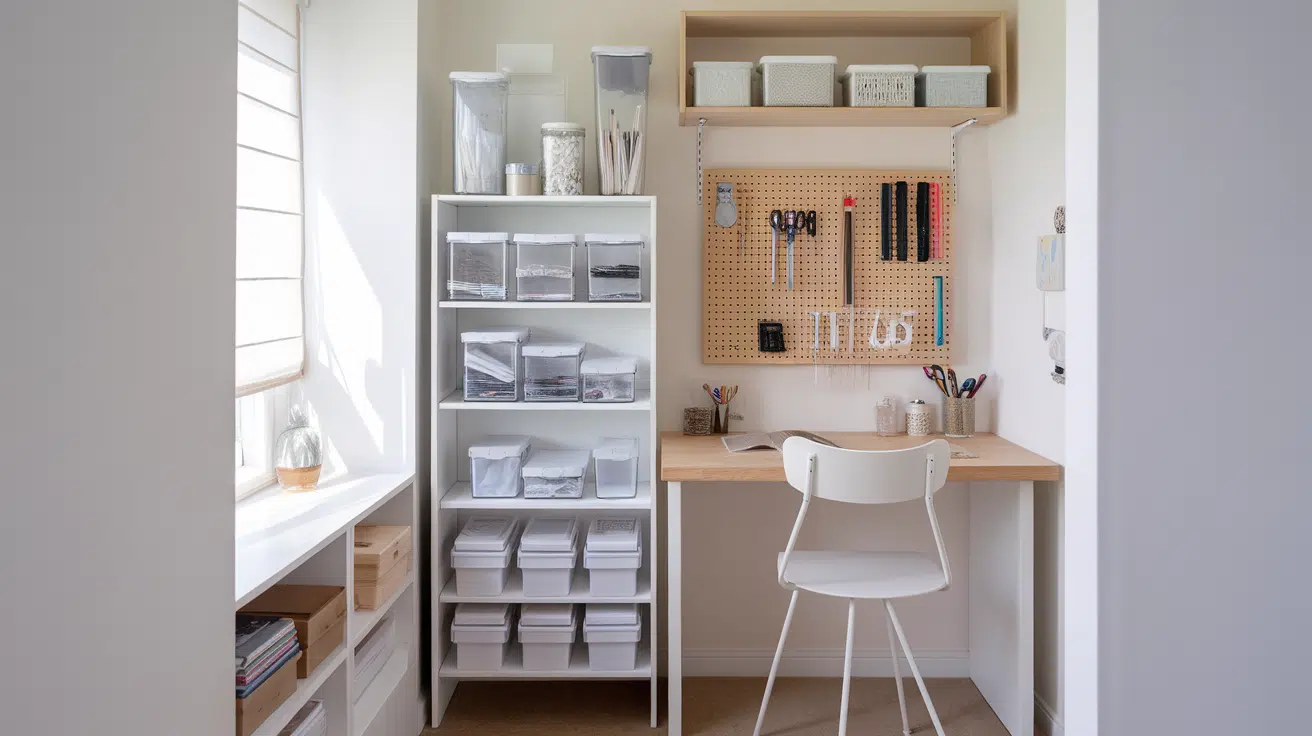
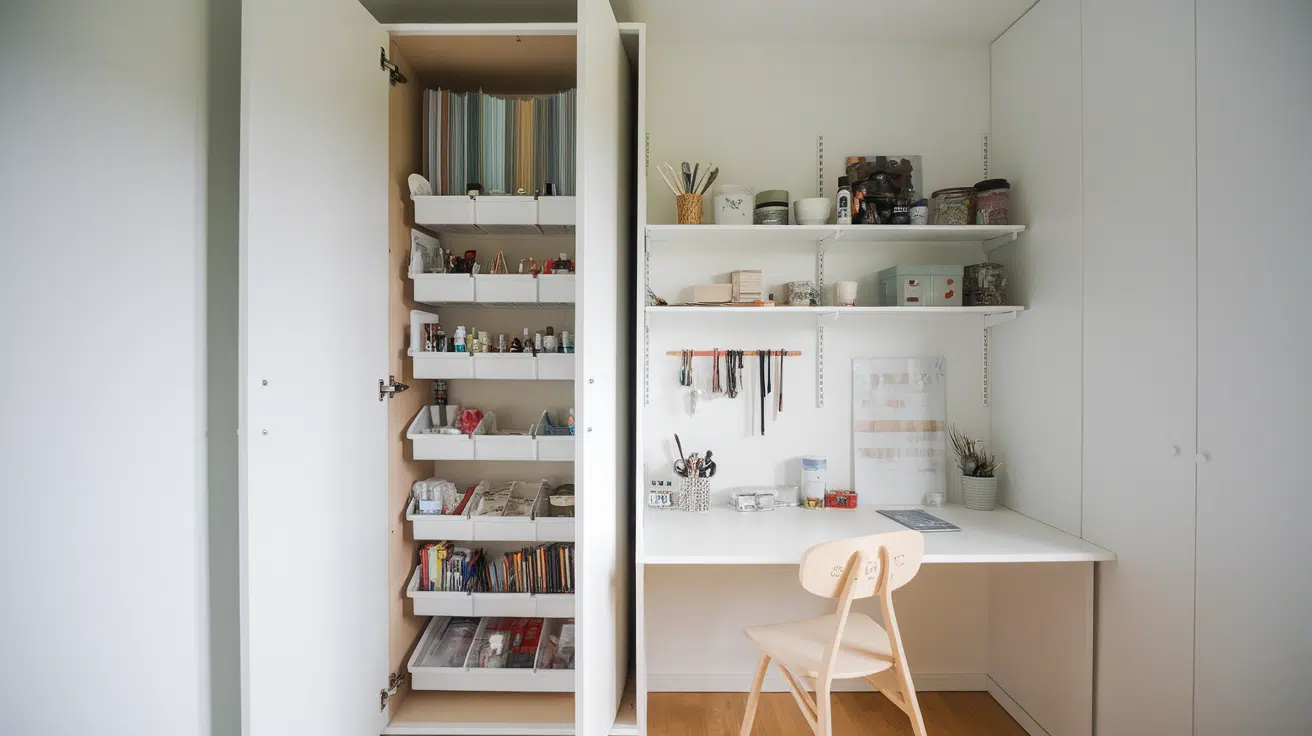
7. Build a Small Closet Craft Nook
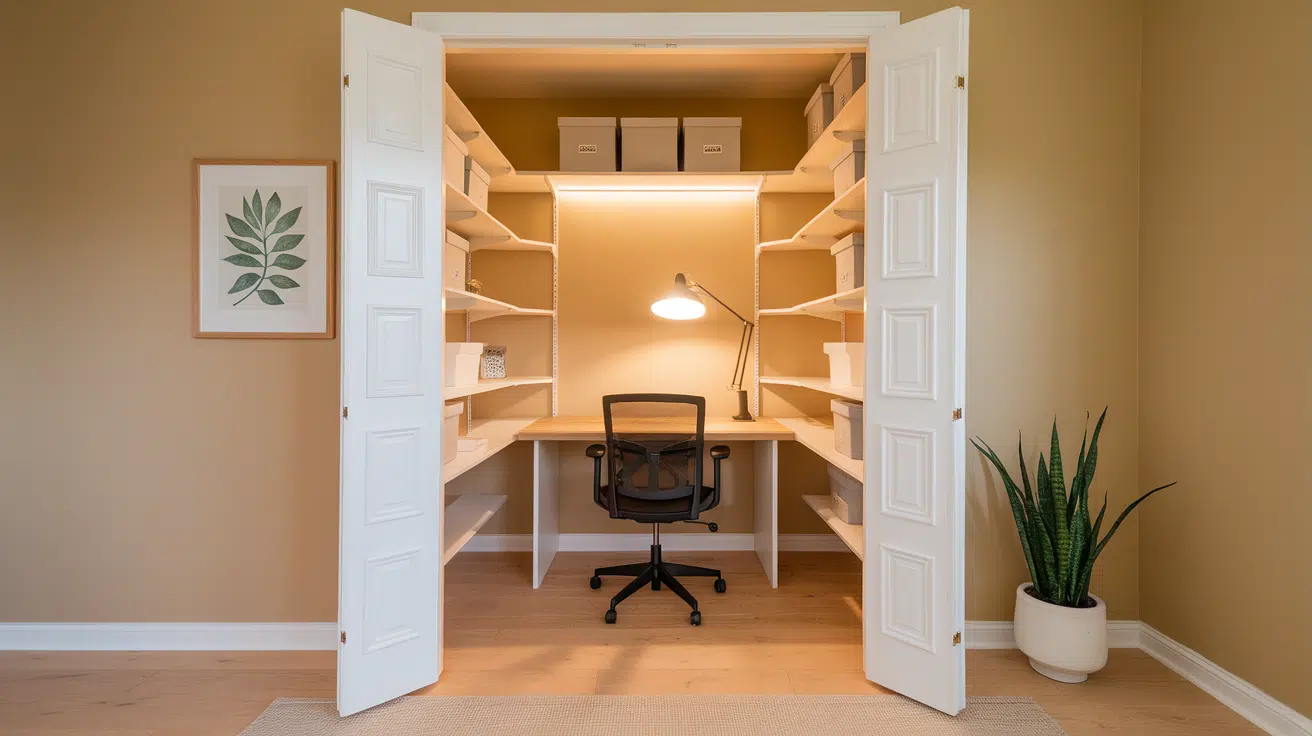
Turning a closet into a craft nook lets you create a full workspace without taking up the entire room. A small desk, a few shelves, and some bins give you everything you need in a compact setup.
Adding storage racks on the doors helps you use every inch, especially for paints, brushes, or thread.
Good lighting inside the nook makes it easier to work without shadows.
When you close the doors, the whole room instantly looks neat. It’s a simple way to contain your craft space while keeping it functional.
8. Use a Corner Desk Setup
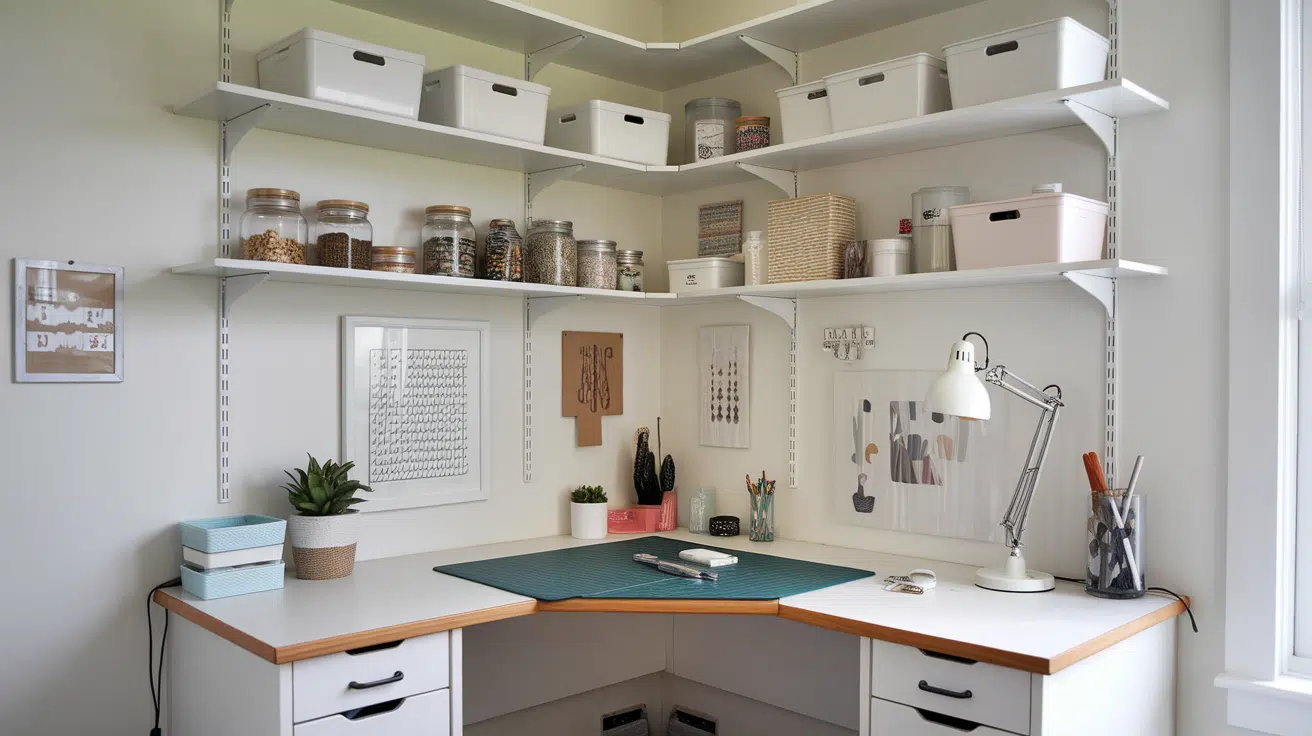
A corner desk takes advantage of space that often goes unused and gives you a bigger work area than a regular desk.
Shelves above the desk and drawers below create extra storage without taking over the room. Keeping everything close but off the floor helps you stay organized and reduces clutter.
A corner setup also gives you a defined work zone that feels tucked away and private.
This leaves the rest of the room open for movement, storage, or displaying finished projects.
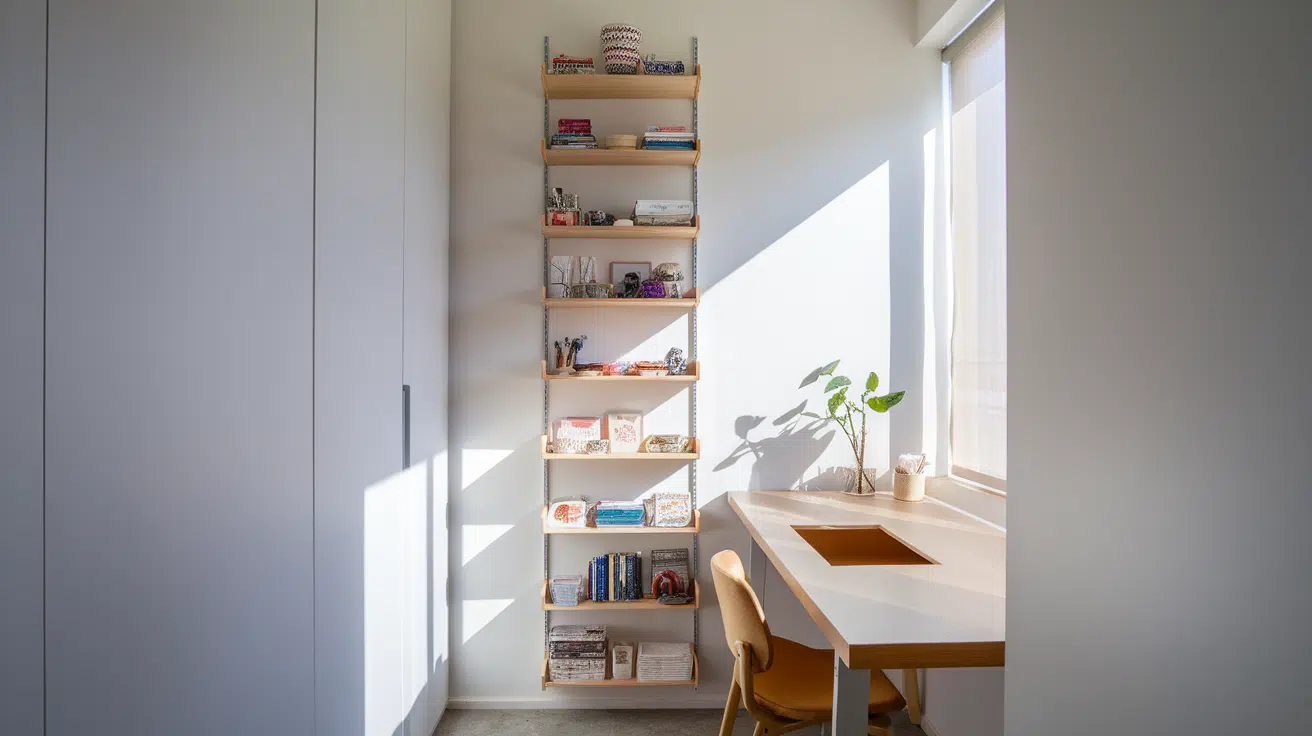
9. Hang Floating Shelves Near the Ceiling
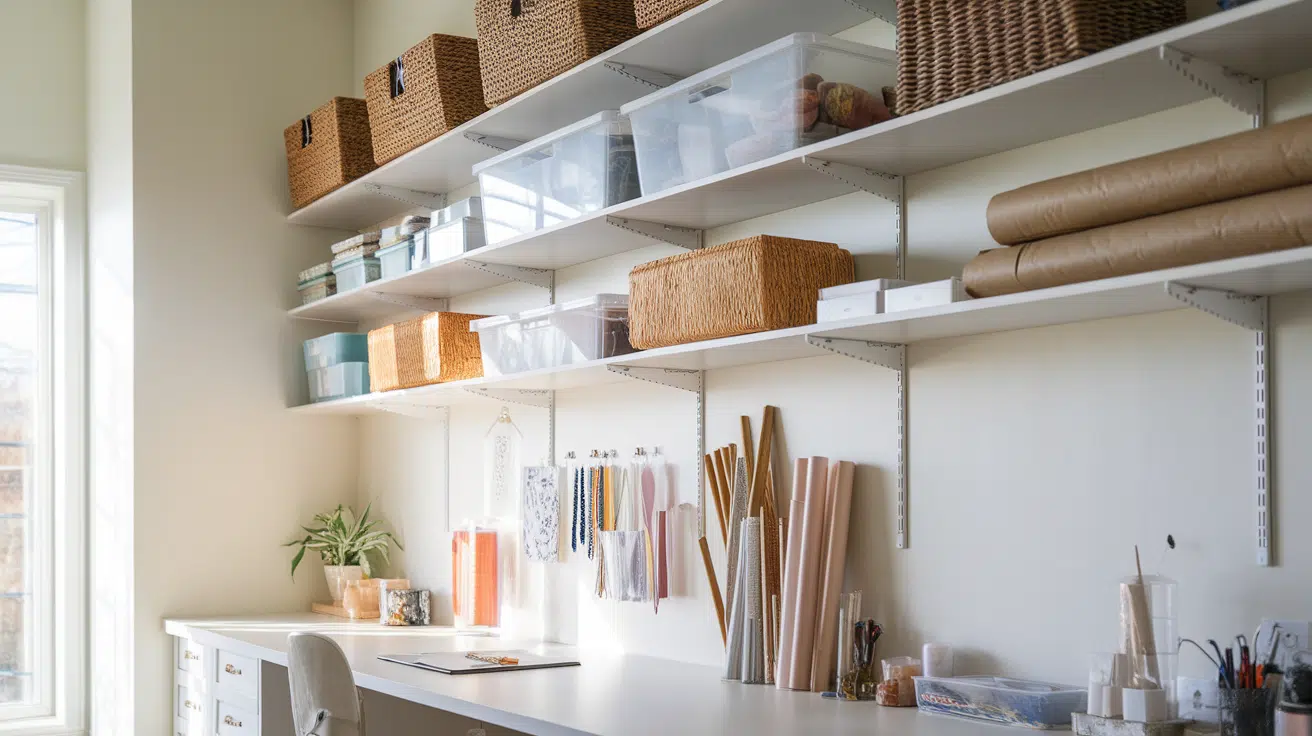
Floating shelves placed high on the wall let you store items you don’t need every day, freeing space at eye level.
They’re perfect for baskets, seasonal supplies, or overflow materials that might crowd your desk. Using labeled boxes on these shelves helps you stay organized without guessing what’s inside.
Keeping the upper space busy also makes the lower shelves easier to use for your daily tools.
This system gives you more storage in a small room without making the space feel cluttered or packed.
10. Use a Slim Storage Cabinet
A slim storage cabinet fits into narrow spaces while holding a surprising amount of craft supplies.
It works well for paper, fabric, glue, tools, and other items you want to keep hidden.
Adjustable shelves let you change the layout as your needs grow, which keeps everything easy to manage. Closed doors help hide clutter and make the room look calm, even on busy project days.
This kind of cabinet is especially helpful in apartments or small homes where every bit of floor space matters.
11. Add a Small Magnetic Board
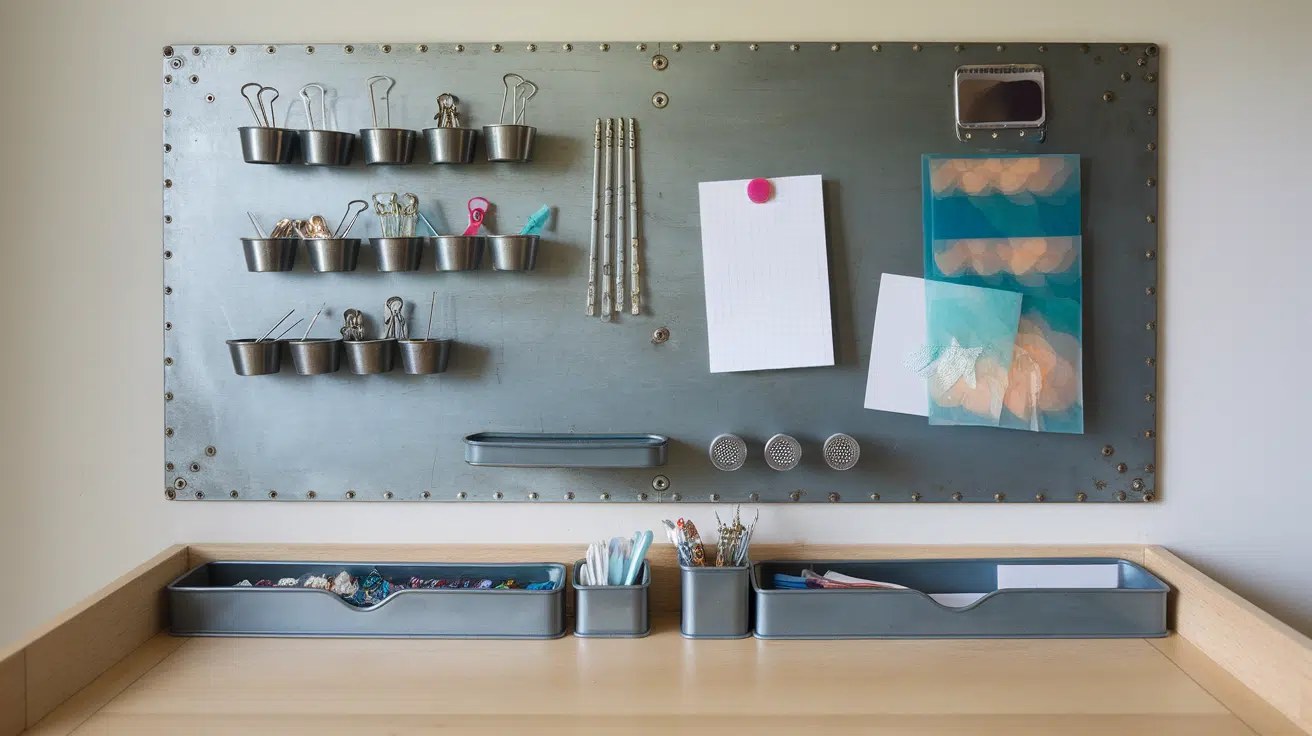
A small magnetic board helps you organize metal tools, notes, and tiny containers without using drawer space.
It keeps your items visible so you don’t have to search through bins for small pieces. Magnetic cups or tins are helpful for holding pins, clips, blades, or other tiny supplies that get lost easily.
You can rearrange the board anytime as your projects change, which keeps your setup flexible.
Adding a magnetic board also gives the wall a neat, tidy look while keeping your desk clear.
12. Use Under-Desk Drawers
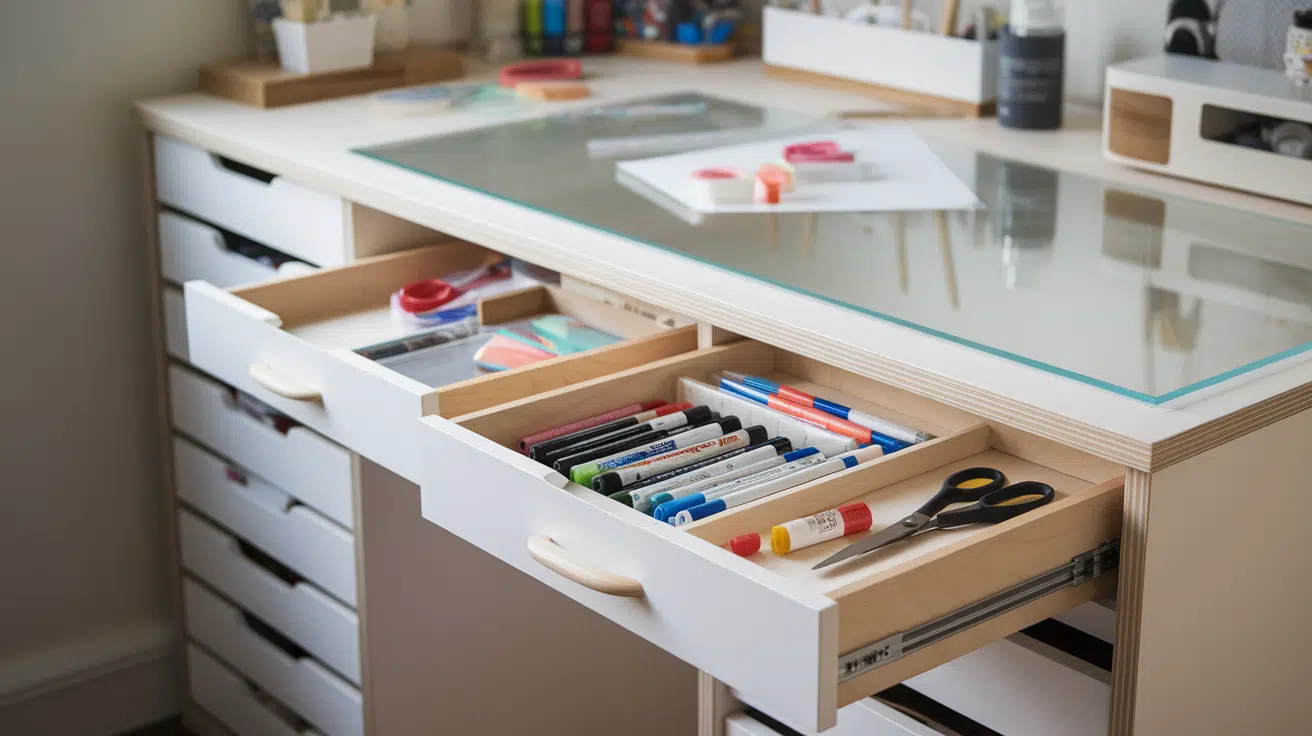
Under-desk drawers help you keep your things close without taking up extra space.
They are great for items like tape, markers, glue sticks, and scissors. Drawers also hide small messes, which makes the room feel cleaner.
You can choose shallow drawers so things don’t pile up.
When supplies are easy to reach but not sitting out, the desk stays clear and ready for any project. It also helps you clean faster after each session.
13. Turn a Bookcase Into Craft Storage
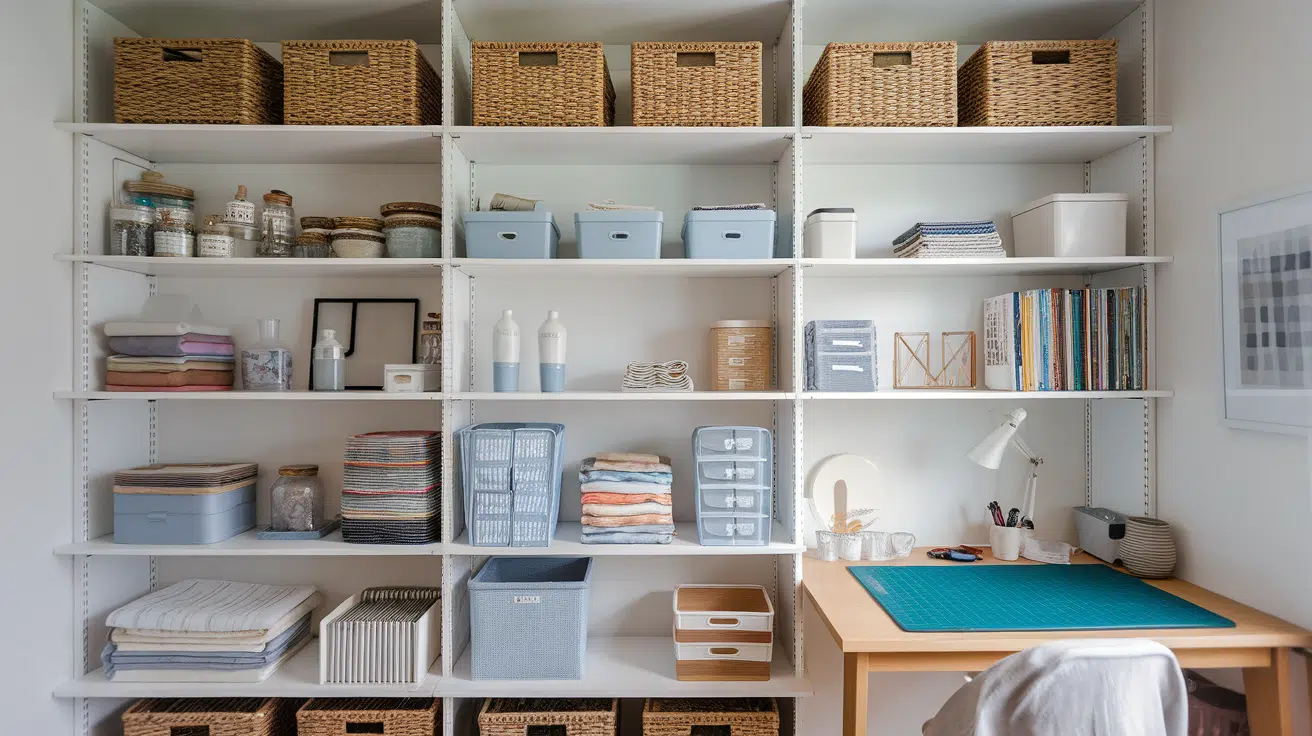
A bookcase gives you open storage that’s easy to sort and reorganize.
You can fill the shelves with baskets, trays, jars, and bins so everything has a clear category.
The open design helps you see what you have at a glance, which saves time and reduces stress during projects. You can use the top shelf for decor, tools you use often, or inspiring items that keep you motivated.
A bookcase adds storage without spreading clutter across the floor, which works well in tight rooms.
14. Use Over-the-Door Organizers
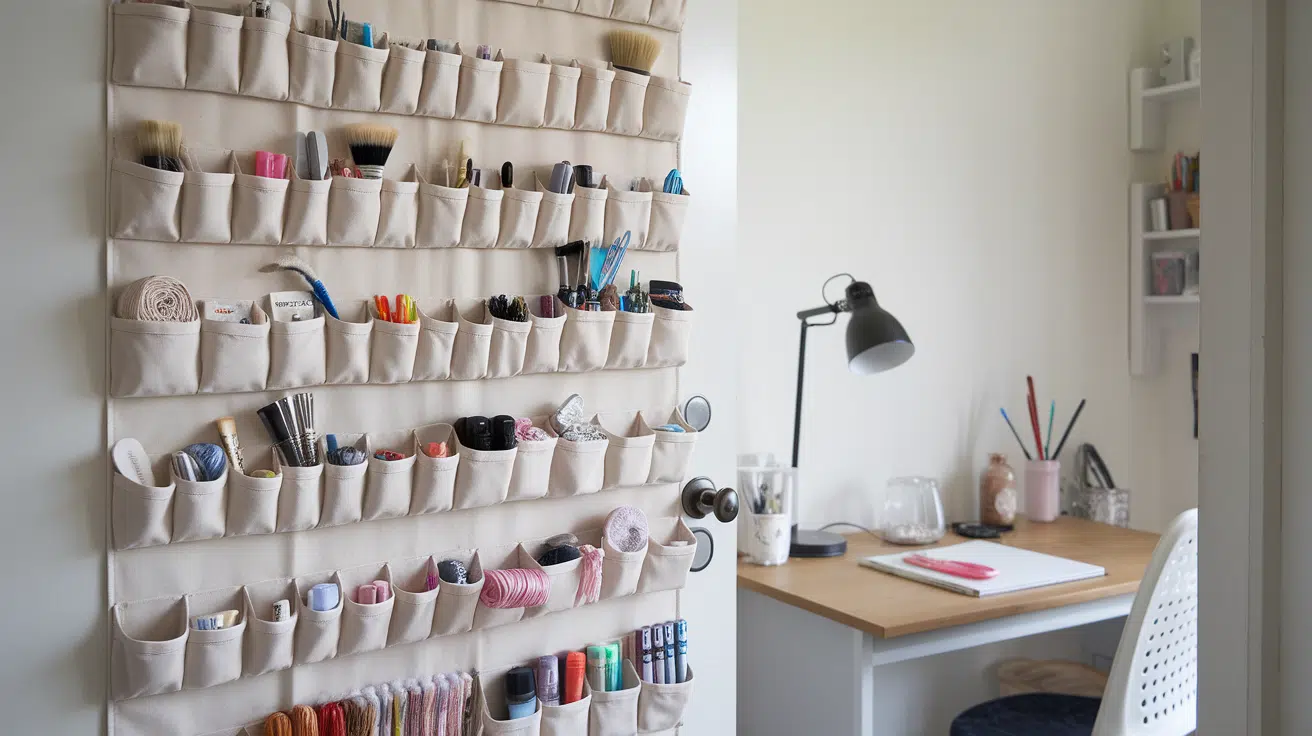
Over-the-door organizers hold a lot without using floor or wall space.
You can store brushes, paints, yarn, ribbon, paper, and even tools in the pockets. Labels help you keep everything sorted, so the door becomes useful instead of wasted space.
This setup also makes cleanup simple because you can just tuck items back into place.
It’s a great option for renters or small rooms with limited storage.
15. Keep a Small Tabletop Shelf on Your Desk
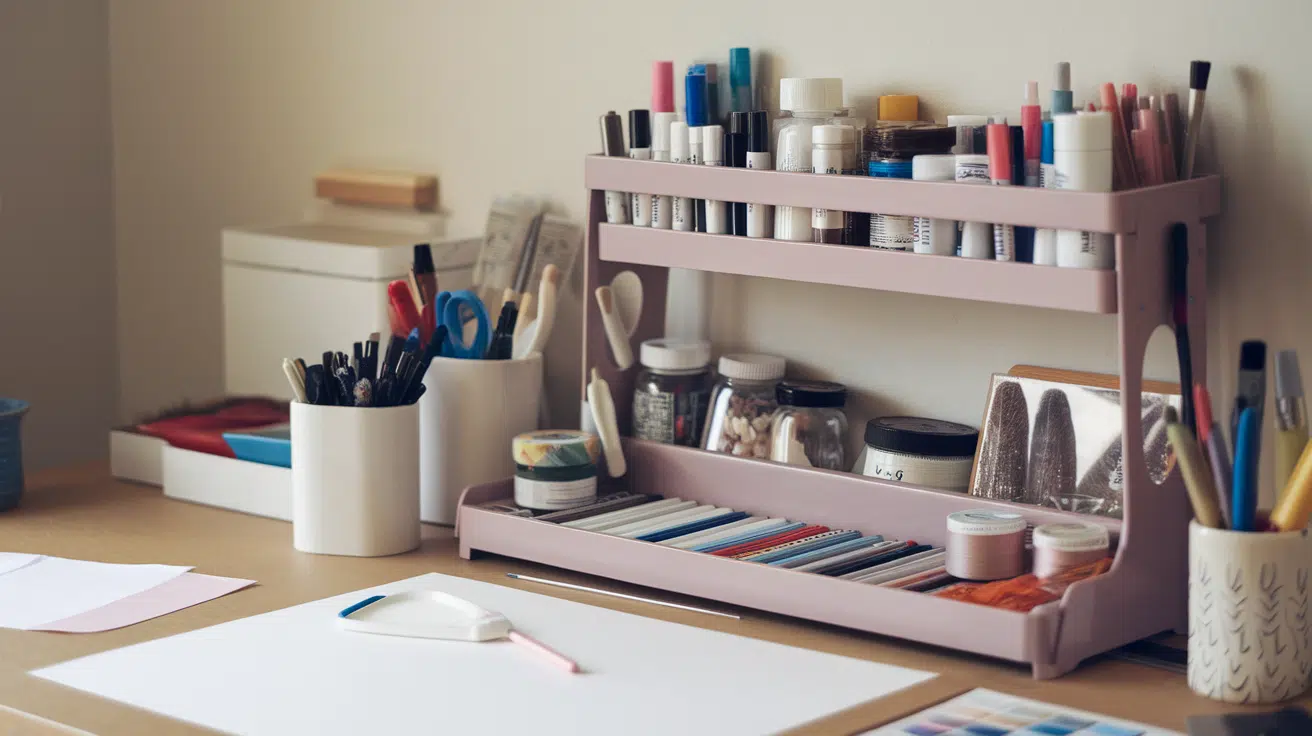
A small tabletop shelf helps you use vertical space even on a tiny desk. It raises your supplies off the work surface but still keeps them within reach.
You can store pens, markers, threads, paints, or small jars on different levels, which keeps things organized.
This frees more room for cutting, gluing, sewing, or drawing.
When your daily tools sit neatly on the shelf instead of spreading out across the desk, the surface stays clean, open, and easier to use for each project.
16. Create a Wall-Mounted Ribbon or Yarn Rack
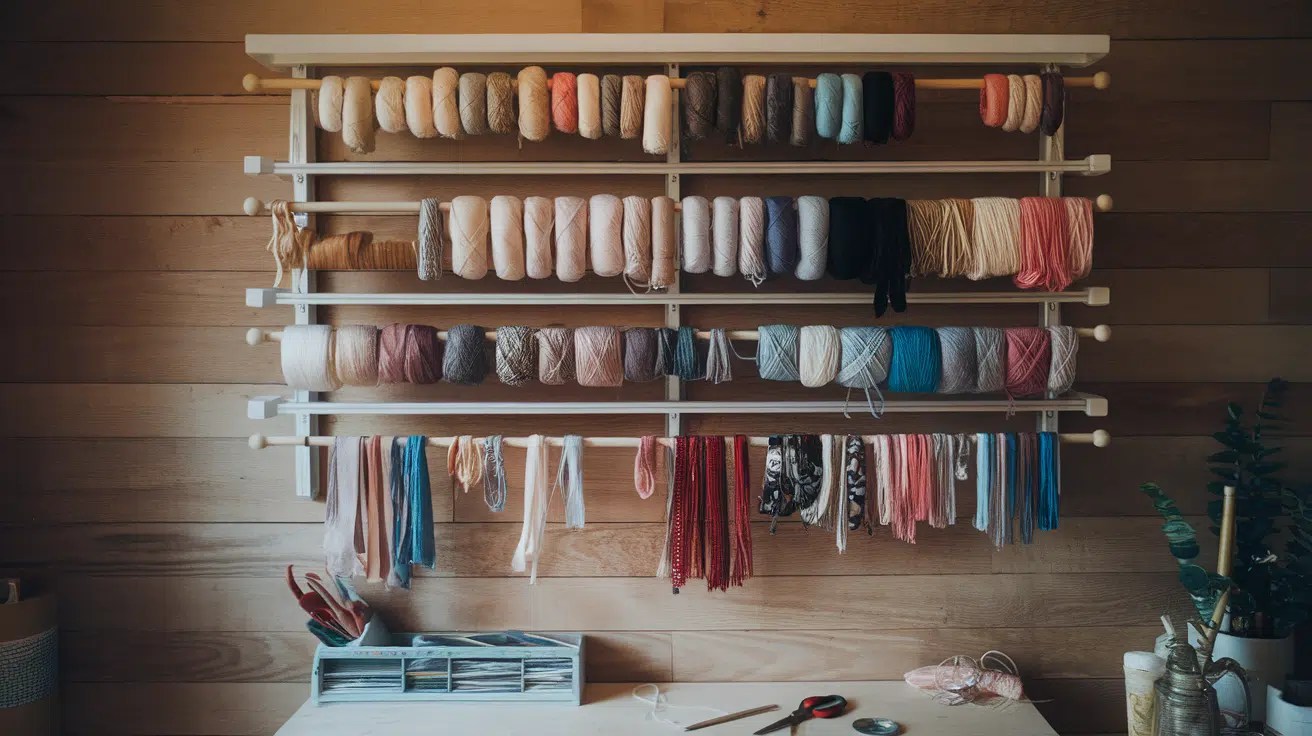
A wall-mounted rack keeps ribbon, yarn, or thread neat, visible, and easy to unwind without tangles.
It frees drawer space and gives you a clear view of the colors and sizes you have on hand. You can make a simple rack with hooks, rods, or dowels that fit the supplies you use most.
Keeping everything on the wall also helps you grab what you need faster.
This setup adds color to the room and stops loose rolls from filling your desk or baskets.
17. Add a Small Lighting Track
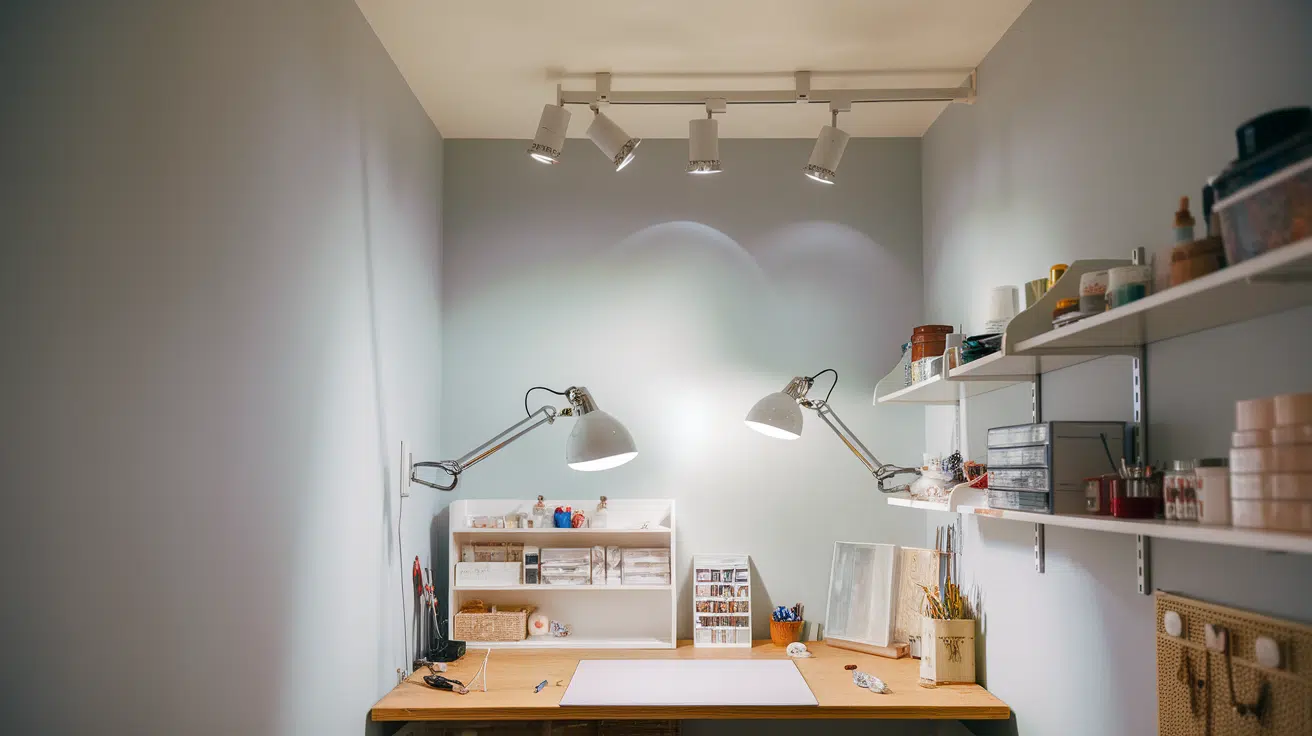
Good lighting makes a small craft room easier to work in and helps you see details clearly.
A small lighting track lets you point lights toward your desk, shelves, or storage areas so shadows don’t get in the way. It’s especially helpful if your room doesn’t get much natural light.
Being able to adjust each light also helps when you switch between tasks like painting, sewing, or cutting.
A simple lighting track doesn’t take up much room but makes the whole space feel brighter and more usable.
Quick Tips to Keep Your Small Craft Room Tidy
A small room stays easy to use when you build simple habits into your routine. These steps help you keep the space clear without extra effort.
- Put tools back in the same spot after each use.
- Keep a small bin for scraps so your desk stays clean.
- Sort supplies by type so you find things faster.
- Keep only the items you reach for often.
- Use labels to show where things go.
- Clear the desk before you start a new task.
- Do a quick five-minute reset at the end of the day.
These easy habits keep clutter from growing and make each project feel smoother. You get a room that stays neat without much work.
Conclusion
When planning your DIY small craft room, think about how you want the space to work for you.
A small room can feel easy to use when you mix clear layouts with smart storage pieces that fit the way you like to create.
You don’t need a large setup to get good results. You just need systems that help you reach what you need and move through your tasks without slowing down.
These ideas show how small changes can create more space, support your projects, and help you stay focused.
With the right setup, even a small corner can become a place where you can work, sort, and plan with ease. Start with one idea, adjust it to fit your space, and build from there.
If you’re ready to shape your own setup, try one of these ideas today and see how it improves your craft room.